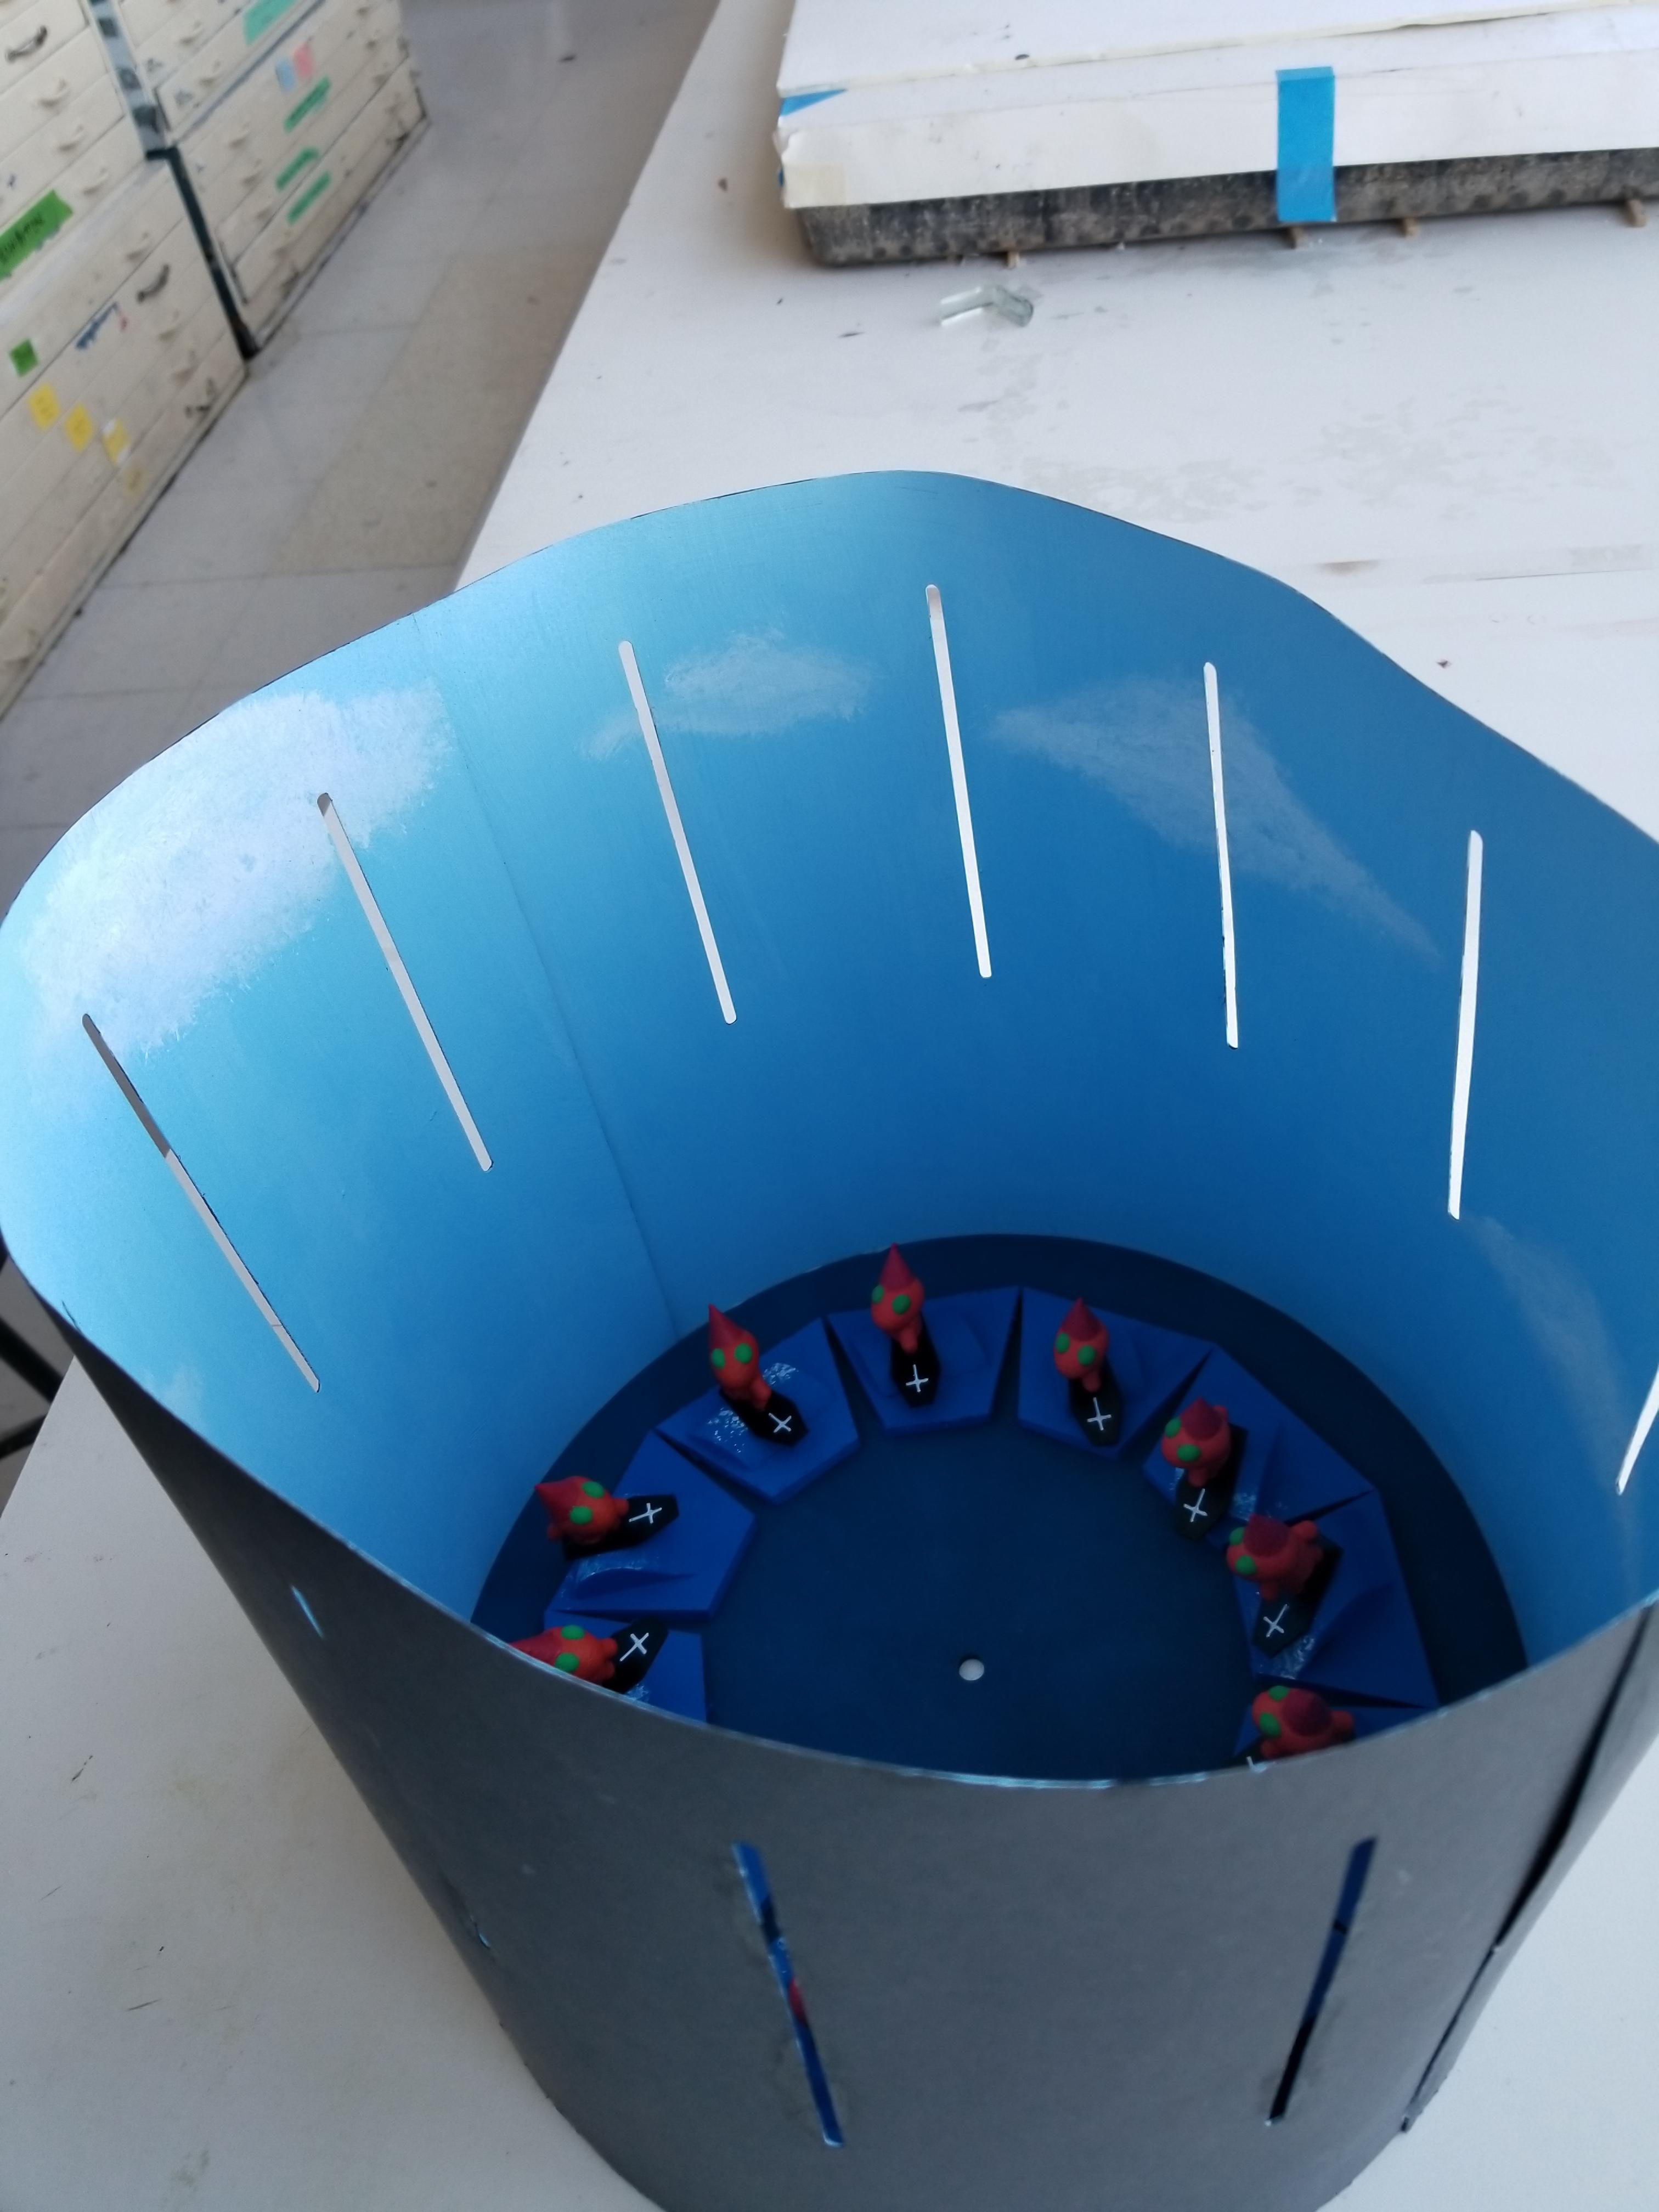
3D Zoetrope

This is a 3D zoetrope that uses 3D prints to act as the moving image instead of a 2D animation on a strip of paper.
Supplies
1x Hot Glue gun
1x 13"x 13" sheet of 1/4" thick wood
2x sheets of black 24x36 paper
1x spinning apparatus (turntable)
3D printer
Laser cutter (or Scissors)
Paint and brushes
Cutting Out Illustrator Files


Use the Illustrator files to cut out the back wall/shutter from the black paper and the wooden circular base from the wood.
Be sure to evenly divide the circle into 12 pie-shaped sections.
Downloads
3D Print Objects


3D print all 12 waves (2 copies of waves 1&12 and 4&5) at 2540% in Cura
3D print all 12 Alien guys 56% in Cura
3D print all 12 Coffin surfboards at 60% in Cura
Paint Everything!


Once everything is printed and cut out, paint them how you like!
Make sure you label which frame each wave is so you don't lose track of where they go.
Attaching 3D Prints


After painting the waves, line up the wide end of the trapezoid bases to the outside of the circle, so that each corner of the longest side is touching the one next to it like in the picture. If your turntable only rotates clockwise, make sure to line the wave frames in a counter-clockwise sequence.
Once you're done painting, glue the guy onto each board just behind the cross shape as shown in the photo.
Once all the guys have been attached to the boards, glue them onto the waves starting with wave 1, while slightly changing the orientation of the next surfer model to mimic motion on the growing wave.
Attach Paper Shutter


Once the models have been glued to the circular disc.
To attach the paper shutter, put a dot of hot glue onto each "v" teeth of the paper and glue it to the bottom of the disc as you work your way around. It would help to bend each tooth at its base before starting this process.
Be sure to align the slits in between each set of 3D prints.