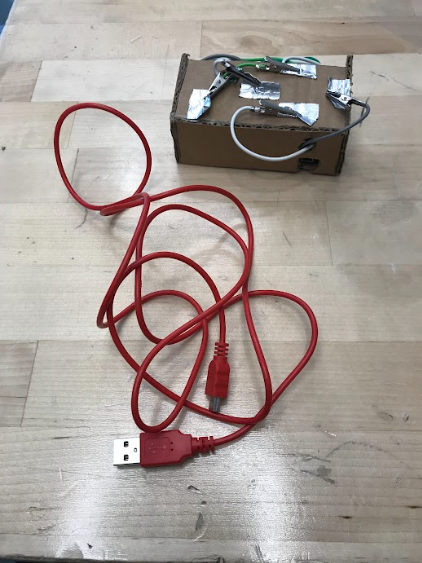
A Makey Makey Powered Remote Control

by 9063411 in Circuits > Computers

280 Views, 0 Favorites, 0 Comments

A Makey Makey Powered Remote Control

Screenshot 2023-10-06 2.31.17 PM.png

I wanted to show people how to make a remote control that can be hooked up to a computer. It is powered by a Makey Makey.

Supplies

Screenshot 2023-10-11 10.08.11 AM.png
Screenshot 2023-10-11 10.07.38 AM.png
Screenshot 2023-10-11 10.07.32 AM.png
Screenshot 2023-10-11 10.07.23 AM.png
Screenshot 2023-10-11 10.07.00 AM.png
Screenshot 2023-10-11 10.02.31 AM.png

2 pieces of cardboard that are 2'' by 1.5'', 2 pieces of cardboard that are 4'' by 2'', 1 piece of cardboard 1.5'' by '', 1 pieces of aluminum tape that is 7'' long, 6 Makey Makey Alligator Clips, and 1 Makey Makey Chip, 1 pair of scissors, a hot glue gun and 1 hot glue stick.

Assembly

Screenshot 2023-10-11 10.02.31 AM.png
Screenshot 2023-10-11 10.09.17 AM.png
Screenshot 2023-10-11 10.06.42 AM.png
Screenshot 2023-10-11 10.05.52 AM.png
Screenshot 2023-10-11 10.06.55 AM.png
Screenshot 2023-10-11 10.04.40 AM.png
Screenshot 2023-10-11 10.04.34 AM.png
Screenshot 2023-10-11 10.08.24 AM.png
Screenshot 2023-10-11 10.07.44 AM.png
Screenshot 2023-10-11 10.08.48 AM.png
Screenshot 2023-10-11 10.02.40 AM.png
Screenshot 2023-10-11 10.04.16 AM.png
Screenshot 2023-10-11 10.08.05 AM.png
Screenshot 2023-10-11 10.07.58 AM.png
Screenshot 2023-10-11 10.07.51 AM.png
Screenshot 2023-10-11 10.04.28 AM.png
Screenshot 2023-10-11 10.07.12 AM.png
Screenshot 2023-10-11 10.06.05 AM.png
Screenshot 2023-10-11 10.08.59 AM.png
Screenshot 2023-10-11 10.09.05 AM.png
Screenshot 2023-10-11 10.06.48 AM.png
  1. Cut out the pieces of cardboard from the large piece.
  2. Attach the skinnier of the rectangles to one of the long sides of one of the larger rectangles with hot glue.
  3. Then attach both small rectangles to either side with hot glue.
  4. Then attach the final large rectangle to the top with hot glue.
  5. Then punch three holes in the box like in the pictures above.
  6. Next, prepare your tape and cut it into five squares.
  7. Fold off the end of each square.
  8. Then attach each individual piece of metal tape to its corresponding spot according to the photos.
  9. Then cut a 3'' 1/4'' piece of metal tape off the roll.
  10. Then fold off the end 1/4 of an inch.
  11. Then attach the piece of metal tape.

Wiring

Screenshot 2023-10-11 10.03.52 AM.png
Screenshot 2023-10-11 10.03.15 AM.png
Screenshot 2023-10-11 10.03.28 AM.png
Screenshot 2023-10-11 10.03.23 AM.png
Screenshot 2023-10-11 10.06.36 AM.png
Screenshot 2023-10-11 10.03.58 AM.png
Screenshot 2023-10-11 10.07.06 AM.png
Screenshot 2023-10-11 10.03.46 AM.png
Screenshot 2023-10-11 10.03.40 AM.png
Screenshot 2023-10-11 10.03.34 AM.png
Screenshot 2023-10-11 10.08.41 AM.png
Screenshot 2023-10-11 10.07.28 AM.png
Screenshot 2023-10-11 10.08.53 AM.png
Screenshot 2023-10-11 10.02.59 AM.png
Screenshot 2023-10-11 10.03.05 AM.png
Screenshot 2023-10-11 10.03.10 AM.png
  1. First, connect each of the six wires to its place.
  2. Then try to gently squeeze the wiring into the box.
  3. Then connect the USB cable to the Makey Makey and to your computer.
  4. Open