Arduino + GPS Module - Destination Notifier
by AmalMathew in Circuits > Microcontrollers
2939 Views, 3 Favorites, 0 Comments
Arduino + GPS Module - Destination Notifier

How much time do we waste in traffic jams? I made an Arduino-powered destination notifier to utilize this time in a productive way.
Everyone knows that traffic jams can be a major time waster. And it is impossible to predict how long it would take from origin to destination.
The problem of traffic jams affected me when I came to a city two months ago. Every day I spend more than two hours stuck in jams. And I felt it like why can't I utilize this time to do something?
Note: I use public transport. :-)
There are plenty of other things you can do while being stuck in traffic jam!
Some of the ones below are not just fun, but productive too:
Use the time to think and plan, either for current and future projects. Utilize time to educate yourself, watch instructional videos or take an e-learning course on Udemy, Coursera, etc or read projects on Insructables :). And of course making electronics stuffs always inspires me. So I built a destination notifier using Arduino and GPS module. So what it does is whenever you are near to your destination, it notifies you by glowing LED or through vibration (by using mini vibrating motor). I have provided circuits for both LED and vibrating motor.
For that, first you need to find latitude and longitude to define the location. Once you find your location, you can use the latitude and longitude values to find distance to the location and by keeping a range you can turn on the notifier. The logic is simple, right?!
So let's get started.......
Parts and Tools:
To get started with your destination notifier, here are the required parts:
- Arduino UNO

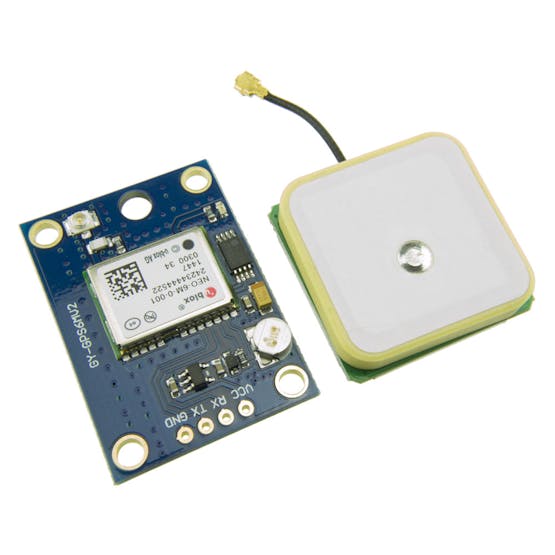
- NEO-6M GPS Module
GPS stands for global positioning system and can be used to determine position, time and speed if you are travelling.

- This module has an external antenna and built-in EEPROM.
- Interface: RS232 TTL
- Power supply: 3V to 5V
- Default baudrate: 9600 bps
- Works with standard NMEA sentences
The NEO-6M GPS module has four pins: VCC, RX, TX, and GND. The module communicates with the Arduino via serial communication using the TX and RX pins, so the wiring couldn’t be simpler:
NEO-6M GPS ModuleWiring to Arduino UNO
VCC VIN
RX TX pin defined in the software serial
TX RX pin defined in the software serial
GND GND
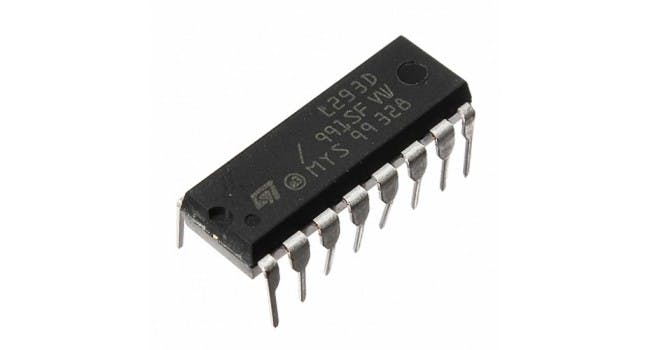
L293D IC

The L293D is a 16-pin motor driver IC which can control upto two DC motors simultaneously in any direction.
Why to use L293D?
The input to the motor driver IC or motor driver is a low current signal.The function of the circuit is to convert the low current signal to a high current signal.This high current signal is then given to the motor.
The TinyGPS++ library makes it simple to get information on location in a format that is useful and easy to understand.
The TinyGPS++ library allows you to get way more information than just the location, and in simple way, besides the location, you can get:
>>date
>>time
>>speed
>>course
>>altitude
>>satellites
>>hdop
Capturing Latitude and Longitude:

I will suggest downloading fritzing files provided in the project page for better clarification of connection or if you have any doubt feel free to ask in comments.
Downloads
Arduino Code for Location Capture:

Note: You must install TinyGPS++ Library
connect as per the circuit diagram and upload above code, Open serial monitor at a baud rate of 9600 and you will see the following output
Note: For getting latitude and longitude it may take some time.because the receiver need to capture the signals. whenever it starts getting signals the LED on the GPS module blinks.
Downloads
Destination Notifier Through LED:


So to ensure that my idea works I made a prototype using LED to notify the destination. So what I did is, I added Latitude and Longitude values of destination from previous code(Read_Lat_Lng.ino) and found distance to destination from the current location. And used it for setting range at which the LED must turn on.
Upload the code and you will see the following on the serial monitor.
 So the distance to destination can be used to define the range at which the output operation (notification) must perform.
 The Final One!


OK my prototype worked fine. Now I want to enclose my project into a box which can fit an Arduino, GPS module, motor with driver IC, and the 9V power supply.
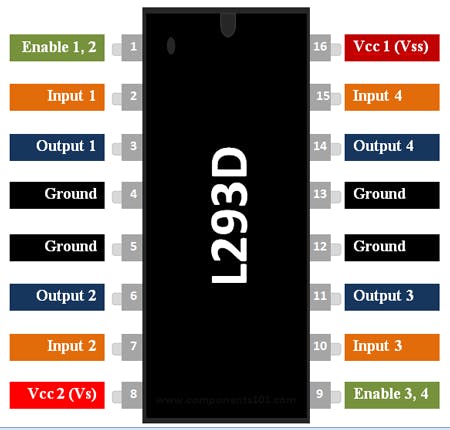
Connection to the L293D IC

- Connect 5V to Enable 1, Vs and Vss on the L293D
- Connect digital output pins (we are using 6 and 7 ) to input 1 and input 2 on the L293D.
- Connect your Arduino's GND to both GND pins on the same side of the L293D
- Finally connect output 1 and output 2 of the L293D to your motor pins.
Watch Video

Happy Making !