BATH CABINETRY From CONCEPT TO DIGITAL MODEL & REALIZATION
by cirena in Workshop > Furniture
1925 Views, 17 Favorites, 0 Comments
BATH CABINETRY From CONCEPT TO DIGITAL MODEL & REALIZATION

Can someone make a BATH CABINET with DRAWERS that run on a concealed & smooth system from scratch?
This DIY - 'dissertation' is about how one can do it.
My mother was looking for a bath cabinet. She asked for my help as an interior designer to make some sketches and create an overall design. Then we went to a cabinetmaker to hear the possibilities and the prices.
This was the moment when I compared the material cost, which was 1/4 part of the finished product price. It made me think if it is possible to make one by myself since it was an interesting topic and there was some time, thanks to COVID-19 pandemic.
A new world, so exiting!
DIMENSIONS & INSPIRATION

The place can hold a cabinet up to 140 x 46 cm. The water supply point and drainage are 100 cm from the left wall, this means that the sink will be placed on the right side of the cabinet.
My mother loved the look of a wood countertop with a sink on top of it. A white laminate finish cabinet was another choice she made.
MATERIALS


A lot of plywood plates are made from a cheep grade materials, at least locally. You can feel the difference in weight, while comparing it with a birch plywood. They are sold as huge plates of 244 x 122 cm with a varying thicknesses.
Finished furniture edges can be concealed in different ways, paint, glued piece of wood or band strip. Here, the BIRCH PLYWOOD wins again, since it has this 'cake like' layers that look gorgeous as they are. They are made from thin layers of wood glued with water resistant dark glue. A good sanding and a clear paint will be perfect.
The plates come in different grades of quality for their top layer, basically it means how clean you want it from the dark dots and patches. Top of the grade is the finish without any patches, it is an even clean and light color wood. You can also find a place where they can laminate the plate with whatever finish you would like.
18 mm thickness with a white laminated finish plate will be used for the cabinet and a 12 mm thickness, clean wood plate for the drawers.
As for the countertop, a thick wood will be use with a countertop sink. The wood will be covered with a varnish that is meant for wet environments. The same varnish will be used for the plywood.
Nice siphon pipe was bought in IKEA since it takes less space than the traditional ones.
DRAWER RUNNER

So, you have the overall cabinet design with the doors and drawers placement. You know what countertop you want and what sink. What is the next step? How you make it real, move the drawers and open the doors? How you calculate the sizes and number of parts that will be cut? The answer to these questions brought me to the most important thing that gave me this security to start this project.
There are three top companies, locally, for cabinet runner systems: GRASS, Hettich and blum. They are all very overwhelming, when you try to understand their 'language', without any knowledge.
Let's dive in and talk about drawers movement! We have two main options in every company: the box system and the runners. The box system is meant for fast assembly of the drawer because you buy the sides of the drawer, you only cut the bottom, front and back panel for it. Box systems come with the runners already integrated, you just build it like a LEGO. The box sides can be made from metal, glass, plastic or combination of these.
In a parallel world, we have the runners. The are meant for wood boxes that you make from scratch, and then you attach the runners to it. In terms of price, a box system, is much more expensive (from two to four times). My guess is that you pay for time, box system are much faster to build than a wood drawer, plus it has more pieces. Of course there are some other explanations to this price difference, but my path was clear, it was the wood drawers with runners.
How do you pick a company that you want to use for the first time in your life? First thing was to try and understand how to install them and how to prepare the drilling holes for them. Some time was spent on the companies websites. The one that made me feel confident to make this project was blums' website.
Their "E-SERVICES" website made this cabinetry project easy for a beginner, like me. Each time, you can create one cabinet. You can save it at their servers and come back to edit, or download the 3D model with the runners to any program. And of course, it outputs a DWG format for the cutout parts with the placement of the drilling holes!
This option was the moment that just made this project real. Other websites were mostly informative even though Hettich has something similar to blums' e-service, the only problem is that the website doesn't save your projects. Hope they will upgrade their website for those that do want to work with their systems.
So blums runners will be used for this project, but which ones? They have the MOVENTO and the TANDEM line, which differs in their 'anatomy'. They both have at least two options for the load capacity. MOVENTO starts at 40 kg load for a pair of runners and TANDEM begins with 30 kg per drawer.
Also, it is important to look for the thickness of the panel that will be used for drawers sides. Basic MOVENTO was picked, it can hold materials with panel thickness between 10-16 mm. If you are planing to use a thicker material like 17-19 mm, then you should use TANDEM 19 mm that can hold this thickness.
CABINET DESIGN

First, the cabinet was created online with the custom measurements.
Pick the CABINET DESIGN section and go through all its tabs: Basic settings, Cabinet top panel, Cabinet base, Cabinet back.
The most confusing settings were the "Gap..." ones, since this was an entirely new world for me. With some playing, it was clear that these parameters are related to the gaps created by the fronts of the cabinet. Usually, it is advised to leave about 3 mm between all the fronts.
Another important parameter is the way you want the cabinet plates to interact. There are many possible ways to do it, just consider the forces that will be applied on the cabinet. My cabinet will be made with two side panels that will overlay the other ones, front, top and back.
The unusual configuration of my cabinet is that its back side is thick. This was made because of the leftovers of material from the huge plywood panels. Also, it will be a very sturdy construction.
FRONT Drawers DESIGN

The front is straightforward, just go to the next tab "Front design" and grab the front that you want. Since this was the left cabinet with the drawers, the first option was grabbed onto the working area. Then the front was separated to three parts, one for each drawer.
There are different ways to make the separation, just play around.
It is very nice that the system will prompt you and try to resolve any problems.
FITTINGS

In the "Fittings" tab, you can select what type of system you want. This project uses the "Runner systems" and a regular drawer.
MOVENTO runner was picked with the full extension.
Here is important to pick the "Nominal length" of your choice. In this project, the longest one was picked so that all the cabinets' depth will be used.
Then you will choose the drawers parameters of the wood thickness and so on. The images near each parameter are self-explanatory.
The same process was repeated for each drawer.
SAVE & EXPORT

Now you can save the project, if you want to come back later to it. Just create a user account and a project folder.
There are endless possibilities for what type of file format you would like to download, 2D or 3D. You can save a PDF with exact cutting measurements and the hole placement for the runners.
If you happen to have tools, this will be a great guide. For those, like me, without the tools, an extra step is required.
SINK CABINET & FRONT

The sink cabinet is made without the top panel. Instead, it has a front 'stretcher' that is placed vertically, this will hold the weight caused by the sink and hold the shape of the cabinet.
It is also divided inside with a shelf that will create a bottom space for a drawer and an open space on top.
SINK CABINET FITTINGS

Here we'll pick the hinges and the runners for the drawer.
FILES FROM Blums E-SERVICES
In the files there are the DWG formats for the parts cutout and in a separate file there is the 3D model.
The PDF is for those that can cut at home.
PREPARE FOR CNC
Cabinet Parts
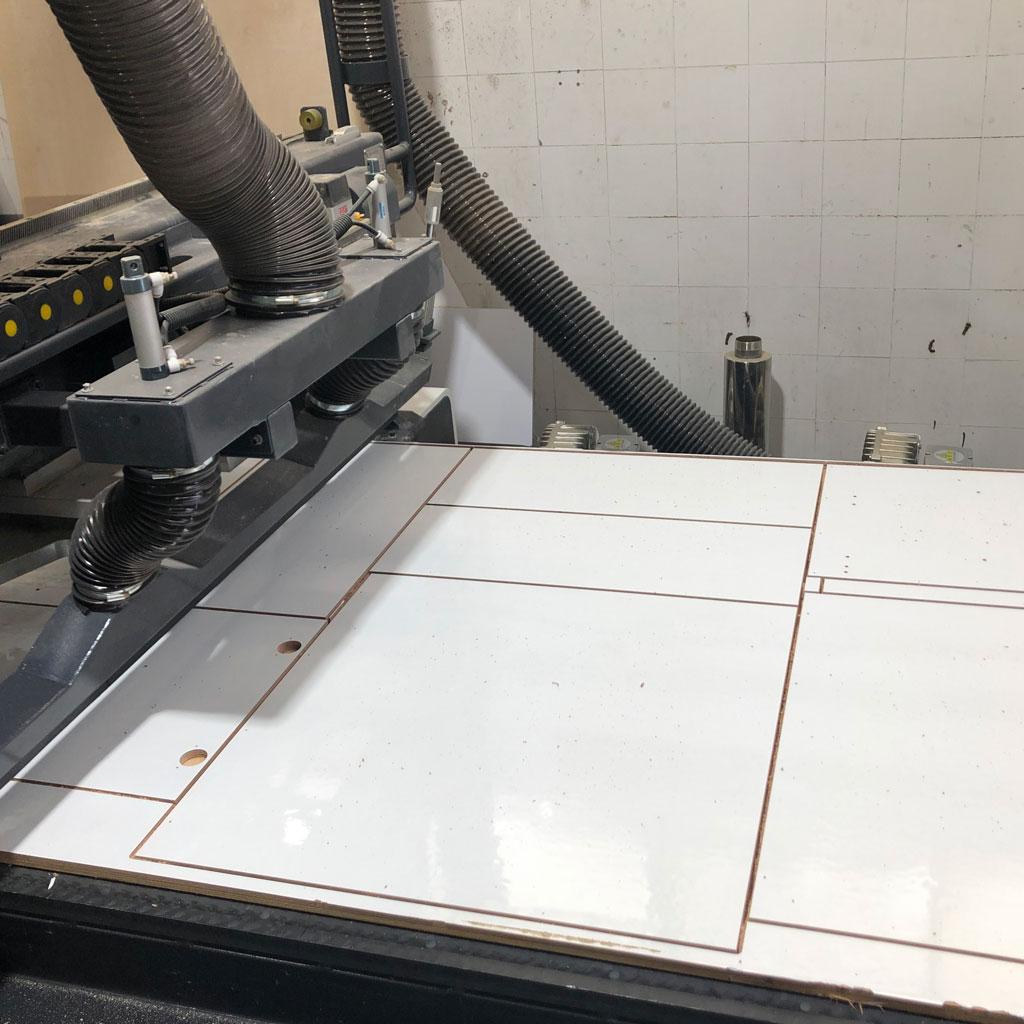
We'll lay out the cutouts for the CNC on a 244 x 122 cm panel. Here is important to speak with the place that has the machine and ask them what gap should be left between the pieces. This is the diameter of the cutting tool that they use. In my case, the gap is 6 mm. Some extra of about 10 mm around the planes edges was left to accommodate imperfections of the boards caused by shipment.
Also ask them the formats their program understands, usually DWG is compatible.
The file was edited and placed on the corresponding board. You can use some sort of nesting software for this task or just play around with it, it's like a puzzle. This step will determine the number of plywood plates that will be bought for the project.
Countertop
A hole should be cut through the countertop so that the sink will sit inside it. This of course depends on the type of the sink you would like to use. Measure the inside curve of the sink from the bottom and draw the cutting lines in an AutoCad or some other software that can output a vector shape that the machine will understand. Place this cutout line onto a drawn countertop outline.
A step for 3D enthusiast and a perfectionist.
How to make the exact line of the cut from a real object to a digital one. Many things where consider, from hand drawing using precise measurements to sand bath submerging till the cutout level to create this cutout line. Then the moment of the 'lightbulb' - 3D digital world is in my veins. The model should be scanned and brought to a 3D modeling environment, from there everything is possible. There are plenty of apps and gadgets for 3D scanning, with some googling the first one that looked O.K. was Meshroom that is very intuitive to use. You provide for it photos, and it creates a mesh, the more information you give it the better the mesh will be. (the process was about 30 min) Some cleanup and size adjustments were made to the model, now it is ready for the exact cutout line.
The whole process can be made simple without all this 'fancy' stuff. The creation flow was stronger than the desire to make it simple.
Of course, if you are planning to use a sink that sits fully onto the countertop, you'll make just the holes for the drain and the water
GRAB THESE

2 plates of 1220 x 2440 x 18 mm laminated birch plywood
1 plate of 1220 x 2440 12 mm birch plywood (your choice of the top layer quality)
1410 x 46 x 26 mm wood for the countertop
Wood varnish for wet environment & brushes
Sanding machine and sanding paper with fine grit
3 cabinet connectors
108 screws for drawers
12 screws for fronts
44 screws for rails
62 screws for cabinet
4 screws for hinges
Drill/Screwdriver
2.5 mm drilling bit for predrilling 8 mm chamfer drill bit Screwdriver
Corner clamps
Cutting tools or place that can cut with CNC the files are provided
Drill, clamps, cutting tools or a place that can cut with CNC
DWG files for the CNC (just download them) they have all the layers with the predrilling holes for everything (hinges, rails, connections)
CNC CUTTING


We had the theoretical knowledge of the materials and the runner system that will be used. What about the cutting? How a beginner with a hand saw can make this project? A simple test of cutting a piece of birch plywood was made, this material is very hard, it was clear that hand saw is a bad choice for this material! Some time was dedicated to understand what tools can be used, and if one has the place and the possibility to work with them than he is lucky. A decent plunge saw with a rail system can make some nice cuts.
Research on what saw to buy was made, BUT, my perfectionism. It is very hard to cut a perfect rectangle from paper just with a sharp knife and a ruler. A plunge saw is essentially the same thing, so I ended up gathering information about a portable working table with holes that can hold 'bench dogs' and help me with this. There are also many rulers and helpers just for this issue, they're guiding a perfect rectangular cut. My shopping list puffed up very fast, so I stopped.
The memory showed me a nice picture that it remembers from a workshop of a cabinetmaker that we went some other day. He had a huge CNC machine that took my breath away because it was so beautiful and precise! It can work on a full-sized plate and make some noise. This brought me to an idea that all the components could be cut with CNC!
After some discussion with mister X about the price, the creative wheels started to rotate again. In total, it was much cheaper to cut the parts with the CNC than to by all the tools and cut the parts. Also, it is much faster because these machines cut a full sheet of 244 x 122 cm per 5 minutes. If we'll add the predrilling holes, then it will add about two more minutes. Since the price was set per 1 hour of machine time, it made this project closer to realization.
So satisfying & loud!
PREPARATIONS


Chamfer the holes for the screw head.
Sand all wood sides.
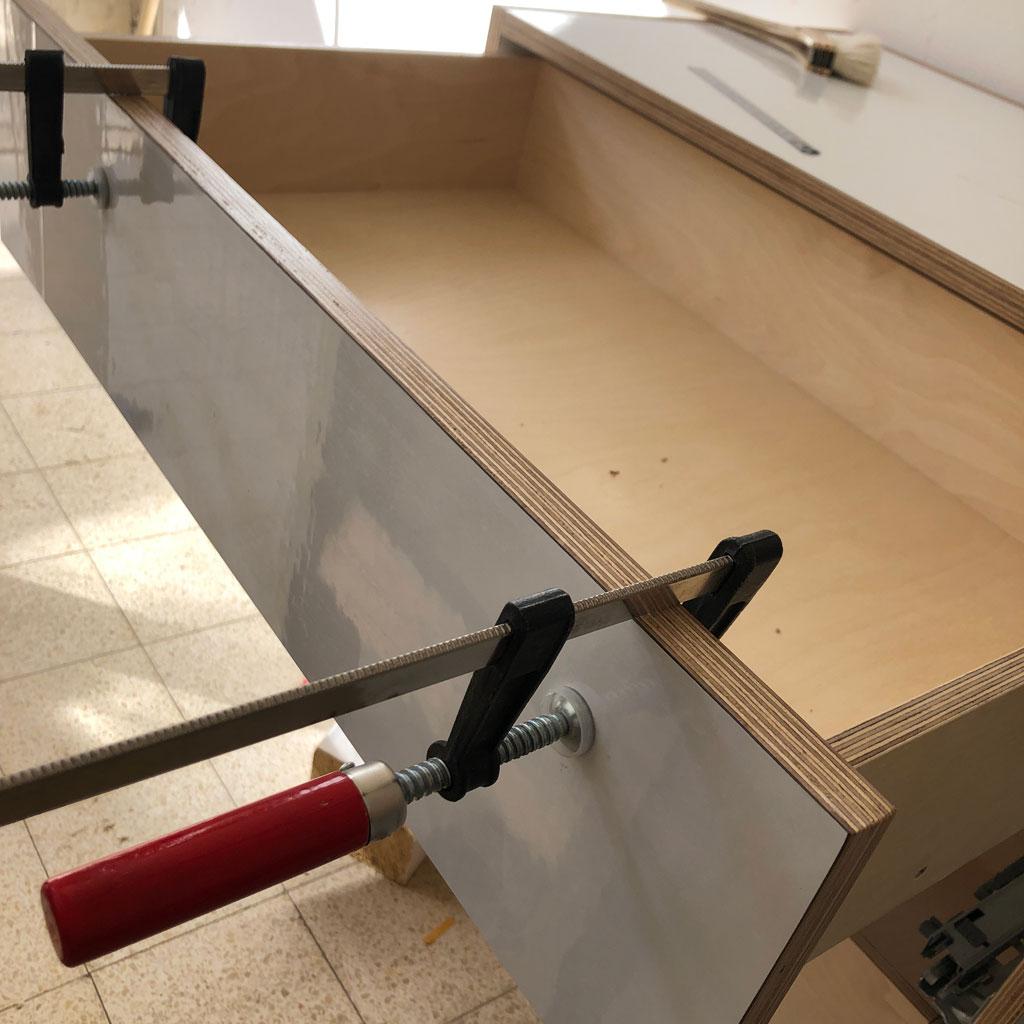
Clamp two adjacent plates with a corner and predrill holes in the side panel for the screws. It should be with a diameter a little less than the screw. Screw the plates.
ASSEMBLE THE CUBES


JOINING
Cabinetry plates can be joined in different ways, screws, nails, dowels, dovetail, mortise and tenon, glue and so on. The most complex one needs special machinery, so screws were picked as the affordable one. Since they will be seen, the preference was to pick the one that will look like a jewel.
Here was made another small research, and the torx Spax yellow screws were the most good-looking, in my opinion. They are also nicer to work with, phillips screws tend to slip from my screwdriver sometime. Pocket holes system are trendy now and was considered too, but a small and clean dot of the screw looks just fine by me. It is better to predrill a hole for a screw so that the screw will be guided while inserted - many holes to predrill, so this can be a little time-consuming.
The cabinets back side, will be made from 18 mm too to use as much from one plate as possible since it is huge. It will also create a sturdier construction and some more meat for the screws. The bottom side of the drawers will be made from the 12 mm plywood for the same reason.
You should have 4 drawer boxes and two big cabinet.
VARNISH


Apply a coat of varnish and let dry to touch. Sand and apply the second layer and so on.
Blum RUNNERS


It's time to make the drawers move!
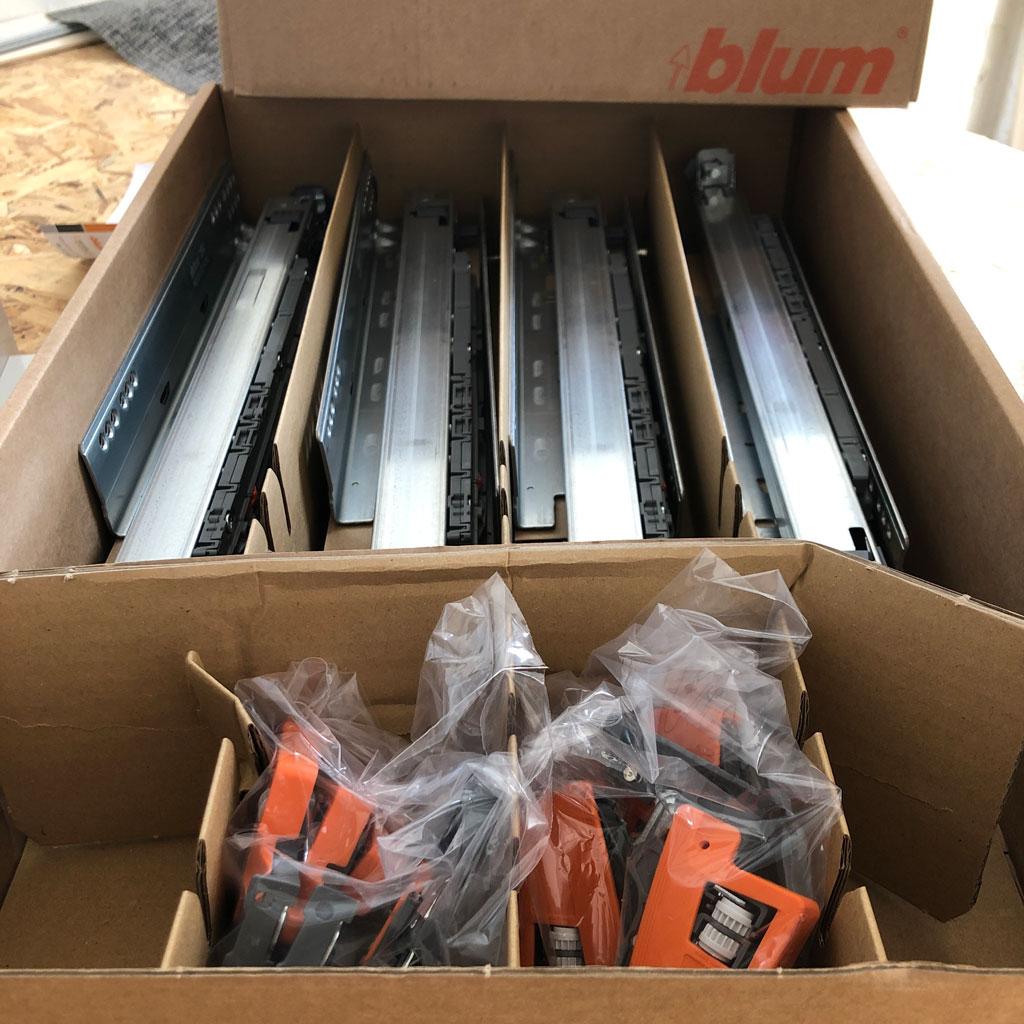
For this project, we'll use four pairs of 40 cm long MOVENTO runners.
Two pairs of hinges, for the doors, with soft closure (BLUMOTION)
The holes are perfectly aligned with the runner. Use the blums screws for this. The predrilled holes are 5 mm in diameter and 13 mm in depth.
Screw two MOVENTO locking devices, at the bottom side of each drawer. This is the part that will hold the drawer in place on the rails.
ASSEMBLE THE FRONTS


MOVEMENT CHECK


Fully opened with soft closure.
This project was a joy!
That's All Folks