Bamboo House


In today’s rapidly advancing world, sustainable living is becoming increasingly essential. This project demonstrates how the timeless, eco-friendly material of bamboo can be combined with modern automation technologies to create a smart, sustainable living space. The bamboo house was designed not only to showcase the versatility of this renewable resource in construction but also to integrate smart technologies that optimize energy efficiency and enhance comfort.
The goal of constructing this bamboo house was to create a serene, eco-friendly space that serves as a haven for leisure and relaxation. With sustainability at its core, the bamboo house offers a place to unwind, recharge after hard work, and share meaningful moments of love and connection with loved ones. By blending natural materials and advanced technology, this project emphasizes the importance of eco-conscious choices in building design.
This bamboo house features Arduino-based automation to control lighting and ventilation systems through IoT cloud technology. The automation system intelligently manages these features based on environmental conditions, reducing energy consumption while maintaining an optimal living environment. The addition of glass panels strategically placed at the top of the structure allows natural light to flood the space, further enhancing its calming and energy-efficient design.
Through this Instructable, I aim to inspire others to embrace sustainable building practices while exploring how modern technology can transform everyday spaces into smarter, greener, and more efficient environments. By demonstrating the fusion of natural materials with cutting-edge innovations, this project serves as a blueprint for a future where sustainability and comfort go hand in hand.
Supplies
- Bamboo
- Solar LED
- Revit (for design)
- 4 Relays
- Soldering Iron
- Wemos D1 or Arduino Uno R4
- connecting wires
- glue gun and sticks
- solar panel
- jumper wires
- 5v dc motor
: Design the Building Using Autodesk Revit


The first step in this project is to design the bamboo house. Autodesk Revit, a powerful Building Information Modeling (BIM) software, is used for creating a detailed and accurate 3D model of the structure. Follow these steps to design your bamboo house:
- Start a New Project: Open Autodesk Revit and create a new project file. Select the appropriate template for your design.
- Create the Layout: Begin by drawing the basic floor plan of your bamboo house, including walls, windows, and doors. Use Revit’s tools to accurately place bamboo elements and ensure the proportions fit your desired house dimensions.
- Add Structural Elements: Using Revit’s structural tools, design the bamboo framework for the walls, roof, and floor. You can use custom bamboo elements or modify existing Revit materials to match the characteristics of bamboo.
- Fine-Tune Details: Add finishing touches like windows, roof design, and environmental considerations (e.g., ventilation). Ensure that the house layout supports the flow of natural light and airflow, essential for the eco-friendly design.
Sourcing Bamboo and Preparing for Construction


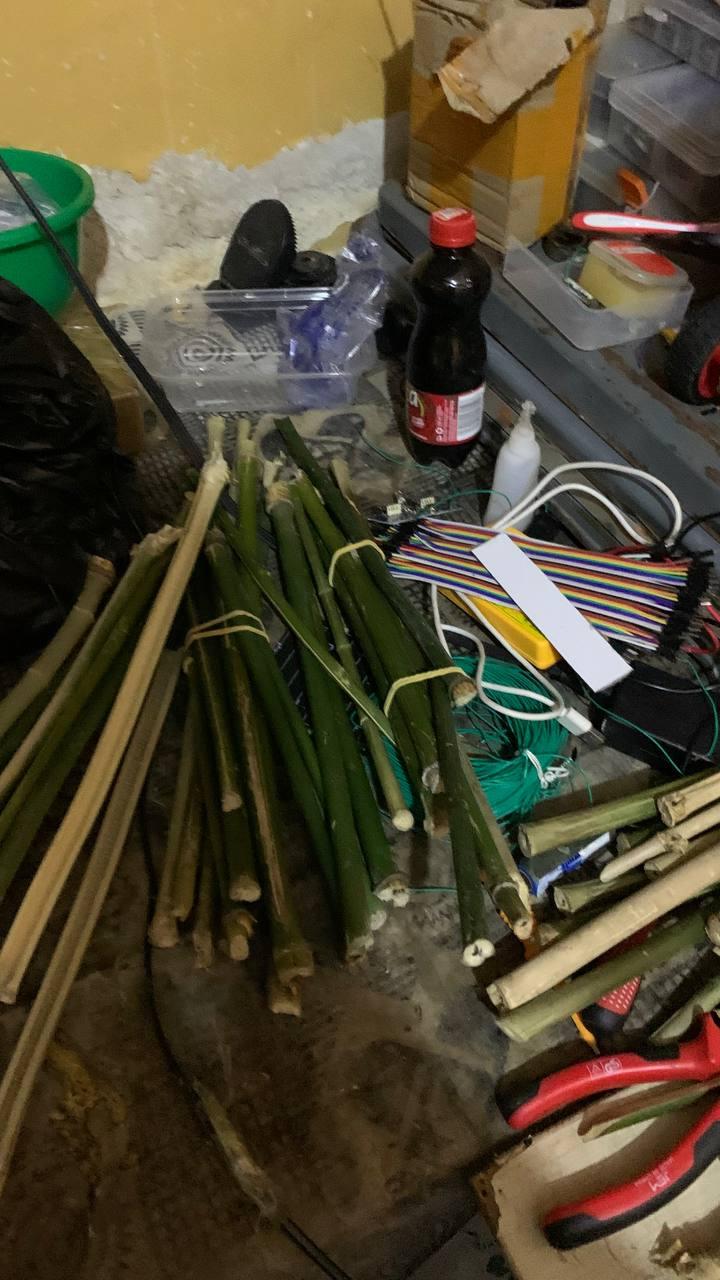
To ensure the success and durability of the bamboo house model, I began by visiting a local bamboo farm. This visit was crucial in sourcing the primary construction material and aligning with the project’s sustainability goals.
- Selection Process:
- Upon arrival at the bamboo farm, I carefully assessed the available bamboo species. Factors such as strength, flexibility, and aesthetic appeal were considered to ensure the selected bamboo would be suitable for the structural and design needs of the model. After thorough inspection, I chose high-quality bamboo that met these criteria, prioritizing pieces that were uniform in size and free from cracks or defects.
- Sustainability Focus:
- A key part of the selection process was verifying that the bamboo was harvested sustainably. I confirmed that the farm adhered to eco-friendly practices, including responsible harvesting techniques that allowed the bamboo to regrow naturally. This step aligned with the overarching goal of promoting sustainable living through this project.
- Procurement and Preparation:
- Once the selection was finalized, I procured bamboo in the required quantities and dimensions. The bamboo was then prepared for use in the construction phase, with additional measures taken to ensure it was clean, dry, and ready for assembly. Proper preparation of the bamboo was critical to achieving a durable and visually appealing final structure
Constructing the Building According to the Design


Objective: Bring the digital design to life by constructing a scaled physical model of the bamboo house, following the blueprint created in Autodesk Revit. The construction focused on maintaining the integrity of the design while showcasing the use of bamboo as a primary material, with added elements to enhance natural light and aesthetics.
Details:
- Materials Used:
- Bamboo: Miniature bamboo sticks were selected to replicate the structural elements of the design. Bamboo was chosen for its eco-friendly nature, durability, and natural aesthetic.
- Glue Sticks: Hot glue sticks were used to join the bamboo pieces securely, ensuring the structure was both stable and visually clean.
- Paper: Paper was creatively used to represent interior furniture such as tables, chairs, and beds, providing scale and depth to the model.
- Glass (or Transparent Plastic): Transparent materials were used to represent glass panels installed on the top sides of the structure. These panels were added to allow more natural light into the room, further enhancing the sustainability and energy efficiency of the design.
- Step-by-Step Construction Process:
- Laying the Foundation:
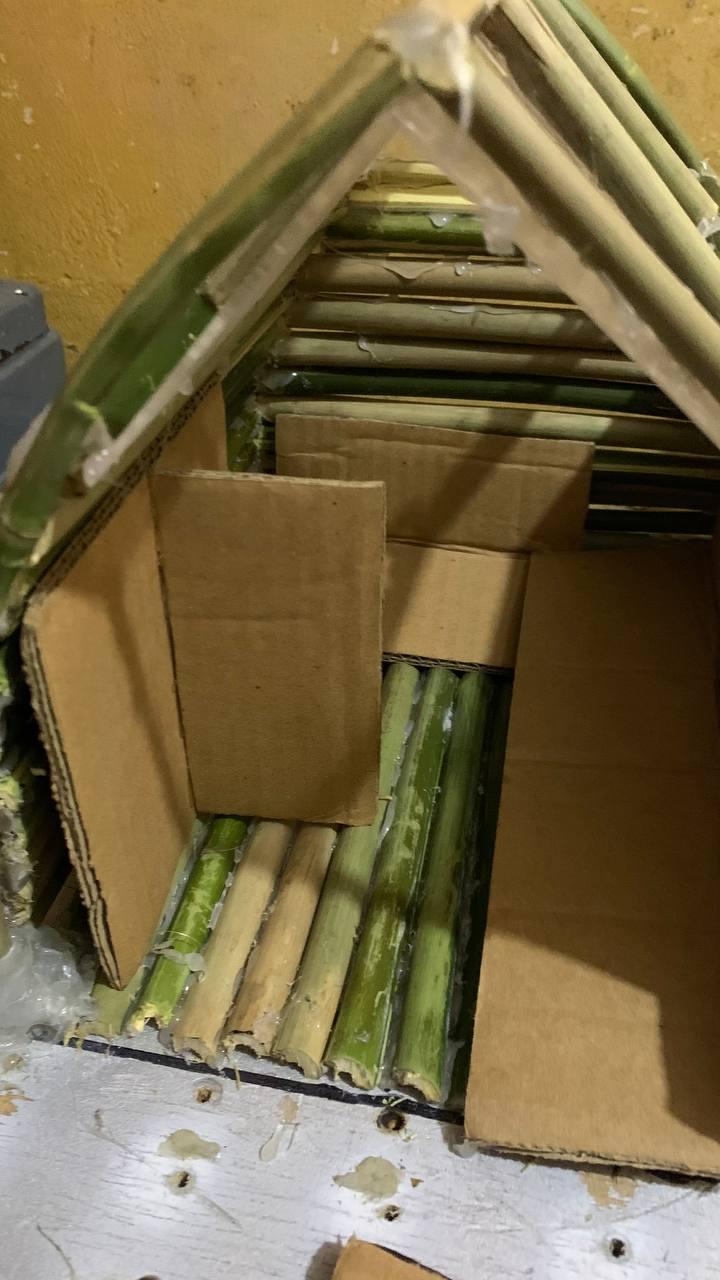
- The construction began by creating the floor structure using bamboo sticks. Each stick was carefully cut to the required dimensions and glued together using hot glue. The floor formed the base of the model and was built to be sturdy and level, ensuring a strong foundation for the rest of the structure.
- Building the Walls and Frame:
- The walls and frame were constructed using vertical bamboo sticks for support and horizontal sticks for reinforcement. Openings for doors and windows were incorporated into the walls, adhering to the blueprint. At this stage, provisions were made for adding the glass panels at the top of the structure.
- Installing the Glass Panels:
- Transparent sheets (representing glass) were cut to size and placed side by side along the top portions of the walls. These panels were designed to maximize natural light within the room, reducing the need for artificial lighting during the day. The placement of the glass panels was carefully aligned with the design, ensuring an even distribution of light throughout the space.
- Roof Construction:
- The roof was constructed using bamboo sticks arranged in a slanted pattern for both structural stability and aesthetic appeal. Care was taken to ensure the roof seamlessly integrated with the walls and glass panels, creating a cohesive design.
- Interior Representation:
- Interior elements such as furniture were crafted using paper. Miniature tables, chairs, and partitions were designed to reflect the layout of a functional living space. These elements were carefully positioned inside the house to provide a realistic visualization of the room’s usability.
- Final Touches:
- The final touches included trimming excess glue, ensuring all joints were secure, and adding decorative details. Small accents, such as paper curtains or decorative pots, were added to enhance the visual appeal of the model.
Challenges Encountered:
- Cutting bamboo sticks to precise lengths and angles required a steady hand and attention to detail.
- Securing the transparent glass panels without disrupting the aesthetic flow of the design was a delicate task.
- Balancing the structure while using lightweight materials like glue, bamboo, and paper required careful assembly.
Outcome:
The scaled model of the bamboo house was successfully constructed, incorporating natural materials and sustainable design elements. The addition of glass panels on the top sides of the structure allowed for enhanced natural light, showcasing a practical solution for energy efficiency. The completed model served as a tangible representation of how bamboo and smart design can work together to create an eco-friendly living space.
Assembling the Connections Based on the Schematic


The next critical step involved following the schematic diagram to connect all the components of the bamboo house automation system. Each connection was meticulously made to ensure the system functions seamlessly as designed. Below is a breakdown of the process:
- Preparation:
- I began by organizing all the components, including the solar panel, charge controller, batteries, ESP8266 microcontroller, relay module, water pumps, DC motor, and sensors. This ensured all materials were easily accessible during the assembly.
- Following the Schematic:
- Using the schematic as a guide, I carefully wired each component to its corresponding pins and terminals.
- Solar Panel and Charge Controller:
- The solar panel was connected to the charge controller, which regulated the voltage and ensured the safe charging of the 18650 Li-ion batteries.
- ESP8266 Microcontroller:
- The microcontroller served as the brain of the system, interfacing with the relays to control various operations. Its GPIO pins were connected to the relay module and other peripherals as per the schematic.
- Relay Module:
- the relay was connected to the light and acted as a switch
- Final Checks:
- After completing the wiring, I double-checked each connection to avoid short circuits or loose connections. I also applied proper insulation to exposed wires for safety.
This step required patience and precision, as any incorrect connection could compromise the system's functionality. By diligently following the schematic, the assembly was successfully completed, and the system is now ready for the next phase: uploading the IoT automation code.
Uploading the Arduino IoT Code
Prepare the Code: I wrote and reviewed the IoT code, ensuring it integrates the lighting and ventilation systems with environmental monitoring. The code is designed to control the systems based on factors such as temperature, humidity, and light levels.
Access the Cloud Editor: Instead of using the traditional Arduino IDE, I accessed the cloud-based editor to write, compile, and upload the code directly to the Arduino board.
Upload the Code: The code was uploaded to the Arduino via the cloud editor, establishing communication between the device and the IoT platform for remote monitoring and control.
Test the System: After uploading the code, I tested the system to ensure that the sensors were correctly reading environmental data and that the lighting and ventilation systems responded as intended via IoT control.
Debugging and Refinement: Any issues discovered during testing were addressed through debugging and adjustments to the code to ensure seamless operation.
Conclusion

This bamboo house project beautifully combines sustainability and modern technology. By using bamboo—a renewable and eco-friendly material—for construction, and integrating IoT automation with Arduino, this project showcases how traditional materials can be enhanced with innovative solutions to create smarter, greener living spaces.
The smart control of lighting and fans not only improves energy efficiency but also highlights the practicality of smart home technology in everyday life. This project proves that sustainability can be both functional and inspiring, offering a path toward a future where technology and nature work hand in hand.