Best Paper Snowflake

This step by step process will help you make a beautiful snowflake for the winter holidays! Have fun (:
Gather Your Tools.

You will need:
-Sissors
-Construction paper (regular printer paper will work too)
-Pen or pencil
Fold Your Paper.

Take one corner of the paper and meet it to other side making a 90 degree angle. This should make a perfect crease.
Cut Extra Paper Off.

You will need to cut off the side of paper that is not overlapping paper. (see picture)
Good Job.

If your paper looks like the picture, you have done it correctly!
Unfold Paper.

Unfold your paper to make sure it looks like a perfect square.
Fold

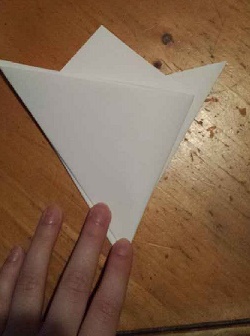
Fold your paper so one corner meets the other.
Fold Again

Now, take the right corner and fold it one inch down from the top corner.
Flip It.

Turn over paper to back side.
Fold

Now take new right corner and fold it one inch down from top corner.
Make Sure Your Paper Is Folded Correctly

Your paper should look like the one in the picture. (:
Fold

Now fold your paper so that each of the outer corners meet.
The Fun Begins..

Now, draw your design by outlining where you will be cutting.
Get Those Scissors Out Again.


Make sure to cut carefully around your design.
Yay

Once you have finished cutting out your design, unfold your paper, and voila! Snowflake!