Blaze Bar Woven Paracord Bracelet
by stephhicks in Outside > Survival
101907 Views, 1540 Favorites, 0 Comments
Blaze Bar Woven Paracord Bracelet

When you are in a survival situation, every second counts. This blaze bar paracord bracelet is designed to quickly deploy. How quick you ask? Under 20 seconds! It is one of the better weaves I found for survival purposes, due to the fact you can get it apart so quickly and easily.
Follow this tutorial to make your very own blaze bar paracord bracelet and be at ease knowing you're a little more ready for an emergency situation.
This is my first instructable, and I am curious to know what you think. I will likely publish more tutorials here on instructables as well as my site, depending on interest. Let me know what you think in comments, either on instructables or on my site! I would also love project suggestions. I have gotten pretty good at paracord weaving, and hopefully, with giving clear instructions.
I have been trying out several different survival weave bracelets, and this is one of the best. I also like the tire tread paracord bracelet, the oat spike paracord bracelet, and the cobra paracord bracelet, which I currently have posted on my site.
Check out some of my stuff here: DIY Projects at DIYready.com
and if you are interested in Survival and Preparedness, I just put this together. Most have tutorials I wrote. All tested.
 DIY Survival Projects
I also have a super tutorial on making a How to Make A Paracord Belt Instructions there, an awesome quick deploy survival belt using Slatt's Rescue Weave, with tons of photos of the process. You end up with a belt that quickly allows you to access 100 feet of paracord. The weave is a little tricky, but once you get the hang of it, it takes only a couple of hours to make. Looks awesome. I am going to put a video up on that one as well.
The original post I did for this blaze bar weave is here: , Making a Blaze Bar Paracord Bracelet
I know that is a lot to say about my site, but if there is interest on instructables, I will be reposting these here. Wanted to give you the links for now. I just built this smokehouse out of pallets. Think I will post it next.
Follow me on Facebook:
How to make this blaze bar paracord bracelet:
Supplies you need:
13 ft of 550 Paracord (makes 8.5" bracelet)
1/2 in side release buckle
scissors
lighter or matches
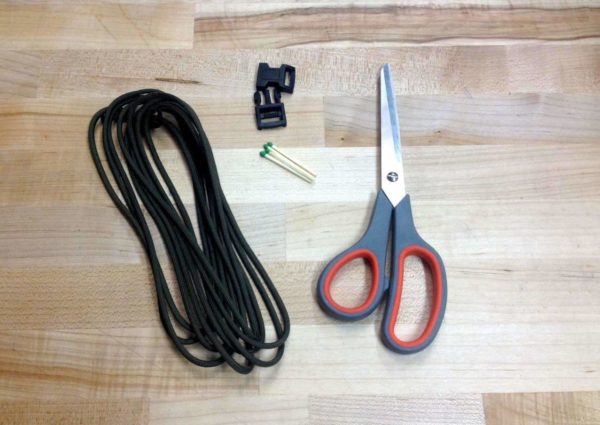
Supplies for this project
Starting


To get started, attach your paracord to one side of your buckle:
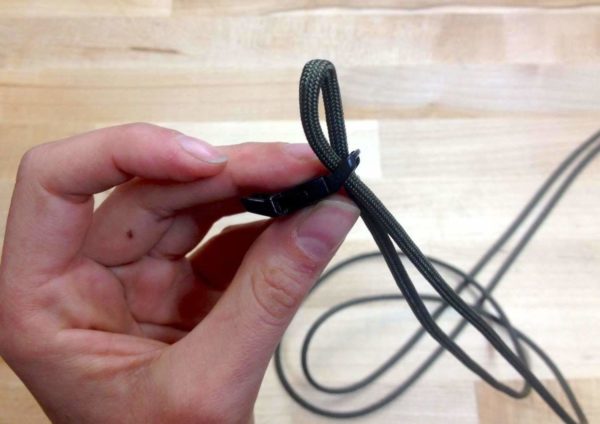
Fold your piece in half and thread it through the buckle.
Pull the ends through the loop you made and pull tight.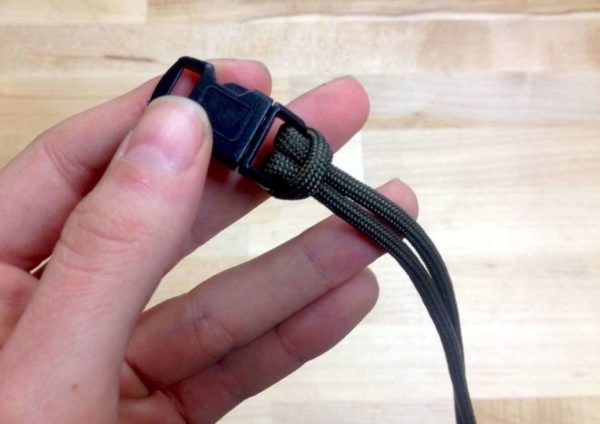
When you start your bracelet, it should look like this.
Length


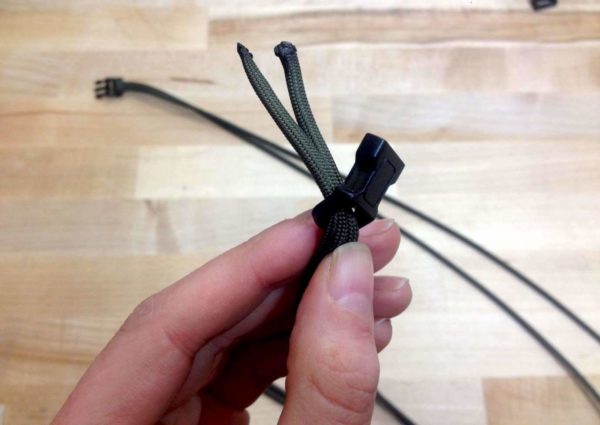
Thread the loose ends through the second buckle piece.

Pull the buckle up along the cord until you are at your desired bracelet length.

Loop the ends back up towards the first buckle.
Start Weaving

Hold the ends so the left free strand is on the left side of the buckle and the right strand is on the right side.

Take the left strand around the front and loop it around all the pieces of paracord.

Pull it back to the left side.
Start With Left
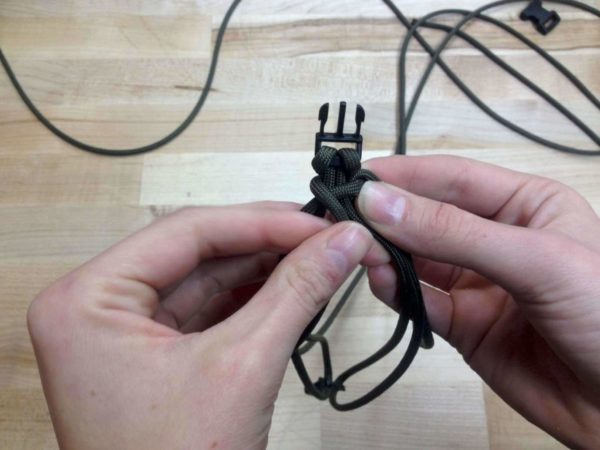
Starting with the left piece, thread it over the left core section.

Take it under the right core section.

Over the right free strand.

Now, take the right free strand. Keeping it under the left free strand - pull it over the right core section.

Underneath the left core section and up through the loop created by your left strand.

Pull to tighten.
Start With Right

Now, starting with the right free strand - Pull it under the right core section.

Over the the left core section.

Underneath the left free strand.

Now, grabbing the left strand, pull it under the left core piece.

Over the right core piece.

Up, through the loop created by the right strand.

Push the weave up.

Pull the free strands in opposite directions to tighten.
Repeat Step 4

Left strand over and under.

Pull the right strand under the left.

Pull the right strand over the right core, under the left and up and through the left loop.

Tighten.
Repeat Step 5

Pull the right strand under the right core and over the left core piece.

Pull the left strand over the right strand, under the left core piece, over the right core piece and through the loop.

Tighten and repeat.
Repeat, Repeat, Repeat. Finish
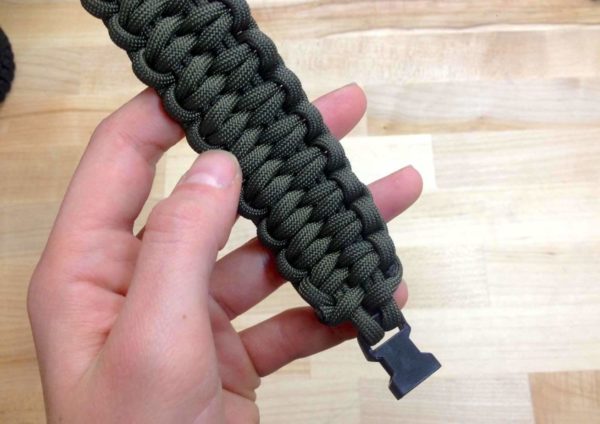
Cut off the ends and use your lighter or matches to burn them.

This is what your finished paracord bracelet will look like.