Carrying Handle(s) for Grocery Bags
by FrenchCrawler in Living > Life Hacks
8776 Views, 9 Favorites, 0 Comments
Carrying Handle(s) for Grocery Bags

This is my first Instructable and the pictures are blurred due to my "wonderful" camera. This Instructable is "inspired" by: https://www.instructables.com/id/EN79PFTMB7EQHOB19G/ as you can see from my comment, I decided to carry out those plans among some others.
First though I've got to say this or someone will complain.
WARNING: There are sharp objects that are needed to make this Instructable. If you can't use sharp objects, get an adult to do it for you. I will not be held responsible for misuse of the Instructable such as, but not limited to: whipping, flailing, throwing, eating, etc.
Gather Materials

To gather materials for the first version you'll need:
1. Wire cutters
2. Wire coat hanger
3. Pliers
4. Tape (duct/electricians)
5. Ruler/tape measurer
6. A 1/2 inch dowel
7. A saw
The saw wasn't included in the photo. All the steps will be done on the next page, and then I'll show you the variations (along with materials) on the page after that.
1. Wire cutters
2. Wire coat hanger
3. Pliers
4. Tape (duct/electricians)
5. Ruler/tape measurer
6. A 1/2 inch dowel
7. A saw
The saw wasn't included in the photo. All the steps will be done on the next page, and then I'll show you the variations (along with materials) on the page after that.
All the Steps Needed to Do the Wire Version.


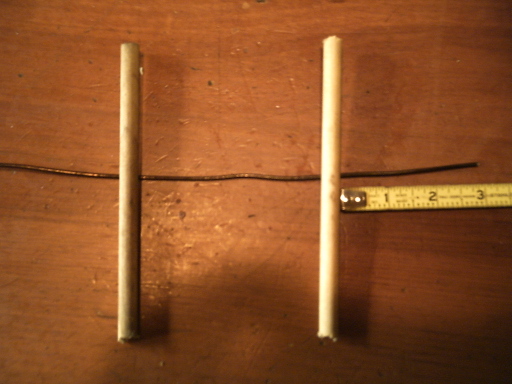
1. First step is to take the dowel and cut two 6 inch pieces off as shown in the photo.
2. Cut a piece (about 10 inches) off the coat hanger using the wire cutters.
3. Take about 3 inches of wire and wrap it around the dowels on both ends.
4. After you've coiled the wire around both dowels, bend the wire into a u-shape.
5. Final step is to wrap the handles up with tape.
At first I thought this would work great, but as it turns out the wire makes it too stiff and hard to load bags on to and then take them off. So I figured out two other versions (which are actually easier to do) and they both work excellent. I didn't bother to photograph the steps to them, but they're so simple I didn't think you'd need them.
Here's the Two Versions That Work Well


Materials for version 1: 1/2 inch dowels, scissors, twine (strong string), fingers, and a saw
Steps:
1. Cut two 6 inch dowels (note: use saw for this :) ).
2. Cut a piece of twine off, about 9 inches (note: use scissors for this).
3. Tie twine around both dowels as seen in the photo (note: use fingers for this).
Now load it up with bags and carry them with ease.
Materials for version 2: 1/2 inch dowel, scissors, twine (or some other strong string), saw, fingers, and a carabiner
Steps:
1. Cut one 6 inch dowel (note: use saw for this).
2. Cut a piece of twine, 5-6 inches (note: use scissors for this).
3. Tie the twine to the dowel and the other end to the carabiner (note: use fingers for this).
Load bags on and carry.
Hope you've enjoyed this Instructable, I've found that I like the version using just the twine and the two dowels works the best. If you see a way to improve it (which I'm sure there are), go ahead a do it.
Steps:
1. Cut two 6 inch dowels (note: use saw for this :) ).
2. Cut a piece of twine off, about 9 inches (note: use scissors for this).
3. Tie twine around both dowels as seen in the photo (note: use fingers for this).
Now load it up with bags and carry them with ease.
Materials for version 2: 1/2 inch dowel, scissors, twine (or some other strong string), saw, fingers, and a carabiner
Steps:
1. Cut one 6 inch dowel (note: use saw for this).
2. Cut a piece of twine, 5-6 inches (note: use scissors for this).
3. Tie the twine to the dowel and the other end to the carabiner (note: use fingers for this).
Load bags on and carry.
Hope you've enjoyed this Instructable, I've found that I like the version using just the twine and the two dowels works the best. If you see a way to improve it (which I'm sure there are), go ahead a do it.