Chibi Elf Amigurumi

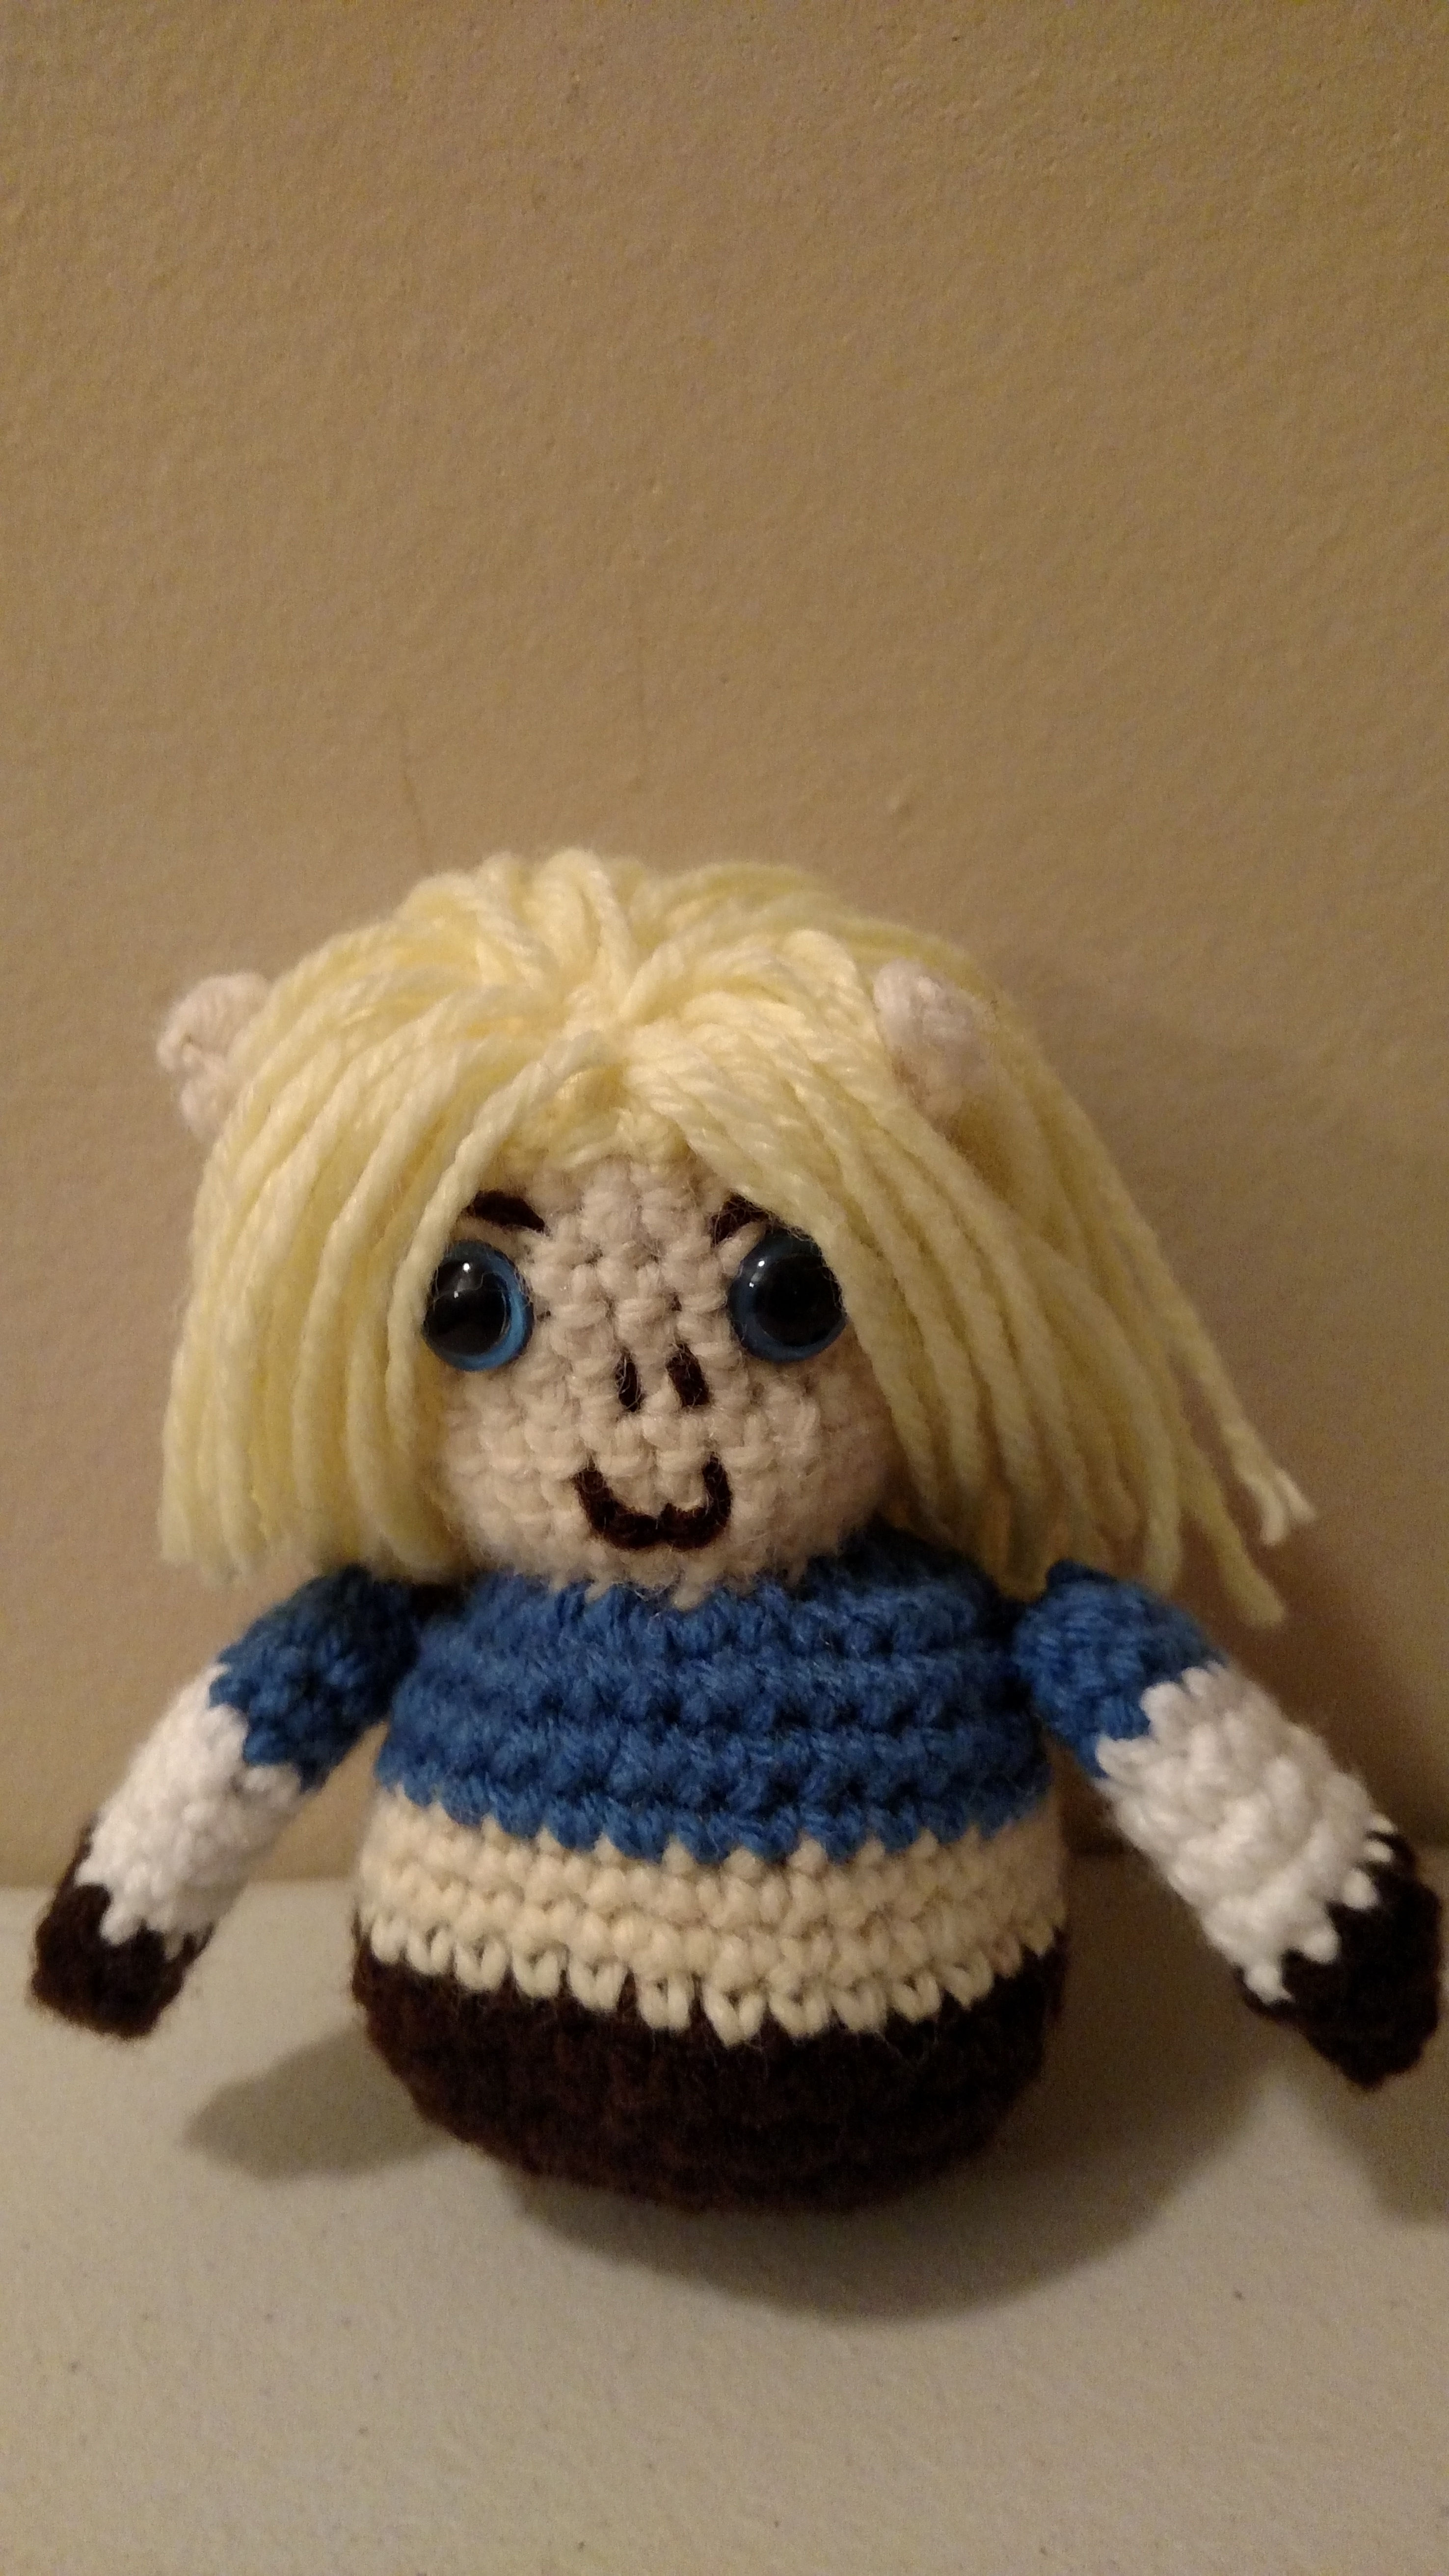
This tutorial will show you how to make a chibi (Japanese term for small person) elf amigurumi. This pattern was inspired by Link from Breath of the Wild. Hope you enjoy the pattern!
Supplies
Worsted Weight yarn: White, Cream (For Skin), Blue, Yellow, and Brown
-3.5 mm crochet hook
-Poly-fill stuffing
-Plastic Yarn Needle
-Scissors
-Blue Safety Eyes
-Stitch Marker
Crochet Stitch Legend
Mc: Magic circle
Sc: Single Crochet
Dc: Double Crochet
Lpst: Loop Stitch
InDec: Invisible decrease
Slst: Slip Stitch
Magic Circle: Row 1

1) Starting with the yellow yarn Mc with 6 Stitches
2) Slst to join and Insert a stitch marker
3) Pull magic circle closed
Row 2: Making the Hair

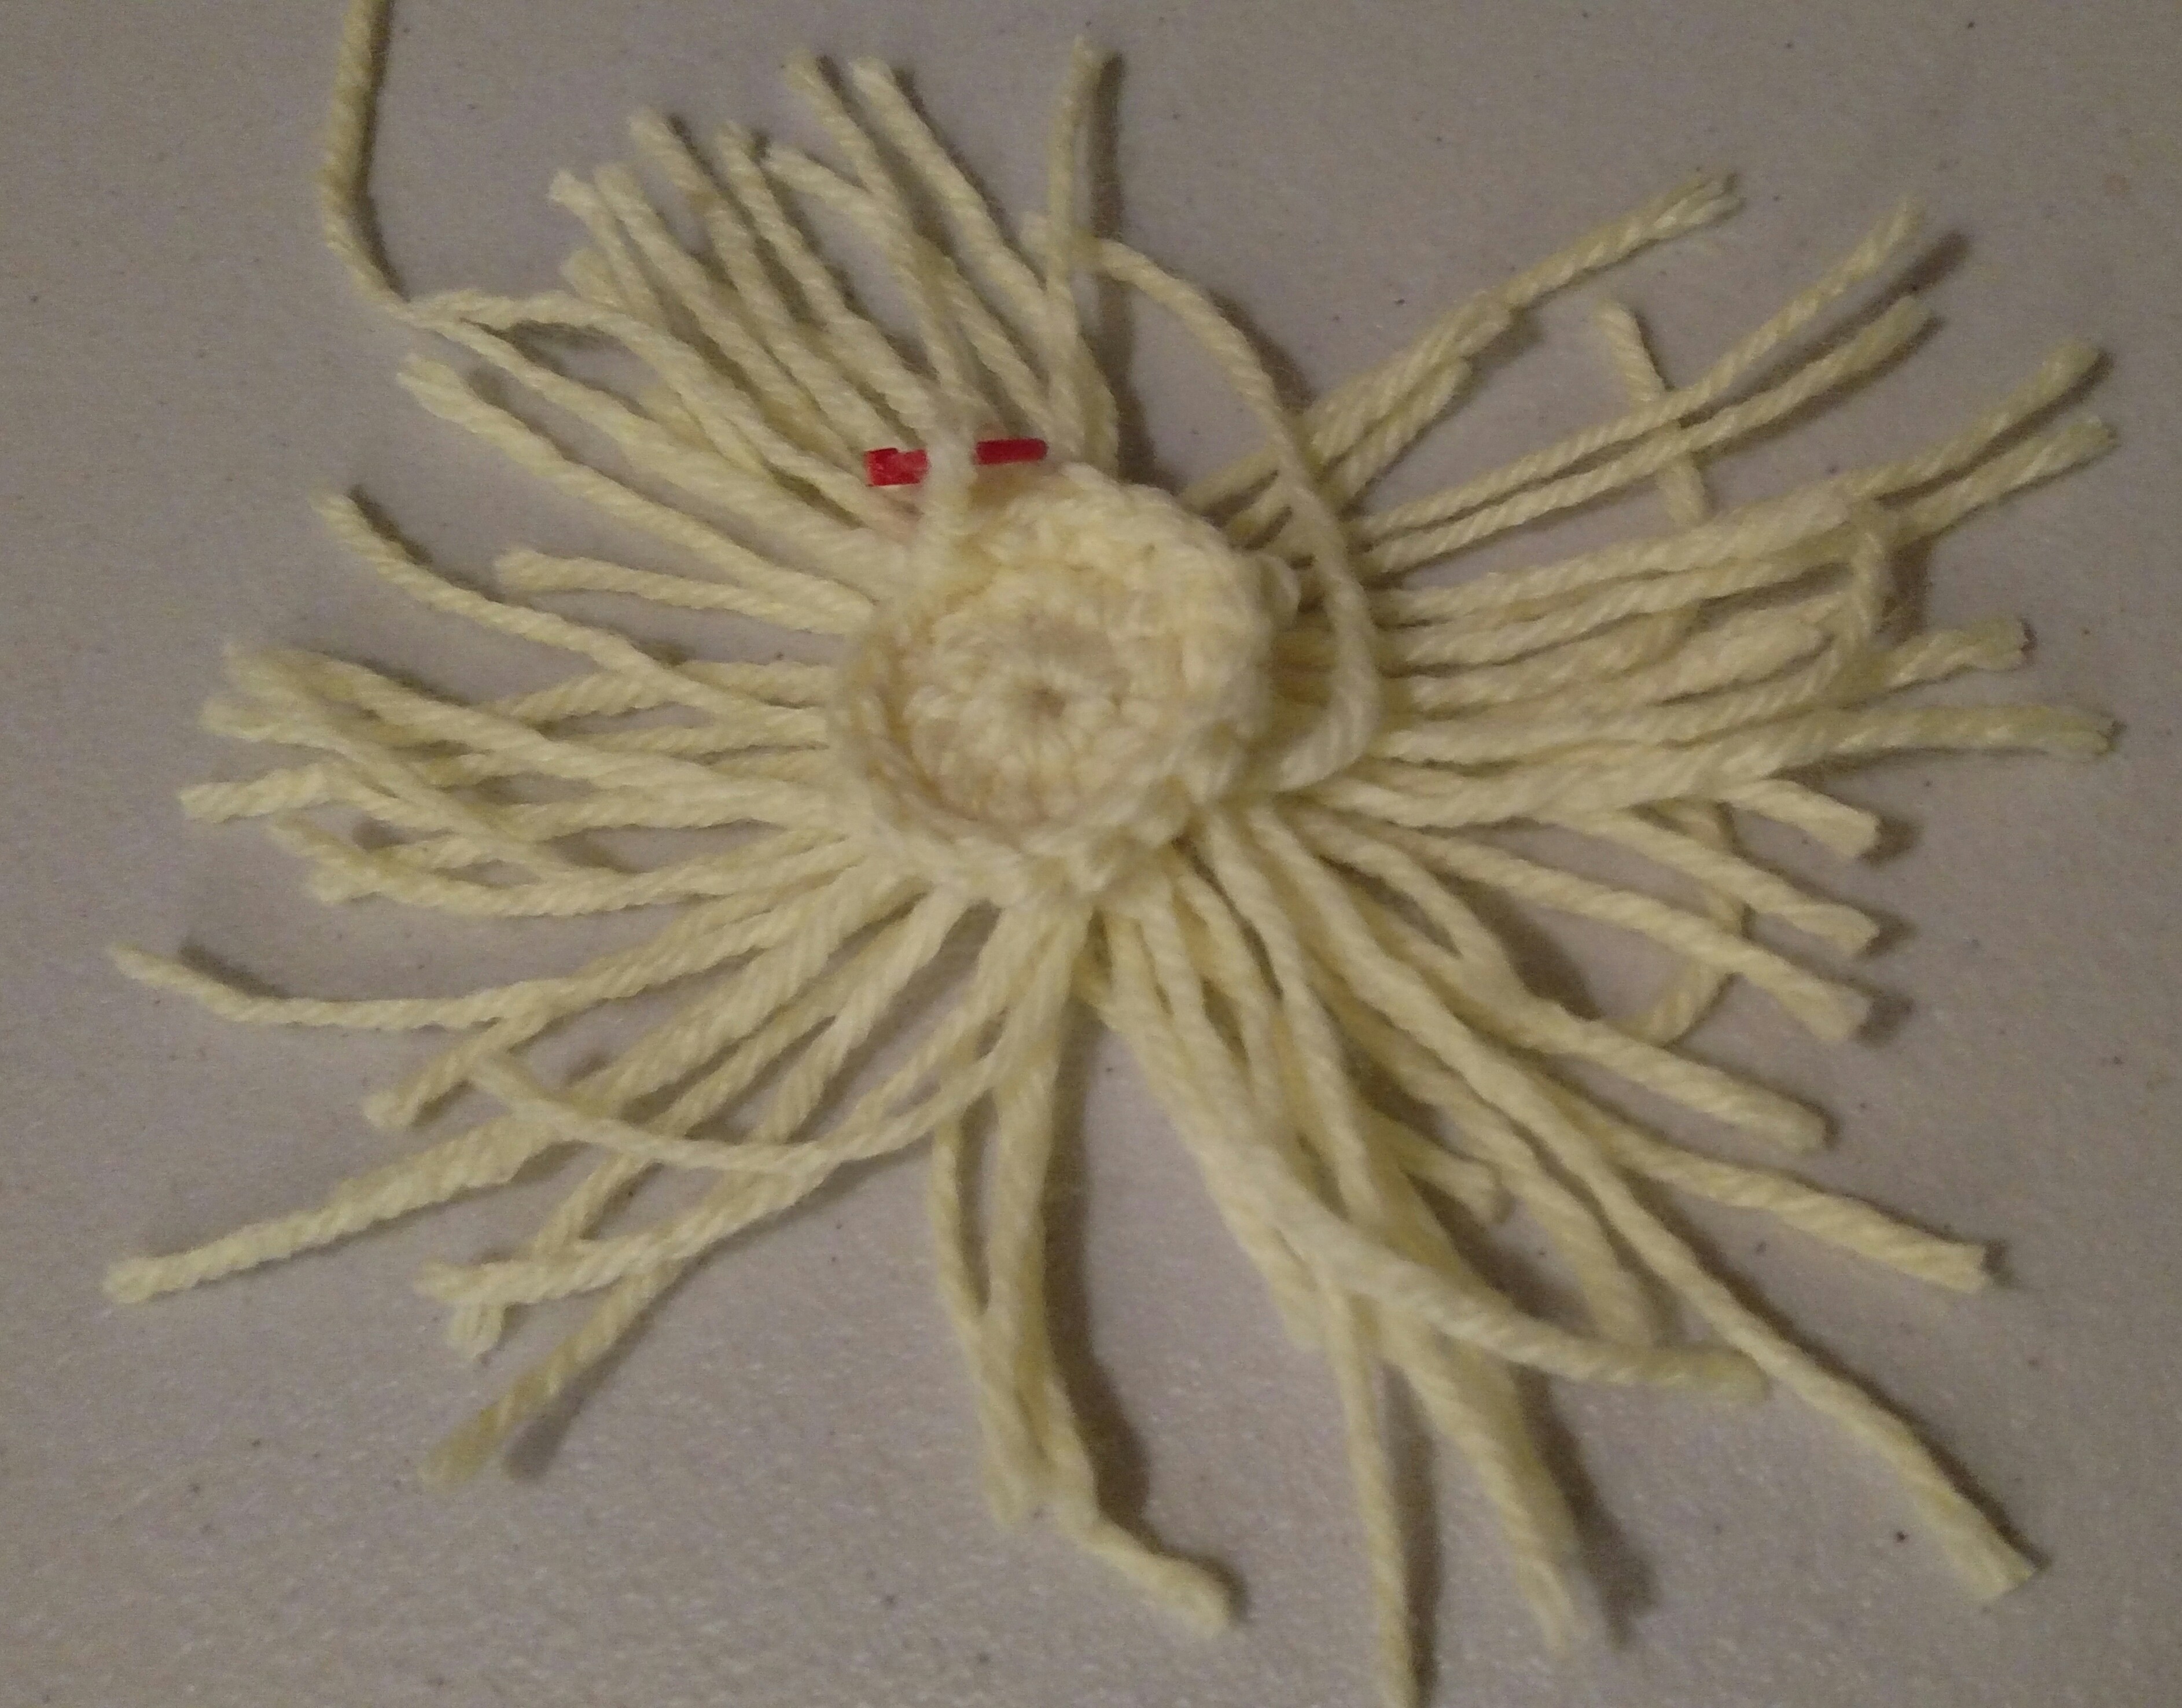
For the hair, we are going to use loop stitches. Since we are starting at the top of the head, create small loops and gradually increase the size of the loops as you start new rows to create layered long hair.
1) 2 Lpst (2 and 1/2 inch length) in each stitch around. Insert stitch marker at end of row.
2) Snip the loops in half to create stands of hair
Row 3 Making the Hair

1) 1 Lpst in first stitch and 2 Lpst in second stitch. Repeat until end of row. Insert stitch marker at end of row.
2) Snip the loops in half to create stands of hair
Row 4: Making the Hair

1) 1 Lpst in first 2 stitches and 2 Lpst in third stitch. Repeat until end of row. Insert stitch marker at end of row.
2) Snip the loops in half to create stands of hair
Row 5: Making the Hair

1) 1 Lpst in first 3 stitches and 2 Lpst in fourth stitch. Repeat until end of row. Insert stitch marker at end of row.
2) Snip the loops in half to create stands of hair
3) Part hair and trim to desired length as needed
Row 6-13: Finishing the Head

1) Change to the Cream color.
2) Sc in each stitch around for rows 6-13. Insert stitch marker at end of each row.
3) Tie back the long stands of hair as seen in the picture with a small piece of blue yarn.
Row 14 Till Fasten Off: Finishing the Head

1) InDec in each stitch around.
2) Insert safety eyes.
3) Stuff the head with Poly-fill
4) Sc until end of row
5) InDec in each stitch around. Slst to close. Fasten off
Embroidering Details for the Face

1) Embroider details for the face as shown using the plastic yarn needle and brown yarn.
Creating the Pointy Ears

1) (Make two) Starting with the cream yarn, Ch 10
2) Starting from second chain from the hook, Sc across, Fasten off and sew to head as shown.
Magic Circle for Starting the Body

1) Starting with the brown yarn, Mc with 6 stitches.
2) Slst to join and insert stitch marker. Pull magic circle closed.
Making the Body Width

1) 2 Sc in each stitch around. Insert stitch marker at end of row.
2) 1 Sc in first stitch. 2 Sc in second stitch. Repeat until end of row. Insert stitch marker at end of row.
3) 1 Sc in first 2 stiches. 2 Sc in third stitch. Repeat until end of row. Insert stitch marker at end of row.
4) 1 Sc in first 3 stitches. 2 Sc in fourth stitch. Repeat until end of row. Insert stitch marker at end of row.
Making the Body Length

1) Sc around for 2 rows
2) Change color to cream, Sc around for 3 rows.
3) Change color to blue, Sc around for 4 rows
Finishing the Body

1) InDec in each stitch around
2) Stuff body with Poly-fill
3) InDec in each stitch around until end. Close with a slip stitch and fasten off.
4) Sew to body.
Making the Arms

Make two arms:
1) Starting with the blue yarn, MC with 6 stitches. Slst to join. Pull magic circle closed. Insert stitch marker.
2) 2 Sc in each stitch around until end of row
3) Sc in each stitch around until end of row.
4) Change color to white, Sc for 4 rows.
5) Change color to brown, Sc in each stitch around until end of row.
6) InDec until end. Slst to close. Fasten off and sew to body.