Create a Traffic Cone
by tinkercad-support in Workshop > 3D Printing
12355 Views, 8 Favorites, 0 Comments
Create a Traffic Cone


Learn to create accessories to enhance your play time.
We will only need a few shapes.
Let's get started with the base of the cone!
Instructions
- Drag a Box shape onto the Workplane.

- Continue to the next step.
Size the Box

Let's adjust the size of the box by making it shorter.
Instructions
- Select the Box shape and size it to 2mm tall.
- Continue to the next step.
Add the Cone

Great work! Next we need the cone shape.
Instructions
- Drag a Cone shape to the Workplane.
- Continue to the next step.
Size the Cone

We will need to trim off the top of the cone a bit, but first let's make the cone a bit taller.
Instructions
- Select the Cone shape and size it to 30mm tall.
- Size the bottom of the Cone to be 15mm by 15mm.
- Continue to the next step.
Align the Shapes

Now we need to align the shapes, so they are centered on each other.
Instructions
- Select both shapes and click the Align button on the toolbar.
- Select the middle align handles on the Workplane to align the shapes.
- Continue to the next step.
Add a Box Hole

We will need to trim off the top of the cone.
Let's get started.
Instructions
- Drag a Box Hole onto the Workplane.
- Continue to the next step.
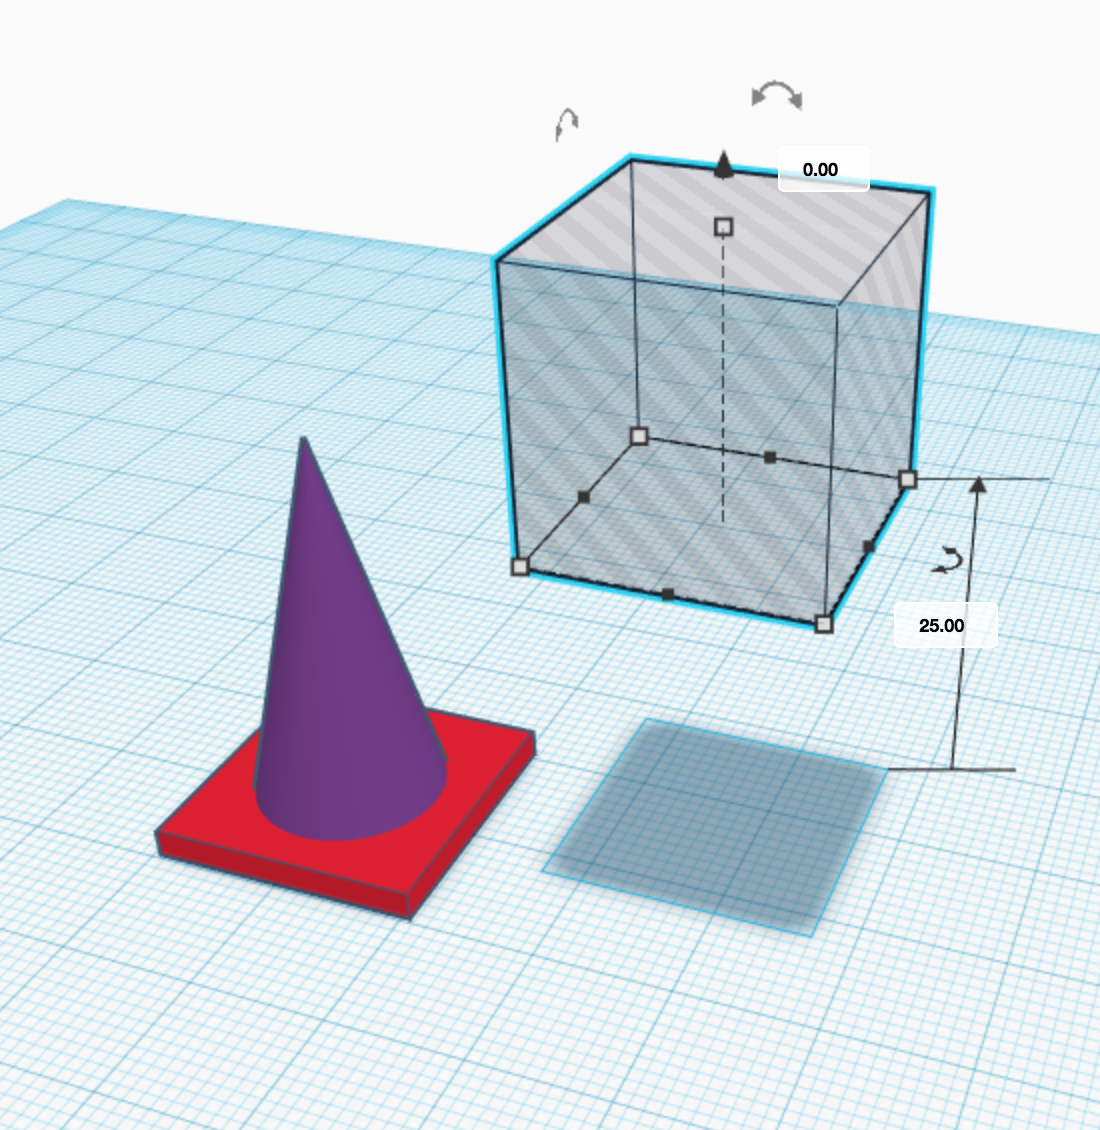
Lift the Box Hole

Let's position the Hole to trim the top of the cone.
Instructions
- Select the Hole shape
- Use the black arrow on top of the shape to lift the hole 25mm up off the Workplane.
- Continue to the next step.
Duplicate the Cone

To hollow out the cone we will make a duplicate of the cone we already have and use it to remove material from the inside of the cone.
Instructions
- Select the Cone shape.
- Click the Duplicate button on the toolbar.
- Use the black arrow on top of the shape to drop the cone 3mm below the Workplane.
- Use the shape panel to set the new cone to a hole.
- Continue to the next step.
Align All the Shapes

Now, let's center all the shapes one last time.
Instructions
- Select all the shapes, including the holes, and click the Align button on the toolbar.
- Select the middle align handles on the Workplane to align the shapes.
- Continue to the next step.
Group the Shapes

With all the shapes in their final position we can now group the shapes into a single object.
Let's make a traffic cone!
Instructions
- Select all the shapes, including the holes, and click the Group button on the toolbar.
- This will combine all the shapes and remove material where the hole shapes are positioned.

- Use the Shape Inspector to change the color of the cone to Orange.
- Continue to the next step.
You Did It!

Great Work!