Creating the N-1 Mandalorian Starfighter! (Fusion 360)
by JoshuaJ1710 in Workshop > 3D Printing
1745 Views, 4 Favorites, 0 Comments
Creating the N-1 Mandalorian Starfighter! (Fusion 360)


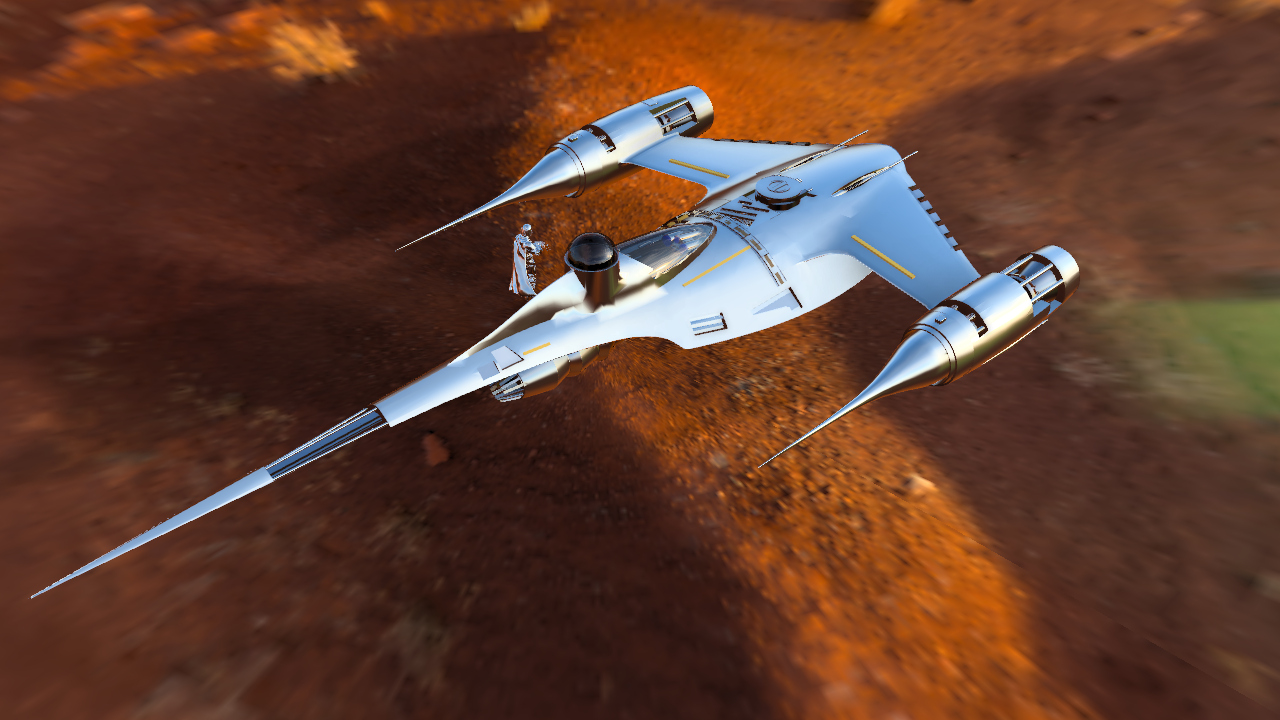


Hello! My name is Josh, and I'm a Freshman (9th Grade) at Olathe Northwest High School. This is a project I have been working on for a few weeks. I have been really enjoying the Book of Boba Fett, and I loved that the Mandalorian got a new ship (Spoilers). I had made a 3d model of a Razor Crest in the past and was looking forward to making one again, but this time, an N-1 Starfighter. This model was the first model where it was entirely made using Fusion 360, so I hope you enjoy it. Also, for the first time, I decided to use the rendering tool in Fusion, which turned out great, in my opinion. The model's files will be attached in the next step (supplies). I hope you enjoy it!
Supplies
Materials Needed:
- A Laptop/Computer
- Fusion 360 Software
- A Fusion 360/Autodesk Account
- Some Experience with CAD
Optional Materials:
- A 3D Printer
- An N-1 Starfighter 3D Model (Recommend Thingiverse)
Materials Used (Render Workspace):
- Glass (Grey): Glass.stl
- Aluminum- Anodized Glossy (Grey): Mandalorian
- Paint- Metallic (Dark Grey): Dark Grey Parts.stl
- Bronze- Patina: Brown Parts.stl
- Plastic- Matte (Yellow): Yellow Parts.stl
- Copper- Raw: Copper Parts.stl
- LED (Blue): Gauges.stl
- Nickel- Satin: Light Grey Parts.stl
Link to Model:
Model Files (Corresponds with Materials Above):
Background


Protecting the skies and space around Naboo is the N-1 starfighter. Its sleek design exemplifies the philosophy of art and function witnessed throughout Naboo technology. Its twin radial J-type engines are capped in gleaming chrome and trail long delicate-looking finials behind the ship's single-pilot compartment. Behind the pilot sits a standard Astro-mech droid, plugged into an abbreviated, ventrally-fed socket which requires the droid to compress slightly in order to fit within the vessel's curves. The fighter features twin blaster cannons, twin fire-linked torpedo launchers, and a capable automatic pilot feature. It was first featured in Star Wars: The Phantom Menace and was introduced to The Book of Boba Fett recently, piloted by the Mandalorian (Din Djarin)
Link to Website: https://www.starwars.com/databank/naboo-n-1-starfighter
Reference Photos


This is one of the hardest parts of designing this ship. Since it is so new and was just recently introduced back into the Star Wars Universe, it is really difficult to find reference photos. But, if you have a Disney+ account, it's really easy to take screenshots directly from the episode/show itself. In addition to this, you could use regular N-1 Starfighter photos to get the overall shape and start editing it using the photos you have. If you don't have a Disney+ account or think that this is too complicated, you can always use a model that has already been made for the original starfighter, and edit it to look like the one in the show. There are many ways to do this, but it is a really important step if you are looking for accuracy.
The Engines


The engines are very unique to the N-1 Starfighter, and specifically the Mandalorian's ship. Normally, it ould be one solid piece, to improve aerodynamics. But, since Mando's N-1 Starfighter was scrapped, it has many missing panels and pieces on the engine itself. I really tried to focus on this when designing it, so I tried to add as many details as possible. I made sure to cut out certain sections of the engine to show missing panels and added engine details on the inside, such as the turbine and the copper section. Though this may not be entirely accurate to the show, I think it turned out just fine and looks great in the photos!
The Weaponry

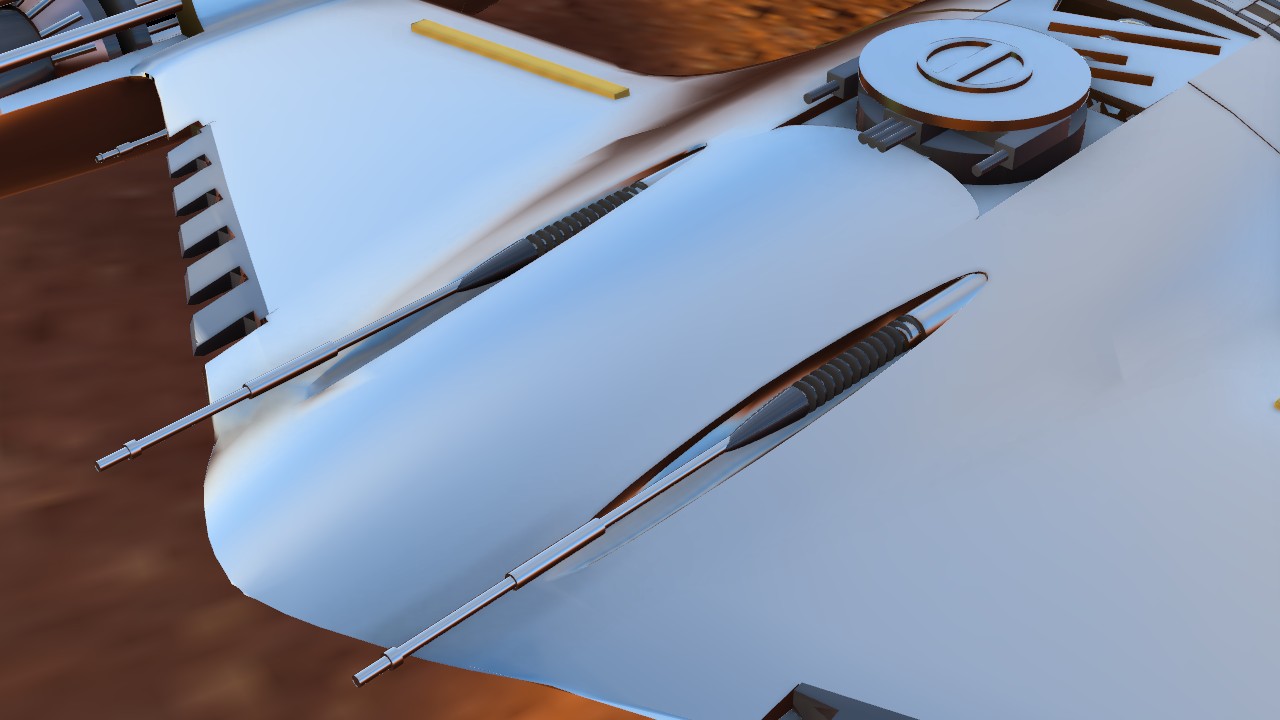


The weaponry on this ship is quite simple and doesn't take much time at all to design in Fusion. The fighter features twin blaster cannons at the front of the ship, and something that is unique to this starfighter only is the blaster placed behind the two in the front. The front blaster is just simply a rod with a cone and many small cylinders attached to it, as seen in the image above. The rear blasters are mainly just a cylinder with added layers. The middle layer is a trapezoid with two rectangular prisms attached to it, with small cylinders to represent the blaster itself. This section was fairly simple and turned out great!
The Thruster


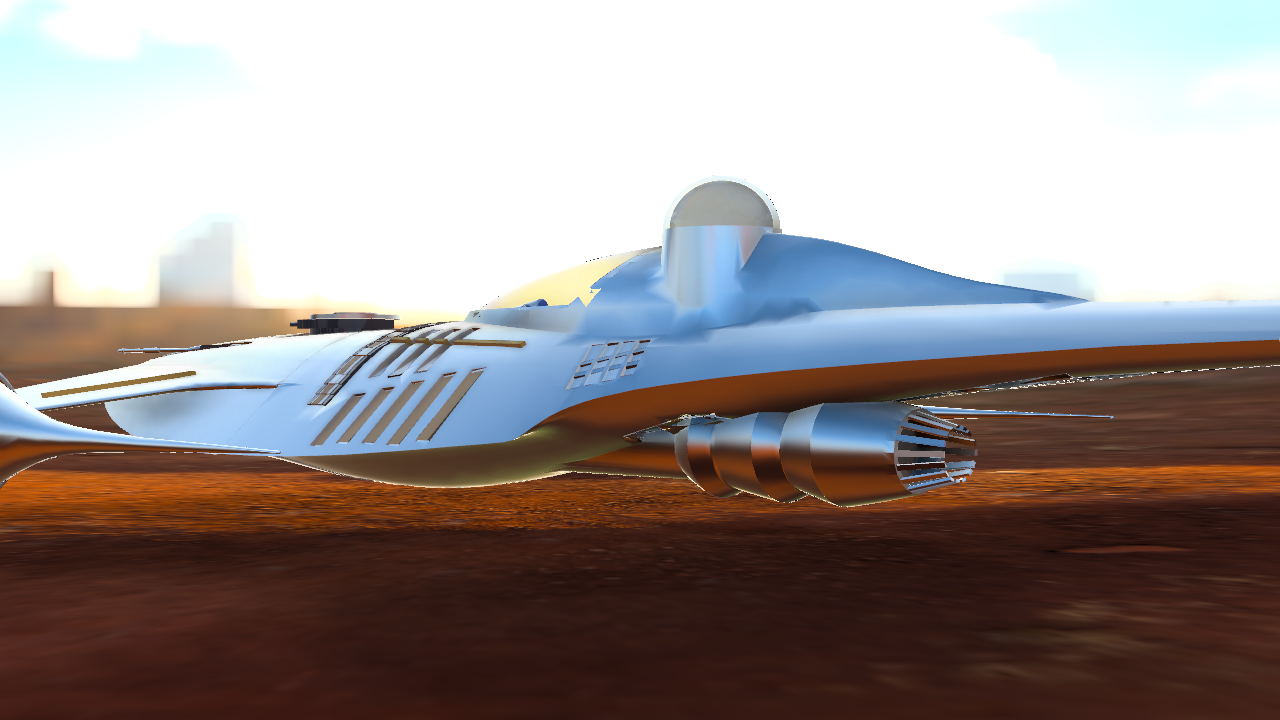
The thruster is very simple, and shouldn't take you much time. Start off with multiple cones with the top cut off, and combine them together, back-to-back, as shown above. Then, once you have the cone facing the back of the ship, you have to add the panels on the thrusters. I would recommend rotating one panel, relocating to the correct position at the top of the thruster, then duplicating. Then, rotate and reposition to the bottom of the thruster. Then, duplicate and rotate until the thruster is filled with panels that complete a circle. And that's it for the thruster!
The Bodywork


Since this starship is so unique because of the missing body panels, and the "junkyard" look, it was important for me to add all the details I could. So, using the reference photos I had, I started to remove some of the bodywork. I started with the are behind the shooter, as seen in the first picture. I also made sure to add some idents of many different shapes and sizes, and even down to small details underneath the ident. After this, I moved onto the right side of the cockpit, as shown in the second picture. I made these rectangles with triangles at the top, and resized them so they would be bigger and bigger each "step". I did this a total of four times. Then, I duplicated it and made it smaller, and rotated it to fit on the top of the other ident, as shown above. After this, I proceeded to the left side of the cockpit. I used a rectangle with a triangle attached to make the ident towards the front, and a rectangle for the back one. Finally, the last ident was on the tail of the ship. I used half of a trapezoid for the one closer to the front end of the ship, and a rectangular ident on the one towards the back. After this, the idents were finished. The next step was the yellow sections, which were just rectangles. The only hard part about this was placing them in the correct locations. The last and final step for the bodywork is the panel behind the ident in the front (brown and silver). This was the hardest part of this section. I decided to duplicate many rectangular prisms to make the semi-circle. And that's it for the bodywork!
The Cockpit


The cockpit, in my opinion, was the most detailed part of this model. I started with the seat, which of course was the largest part of the cockpit. After I made the seat, I added padding, which I don't know if it was entirely accurate, but it worked pretty well. Next, I added the electronics to the front of the seat. This included the three main gauges and the two handles for the pilot to use to steer. The final step t finishing the cockpit was the glass. I used a cylinder and cut it into four pieces (1/4). Then I stretched it to fit over the cockpit. This section turned out amazing, and looks great!
Using Render in Fusion 360
.png)
.png)
.png)
.png)
.png)
.png)
.png)
.png)
.png)
.png)
.png)
.png)
.png)
Steps to How I Rendered This 3D Model:
Notice: (You don't have to follow these steps to render your design. This is how I taught myself to do it, and it worked well for me!)
- Once you are complete with your model, go to the top corner labeled as "design." Click on the tab, and then click on "render." This should take you to the render workspace in Fusion 360.
- Next, open the color wheel labeled as "Appearance"
- Then, drag and drop certain materials to certain parts of the model. Ex: (The body of the ship- Nickel Stain) Use Materials List Above (In Supplies)
- After this, open the tab at the top left corner labeled as "Scene Settings."
- Then, go to your web browser (Used Chrome) and go to This Website, or search for a website with HDR files
- If you used the website provided above, and want to use the same scene as the one I used, scroll down to the picture labeled "MonValley Lookout" and click on it.
- After this, return to Fusion 360, scroll down until you find text labeled "Attach Custom Environment", and click on it.
- Once you click on it, it should open your file explorer and open download. Then, click on the file you downloaded as an HDR file, or the one I used (MonValley Lookout), and click "Open."
- Then, it should eventually upload it to the scene, and it should appear in the render workspace.
- Finally, you are finished!
Additional Images


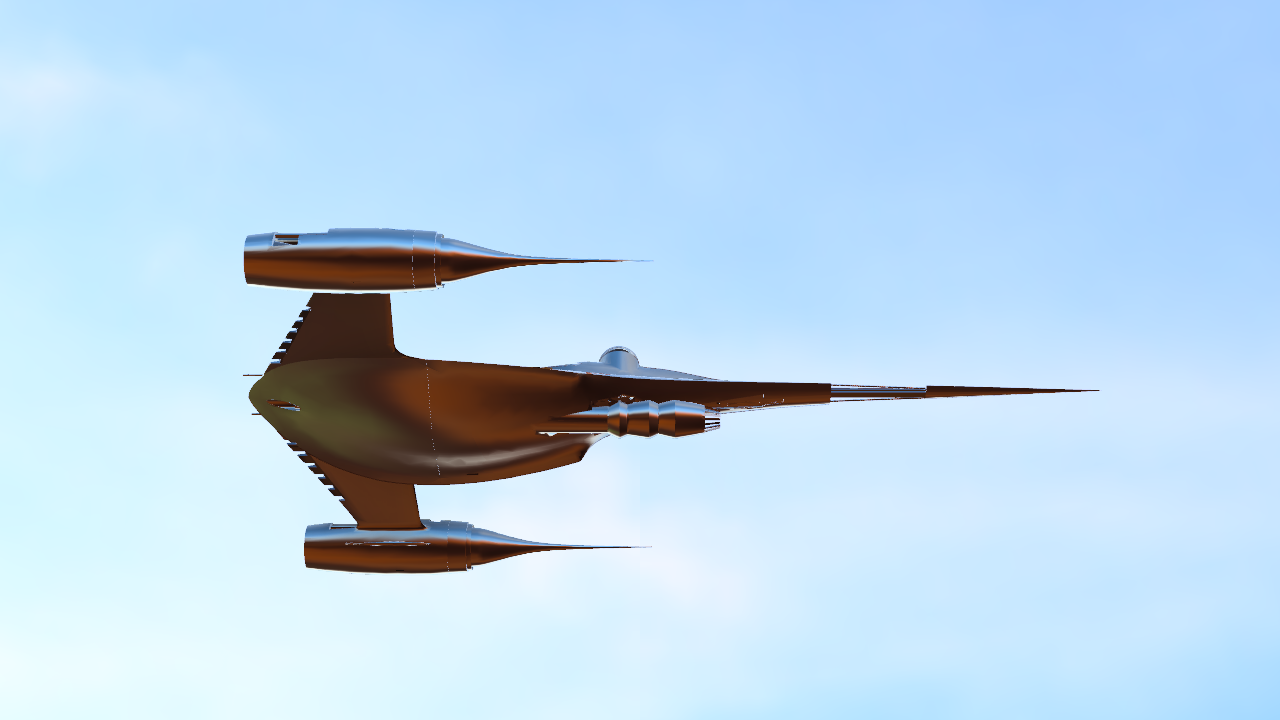


These are some additional images I rendered in Fusion 360 of the starship flying in the sky. Feel free to leave a comment on any improvements I could make!
The End

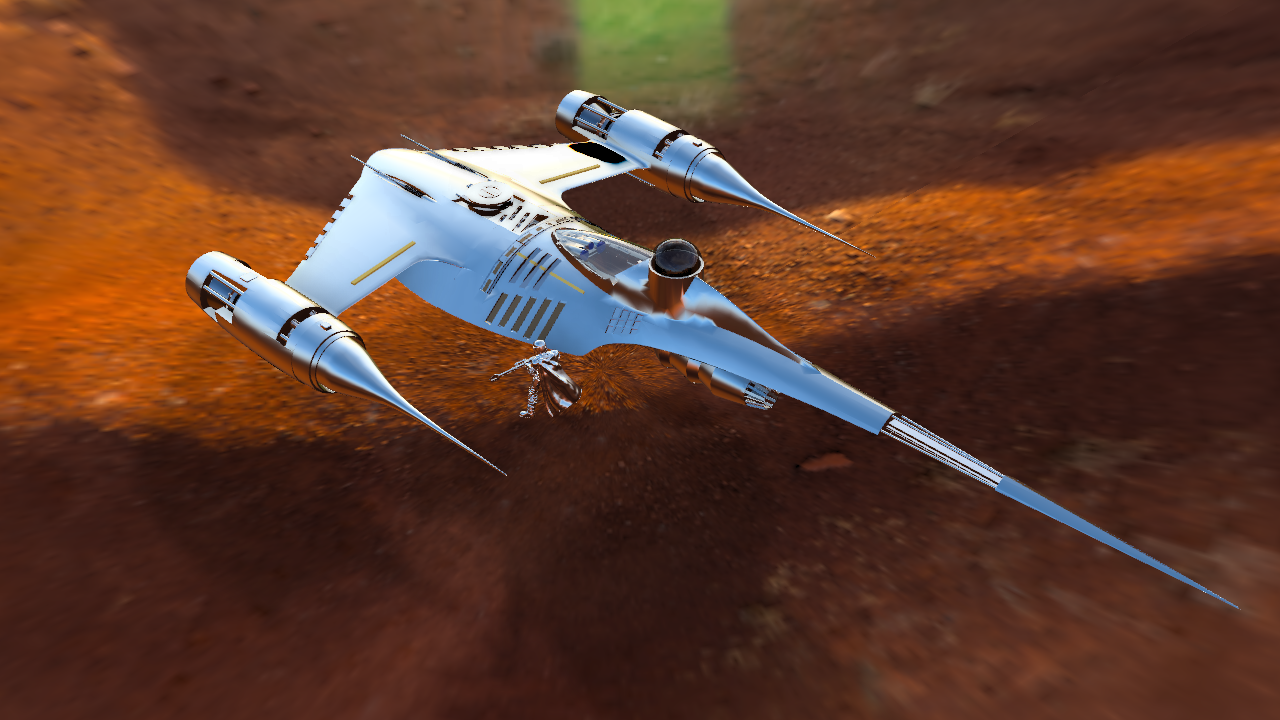


And this is the last and final step! Take a look at your design! I am happy with how this turned out, and I hope you liked it too. It took a lot of effort and time, but I obviously think it pays off after you are finished. I will still be tweaking the design and making changes and adding things as the show progresses, so stay tuned for that. Otherwise, I hope you enjoyed reading through this instructable and seeing the design process of making the N-1 Starfighter Using Fusion 360! Just remember that your imagination can take you anywhere!
Link to Model: Autodesk- Fusion 360: N-1 Starfighter (Mandalorian)