DIY Simplest IV9 Numitron Clock With Arduino
by mirkopavleski2707_mid in Circuits > Clocks
895 Views, 2 Favorites, 0 Comments
DIY Simplest IV9 Numitron Clock With Arduino

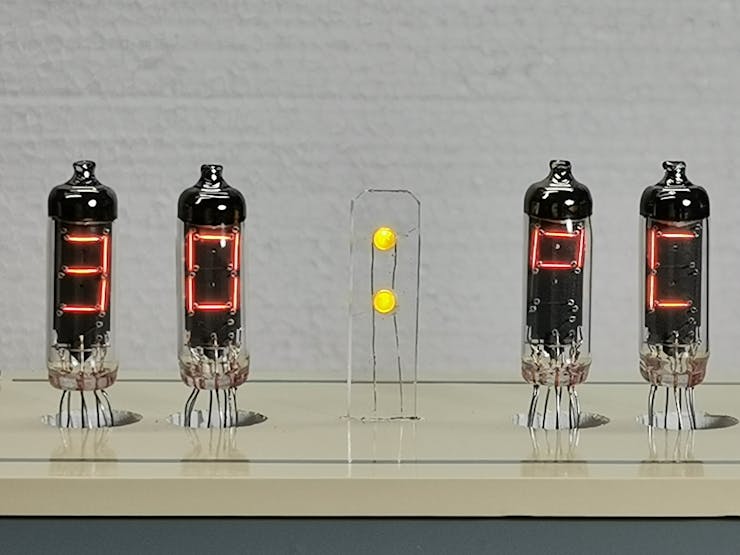
This time I will show you how to make a nice Retro style Numitron tubes clock. In addition to the correct time, the device briefly displays the Date, Year, and Current Temperature every 30 seconds.
I got the idea to make this watch from the given Github page.
Supplies
Hardware Used:
- Arduino Nano R3
- Maxim Integrated DS3231M - ±5ppm, I2C Real-Time Clock
- TPIC6C595 shift register X4
- IV9 Numitron tube X4
- LED X2
- Capacitor 100 nF X4
- 1N4007 – High Voltage, High Current Rated Diode X2
- Slide Switch X1
- Resistor 1k ohm
Software Used:
- Arduino IDE
First Prototype
I first made the project according to the instructions on the site and found that it contained many flaws.
Here is what the first prototype with 74HC595 looked like the one below.
Working
For 74HC595 IC The total maximum current according to the datasheet is 70 milliamperes, which in this case is several times exceeded (about 160 milliamperes for digit 8), so that after a while the IC overheats and does not work properly. Another lack is that there are too many delays in the loop of code, so the time is read only once in 60 seconds. In the picture you can see the finished clock made primarily according to the instructions on the page above. In the beginning, it works completely normally, but after a while, random segments are activated and IC-s, numitrons, or the microcontroller can burn very easily. In the first case, the problem was solved by using TPIC6C595 IC instead of 74HC595, which is provided for larger currents. Also, should be taken care of that these two integrated circuits are not pin compatible.
.
Code Details
And the new code was created Using millis() Instead of delay() function so now the real-time clock is read constantly. I also added a switch that changes the light intensity of the numitrons, and thus the lifespan. As you can see, the device is relatively simple to build, and I think this is the simplest way to make a tube clock. Numitrons are inexpensive, easy to obtain, and do not use an additional high voltage power supply.
Final Look

The real-time module also contains a thermometer, so for a more accurate display of the temperature, it is located outside the box, protected by a mesh. First, it is desirable to synchronize real-time clock with the PC clock, and we do that with the help of the DS1307RTC library. Then we upload the code and with that the device is ready. It remains to modify the code so that we can set the time with the help of buttons, and it will be in the next period as a project update.
Finally, the clock is mounted in a suitable box and is a beautiful decoration in every showcase.
Circuit Diagram

Code
Downloads
Detailed Video

