DIY Blacksmithing - Converting Your Barbecue Into a Forge Then Using It to Recycle Scrap Metal Into Tools
by rosemarybeetle in Workshop > Tools
69463 Views, 805 Favorites, 0 Comments
DIY Blacksmithing - Converting Your Barbecue Into a Forge Then Using It to Recycle Scrap Metal Into Tools

Blacksmithery on the barbecue? - yes, this really works!
Here's how you can make the quality steel that is found in bicycle parts live on, by forging it into blades to create useful tools. The best thing though is that this can be done on a normal barbecue using lumpwood charcoal and a camping airbed inflation fan as a bellows. It is very satisfying.
Video: superfast skim through the various forging, grinding, carving, sanding and polishing involved, and showing which reclaimed materials were used for each tool.
All you need to get started
This Instructable covers:
1. Making your forge:
- How to convert your barbecue into a pretty effective mini-forge by adding a simple fan-assisted bellows
2. Basic techniques for simple tool making
- The basics of forging, grinding and finishing blades from recycled steel bike parts
- The basics of making handles from reclaimed wood, including green wood
2. Examples of 4 tools made using the methods described, so you can see for real what is involved
- A simple fixed blade hunting/fishing/general purpose knife
- A broad bladed carving knife
- A lightweight folding pocket mushroom knife
- A portable folding pruning-saw for foraging
Each tool here only took about 8-9 hours to make. I've outlined how I made each tool in a single step that shows some of the specific work that tool needed above the basic forging and handle making.
Getting Hold of the Raw Materials


![17619644988_1de2c1a65f_c[1].jpg](/proxy/?url=https://content.instructables.com/F42/F2VF/IAJHCWMF/F42F2VFIAJHCWMF.jpg&filename=17619644988_1de2c1a65f_c[1].jpg)


Quality tools from recycled free raw materials...
You really can make decent tools from stuff found lying about unused. It will you cost very little to make and it is a good feeling using a tool you made from discarded materials at virtually no cost. The only real cost was the charcoal used to forge them, though you could even use scrap wood for that if you really wanted to.
Bike parts are used here as they are made from high quality stainless steel. The wood was mostly recycled already seasoned wood (oak floorboards) and in once case, lovely yew from a scavenged log in the woods.
These materials were used. You can easily scavenge similar ones:
- Blades - a cast off crank axle (high strength steel) and a broken bike lock (stainless steel)
- Handles - old floorboards (oak) and forestry log offcuts (yew)
- Ferrules - an Ikea waste paper bin (stainless steel) and a broken towel rail (steel)Rivets for handles - old screws (brass)
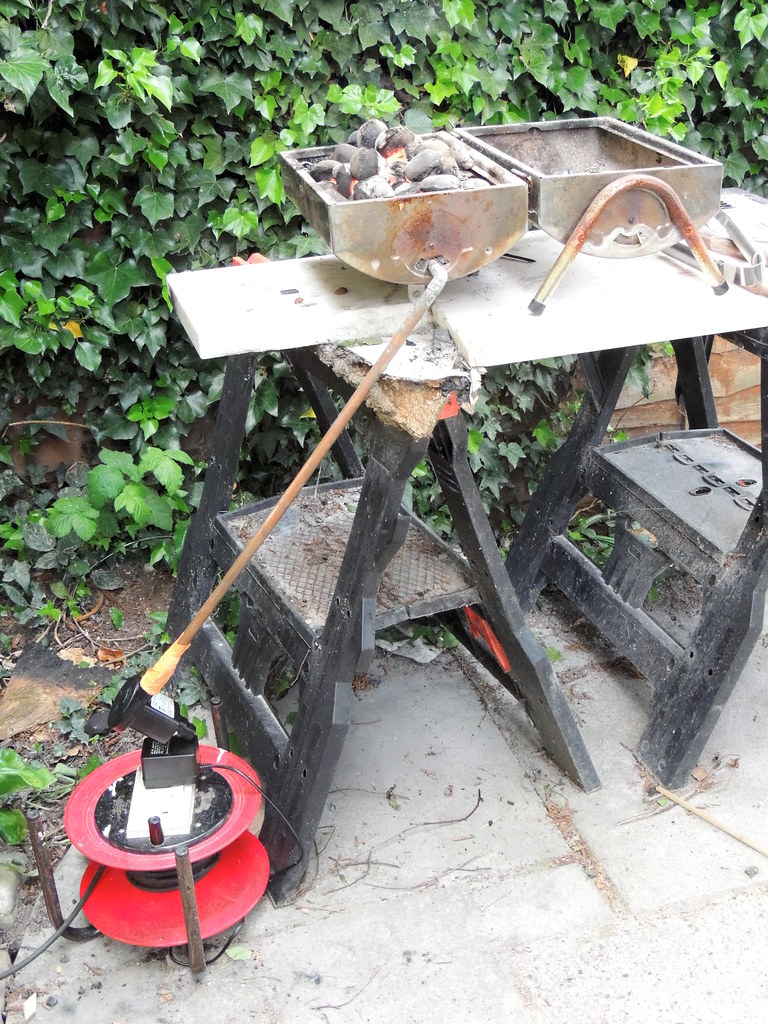
A cheap barbecue makes a surprisingly effective forge. The tube is attached to a camp-bed inflator fan which pumps air through the charcoal to superheat it.
Tools That You Will Need


The tools used are mostly readily found in many households. Some of the things used here are not essential, but make it much easier. Probably the only thing unlikely to be commonly found is a blacksmith's anvil. I love mine, but you may not be lucky enough to own one. You could improvise on granite or the jaws of a large heavy vice (closed or it may damage it). You could also use scrap metal parts from cars or truck like axles. Anything large, heavy and solid, preferably steel.
Tools used for metalworking the blades and ferrules
- Barbecue with fan-assisted bellows using camping airbed fan
- Anvil
- Locking grips
- Barbecue tongs
- Metalworking vice
- Angle grinder
- Bench grinder
- Hacksaw
- Various grades of file
- Hammers (various)
- Saws
- Heavy duty belt sander
- Light weight eccentric orbit sander
- Various grit papers
- Leather strop with emery paste for polishing
- Dremel with various grindng and polishing discs
Tools used for woodworking the handles
- Power saws (Reciprocating, circular and bench saws)
- Hands saws (general hand saw and tenon saw
- Chisels and mallets
- Rasps and surform planes
- Belt sander
- Eccentic orbit sander
- Drills
- Dremel with assorted cutting and routing bits
- Cabinet maker's smoothing scrapers
- Various grit papers
Converting Your Barbecue Into a Forge


Using a camping bed fan as a bellows
Here's how I made the forge. It is pretty basic. You get a barbecue and find a way to blast air through it to fan the flames so they get really hot. I've seen hairdryers used, but this camping fan worked a treat. Whatever you use, it is a simple electric bellows.
You could improve it by enclosing the charcoal to retain heat, by using coal (smoky) which burns hotter or by using a really powerful fan. The principle is all that matters and here's my version so you can see what I did for real.

Cheap and quite tough, a camp bed inflator fan is a great bellows for your DIY forge.
Camping bed fans make good bellows. They are built to pump air for ages and are quite hardy and not esepcially loud. Mine can cope with being used for an hour with no problem. You could use a hairdryer, but they tend to cut out. It will get grubby too, so take care if using your actual hairdryer...
From your fan, you need a connecting pipe to deliver the air-flow into the fire....
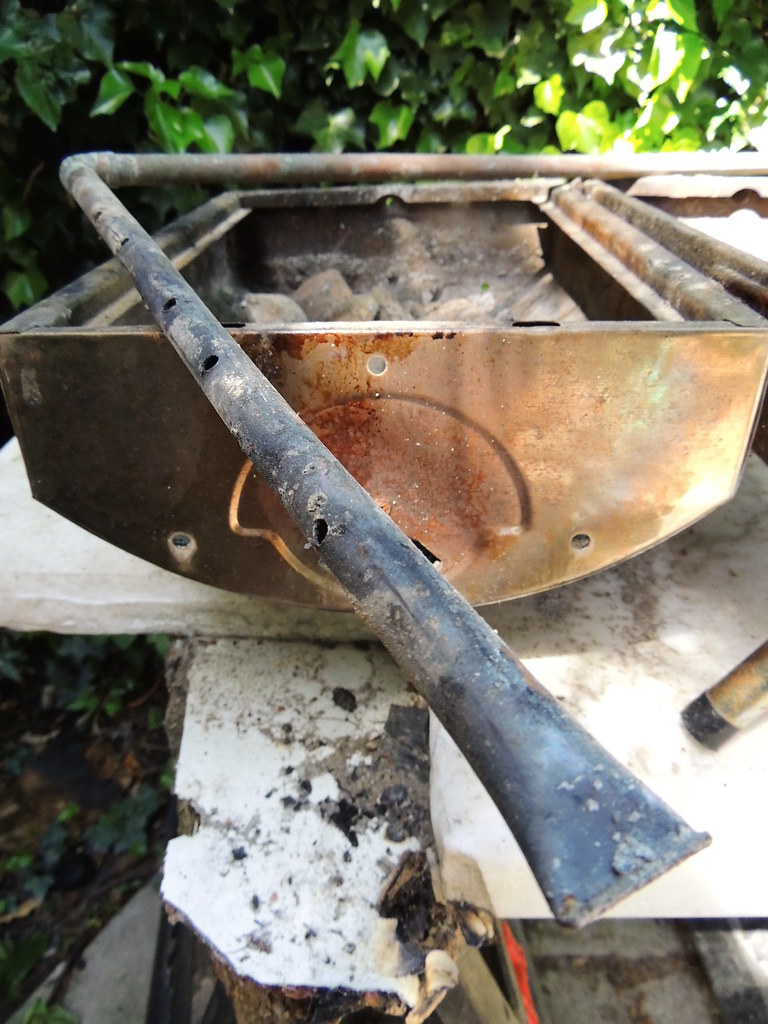
Domestic copper plumbing pipe used to deliver airflow
(with camping bed fan as bellows)
The business end of your bellows needs to push out air under a bit of pressure to get the fire roaring. A common copper water pipe is ideal. It is easiest to have a 90 degree bend with one arm matched to the length of your barbecue. It has holes drilled and sealed by hammering a double fold in the end.
The other end needs to be long enough to reach your pump. It can't be too close or you'll melt it.
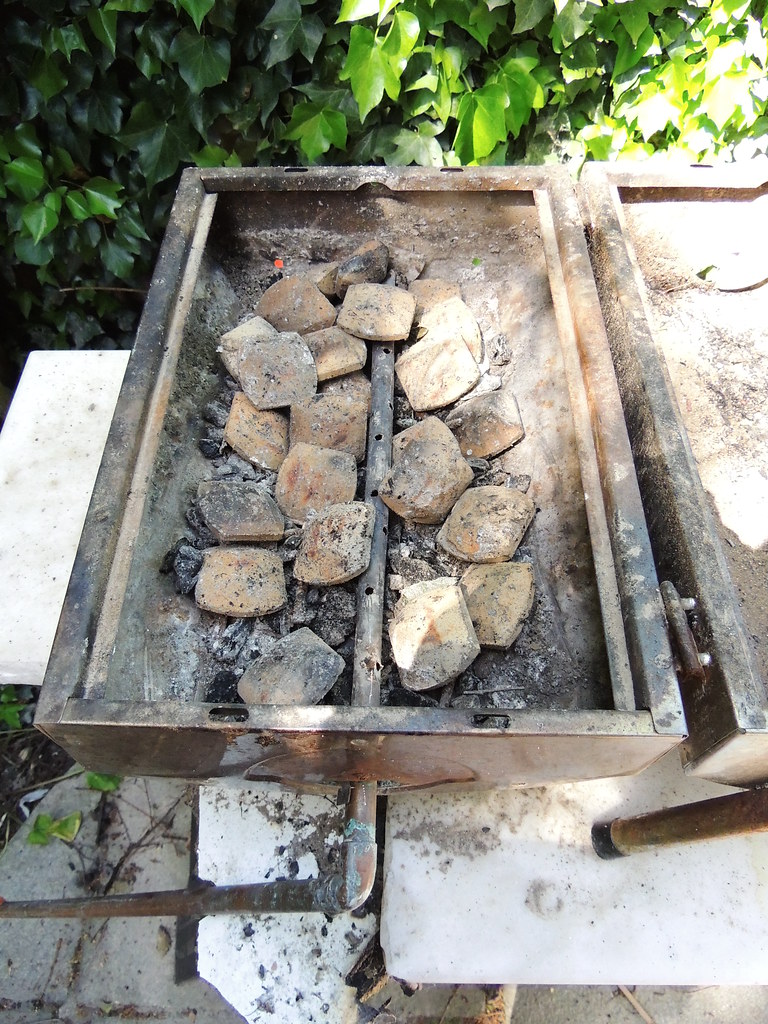
Air pipe covered by barbecue fire bricks.
The pipe sits in the barbecue and is covered with fire bricks to help spread out the flow across the coals that sit on top of it. It is better than just piling charcoal on top of the pipe.
Here is the barbecue with air flowing. It gets plenty hot.

Steel bicycle D-lock being heated to red heat with air-forced charcoal fire - tasty!
T
Basic Blade Making Techniques


Forging blades from recyled parts
All the tools in this Instructable have blades that used to be scrap metal. Most are made from nice stainless steel from a broken D-lock for a bike and one is made from a bike crank axle, which provided super high quality steel alloy. Axles have to be strong and they are typically made from Molybdenum Chrome steel.
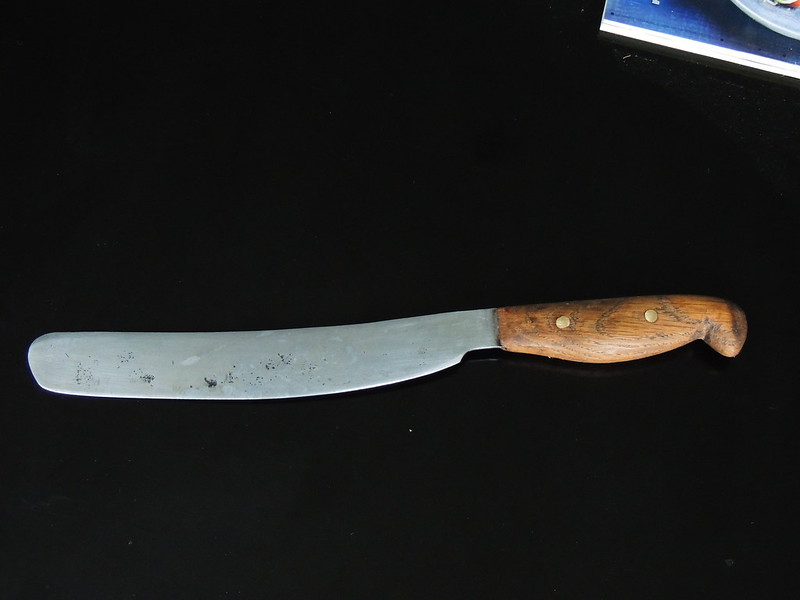
Here is a carving slicing knife I made on the barbecue. It cuts like a dream and is broad enough to create even slices.
Slicing/carving knife
This is the broken bike lock it was made from...

Broken stainless steel bicycle D-lock - handy source fo stainless steel
To convert this into a blade, start by heating it to red heat. Shove it right i the coals and leave for 3-4 minutes

Heating in the forge
Once red hot, you hammer it to flatten. This doesn't just happen. It will take quite a lot of passes and takes about half an hour. I use locking grips (Mole grips) to hold the end of the steel. They offer a reassuring control. This means you don't drop red hot metal on your foot or have a piece fly off at an angle. Neither are welcome!
It is advisable to wear a glove as even the grips can get hot. You can use one on the hammering hand too, but I like the control you get without one.
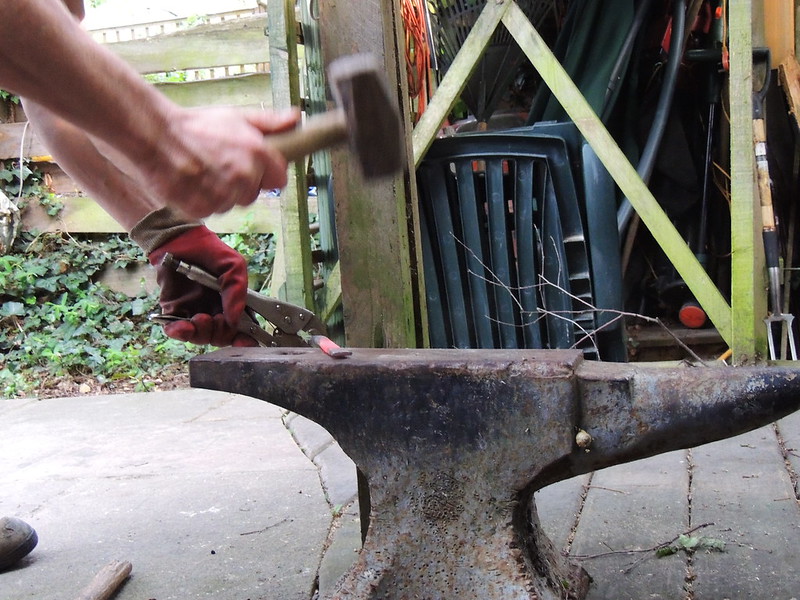
Hammering on the anvil
You can see the shape of the lade emerging

First flattening of a blade
After lots of repeated battering, you will find a fairly small diameter piece of steel will flatten to quite a wide blade once it is bashed thin.
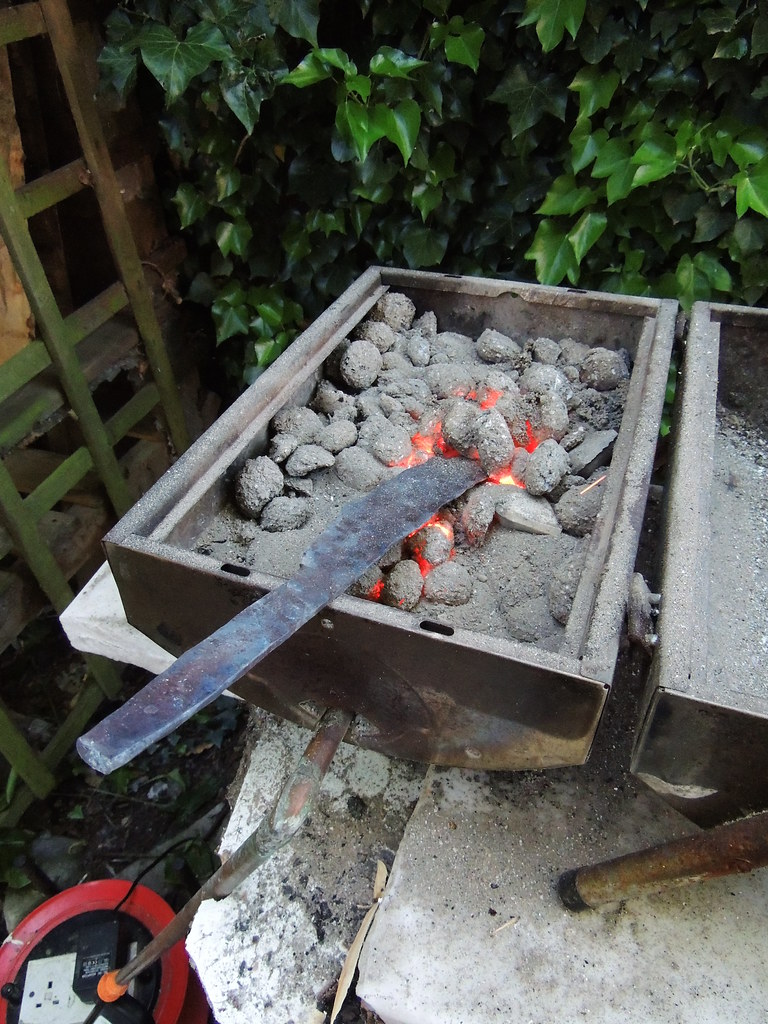
Ham slicer on the forge
The best way to figure this out is to do it. Here is the carving knife blade once forging is complete. It will be blueish black.
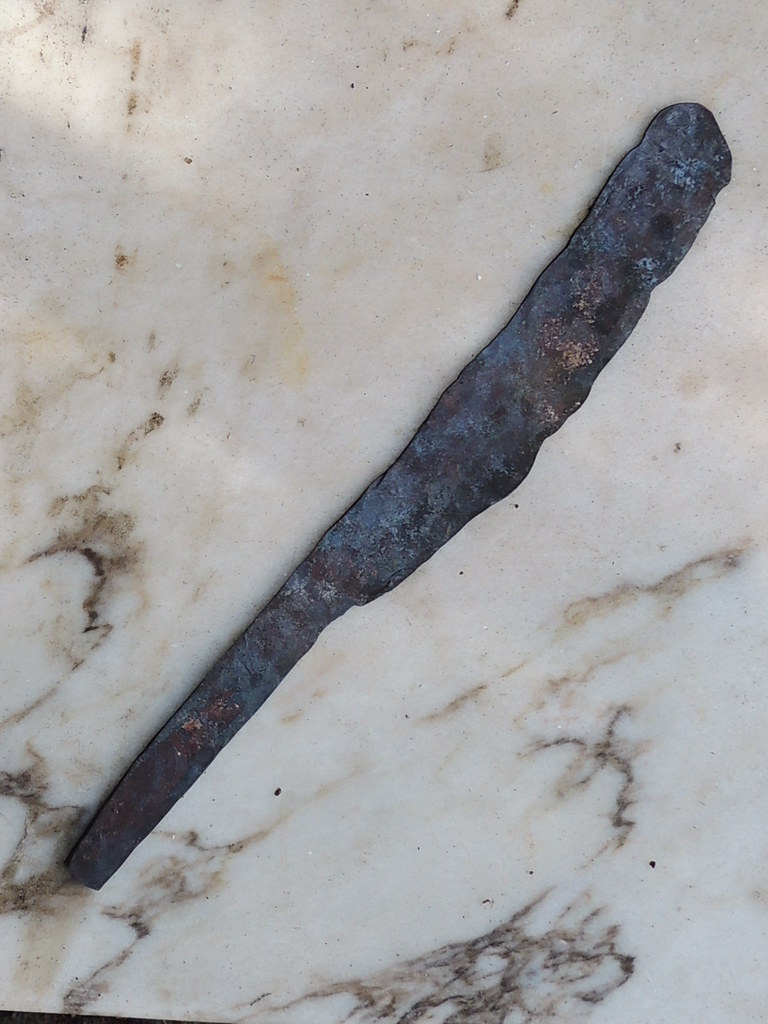
Ham slicer after forging before grinding
After forging, the rest of the process is about grinding the blade into shape and producing a consistent thickness. The best thing for this is a belt sander. You could use a bench grinder, but the sander is much better as its flat plate helps you keep it even.
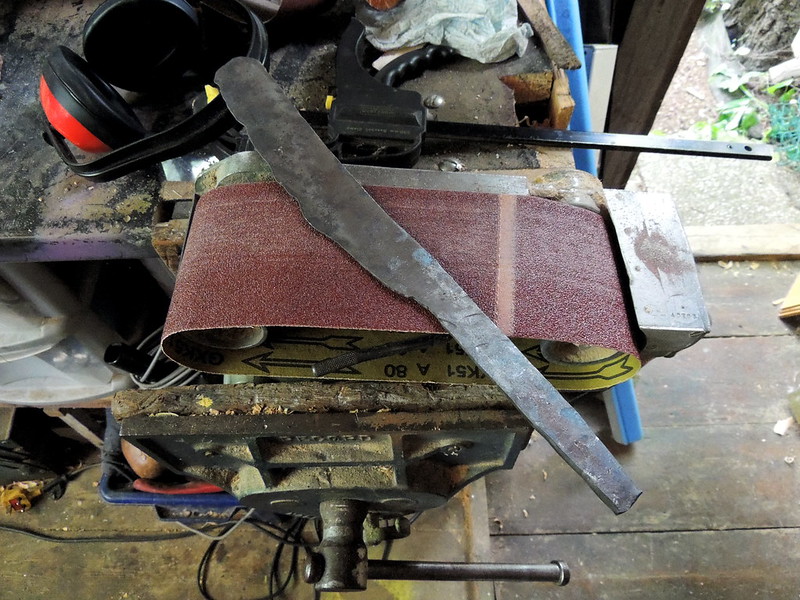
Ham slicer on the belt sander
To get fastest results, you need to start with a rough grit (60 grit). Here you can see the first rough grind.
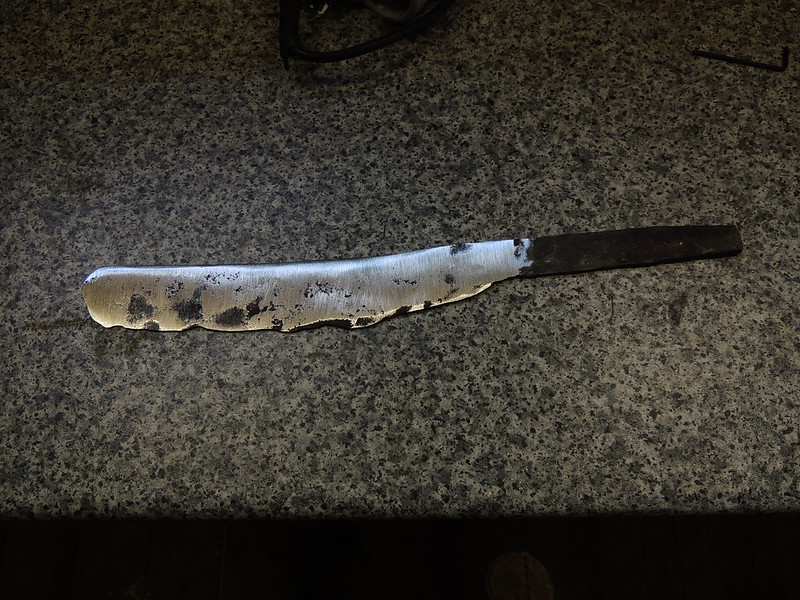
Ham slicer after rough grinding
The tang end (the bit that fits into the handle) needs to have straight edges. This is easy to do on the sander.

Grinding the blade on the belt sander
By reducing the grit size, the grinding will produce a smoother and smoother blade.
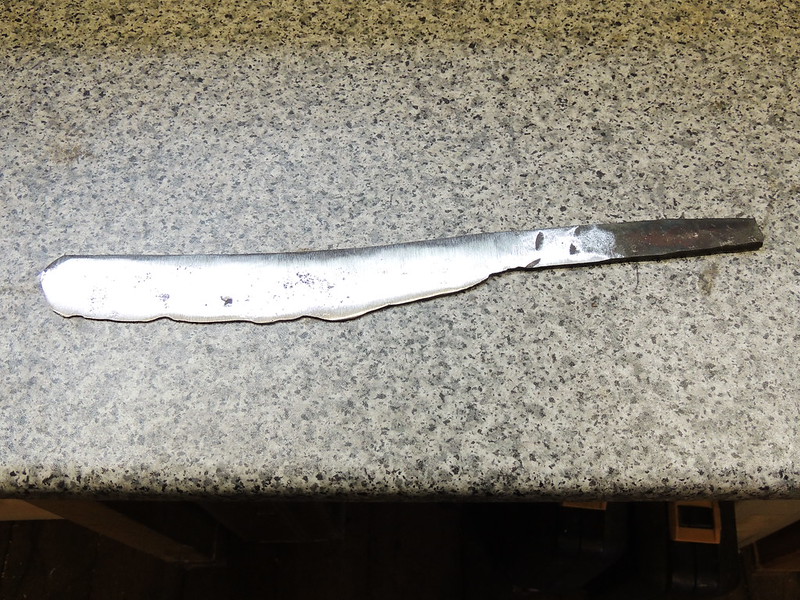
Ham slicer blade part-polished
Eventually you can stop grinding to shape and start polishing it. For this, you need a finer sander. I used a random orbit sander. This produces a really fine finish. Again, start with a coarse grit (120) and work down to a fine grit (240).
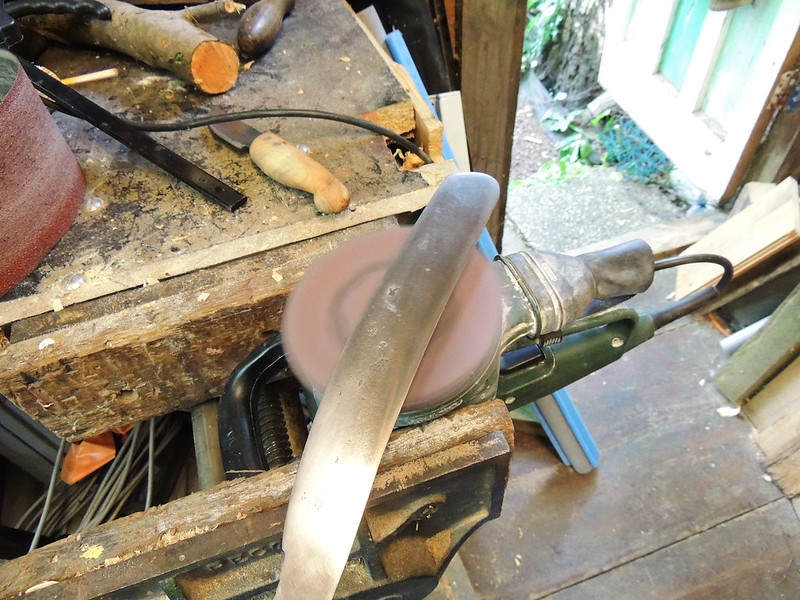
Fine polishing with the orbital sander
Finally, the really really fine polish comes from using a strop. This is what barbers hone their razors on. Essentially it is a soft surface impregnated with a super fine abrasive grit that acts as a polish. This is easy to make. You just find some scrap leather and pull it round a rounded piece of wood and clamp it in the vice. The abrasive paste is called emery paste. You could use bathroom ream cleaner as that is also a mild abrasive
I've used an old tool handle here for the wooden base.
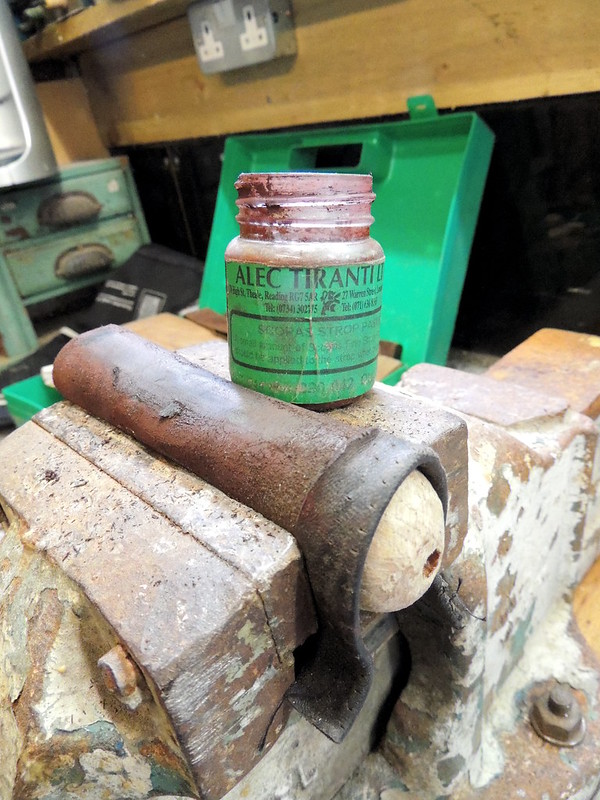
Strop
To polish, whip the blade back and forth on the strop. You'll be amazed how smooth and shiny it gets
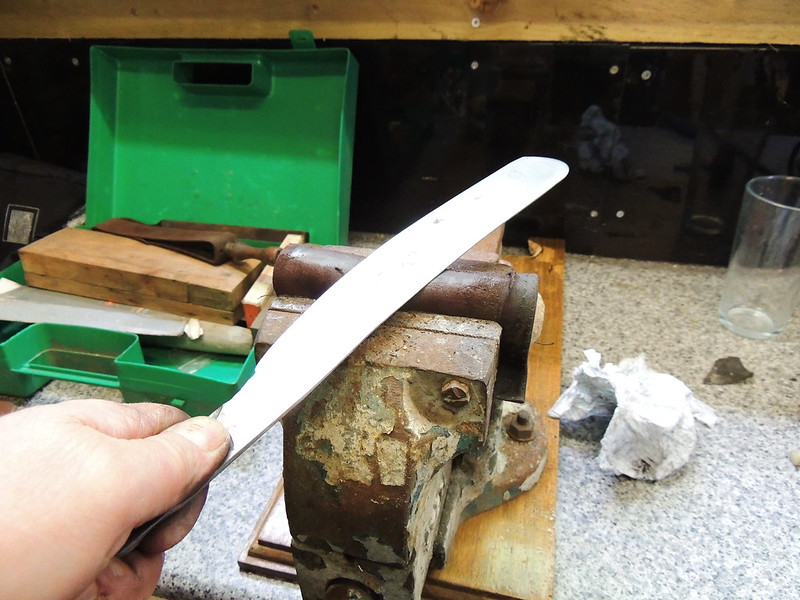
Slicer blade being polished on the strop
And here it is ready to have a handle fitted. Not bad for a bike lock.
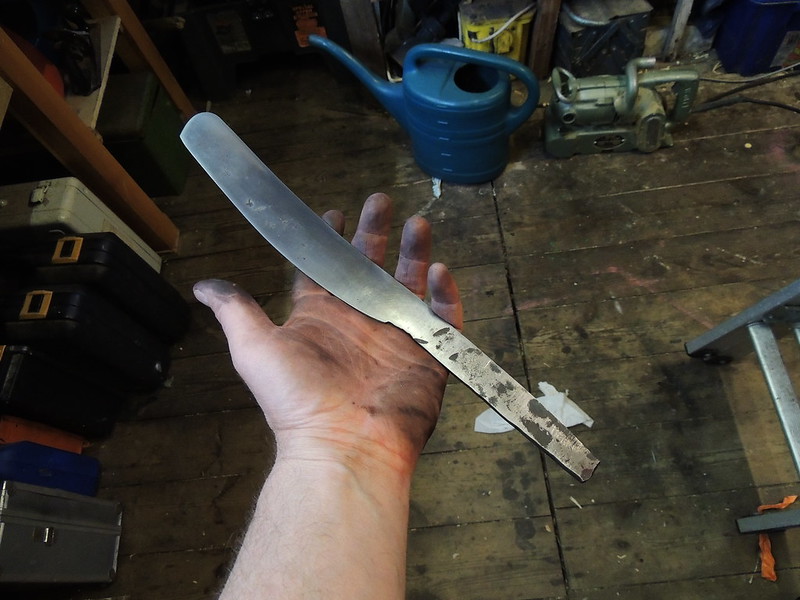
Slicer blade after polishing
Here is another example. This shows how a pretty tough bike crank axle can also be used. Here i sthe raw object found in the shed.
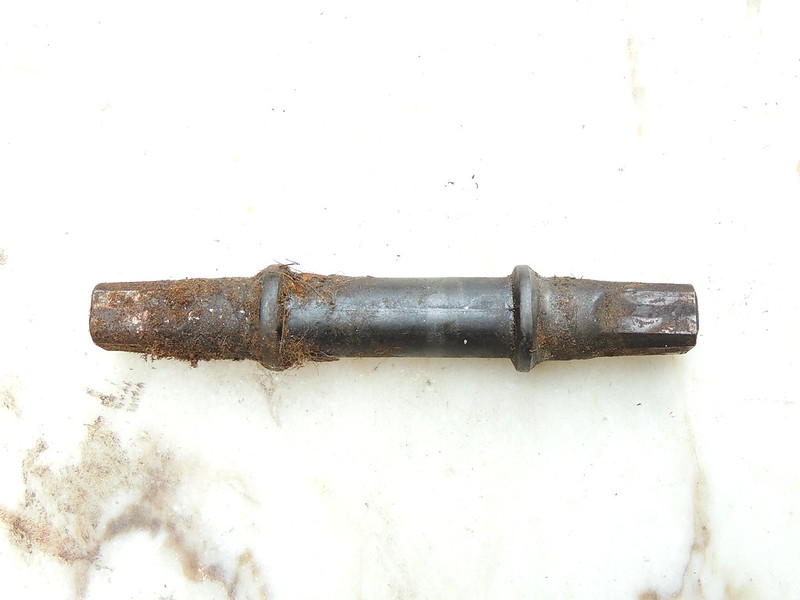
Axle
Here it is being hammered out on the anvil at red heat

Mushroom knife on the forge
Being thicker to start with, this took much longer to flatten.
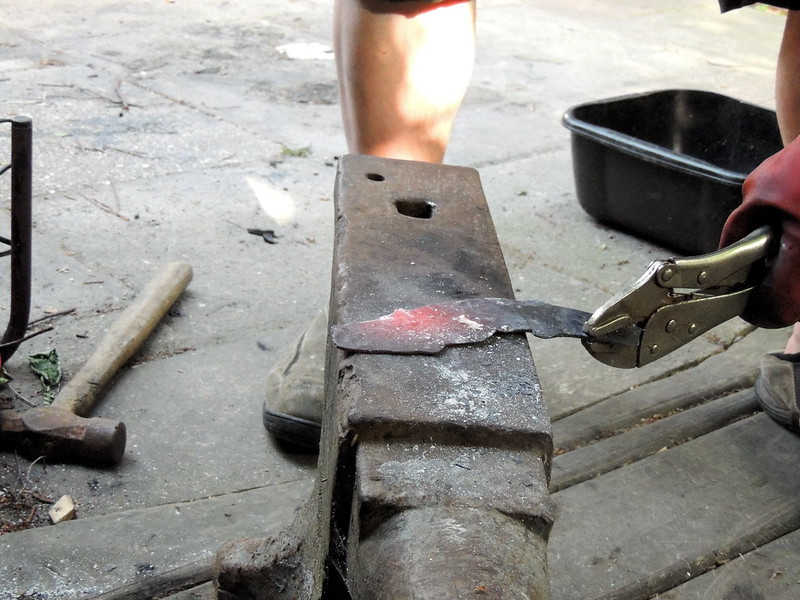
Mushroom knife on the forge - thinner
Eventually it ended up looking like this. THis knife needed to be curved. You can see how a basic curve has been hammered into the metal during forging.

Mushroom knife blade after forging
Here are two pieces of metal that have been forged flat. The lower one was used in the end (the axle). If you look closely, you can see the blade design traced onto the raw forged steel to act as a guide for cutting.

Mushroom knife blade after forging next to knife design
The raw forged steel was then cut roughly to shape using an angle grinder.
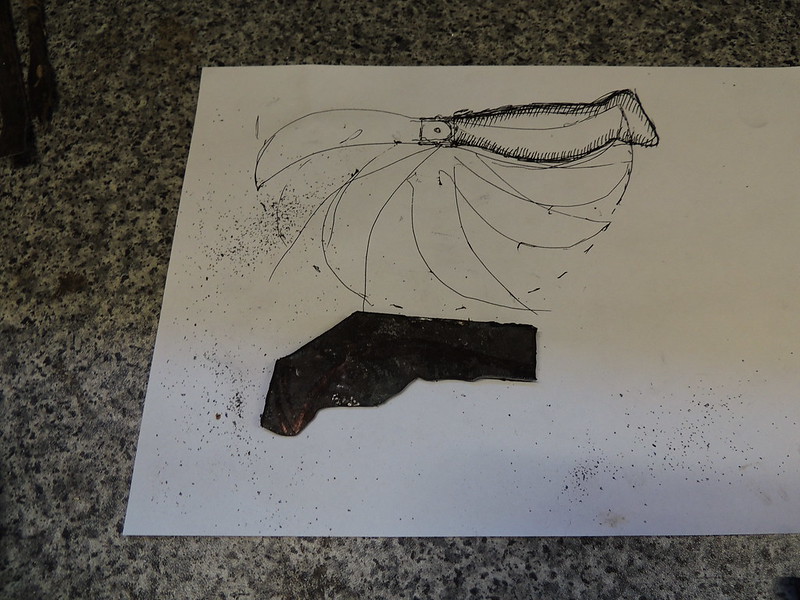
Mushroom knife blade rough cut
After this, it was shaped further on the bench grinder

Bench grinder
Here it is close to final shape. The surface is very roough from the grinder

Mushroom knife blade rough cut and ground
A bit more cleaned up
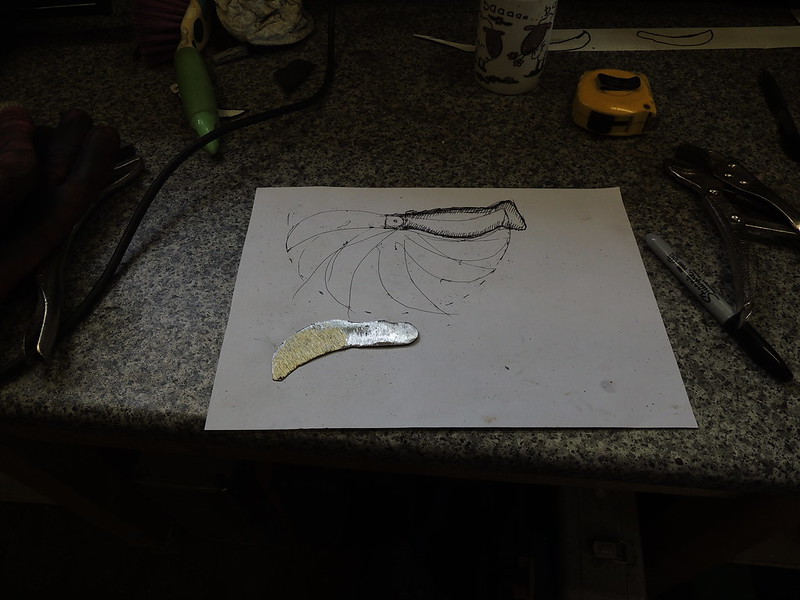
Mushroom knife first grind
At this point the desired shape was drawn on again to help guide the final shaping.

Mushroom knife fine honing grind by drawing guidelines on blade
The blade here has been more finely ground back on the belt sander

Mushroom knife fine grind
At this point, the blade was ready to have a handle fitted
Basic Handle-making Techniques
![17619644988_1de2c1a65f_c[1].jpg](/proxy/?url=https://content.instructables.com/F42/F2VF/IAJHCWMF/F42F2VFIAJHCWMF.jpg&filename=17619644988_1de2c1a65f_c[1].jpg)


A good handle needs to be made from good wood.
Luckily, you can get good free wood for handles all over the place. The simplest way to do this isto reclaim some suitable seasoned wood. I had a lot of thick old oak floorboards, which were perfect. Oak is strong, tough and takes a really good polish when smoothed down with sanding.
You can also use raw wood from branches, but this is harder as it needs seasoning. I used a yew branch that I found in the woods for one knife. This was from prunings resulting from forestry clearance. This method is more unpredictable as you need to let the wood season or it will crack. I cut it green on the band saw then left it to dry out in my shed for two months. Even this was not really long enough. A year would have been better.
Shaping handles
Method 1 - using reclaimed wood that is aleady seasoned
The easiest wood to recycle is reclaimed wood. It is surprisingly easy to get hold of suitable wood for handles. The most common you will find in skips is probably beech, which makes a great handle. It is widely used in furniture. Oak is slightly harder to work, but is also quite commonly thrown away. Here are some solid oak floorboards I found in a skip.
Oak is often used in older fence posts and can be ripped down into useful sizes as needed. It can be found in the sides of old drawers too.
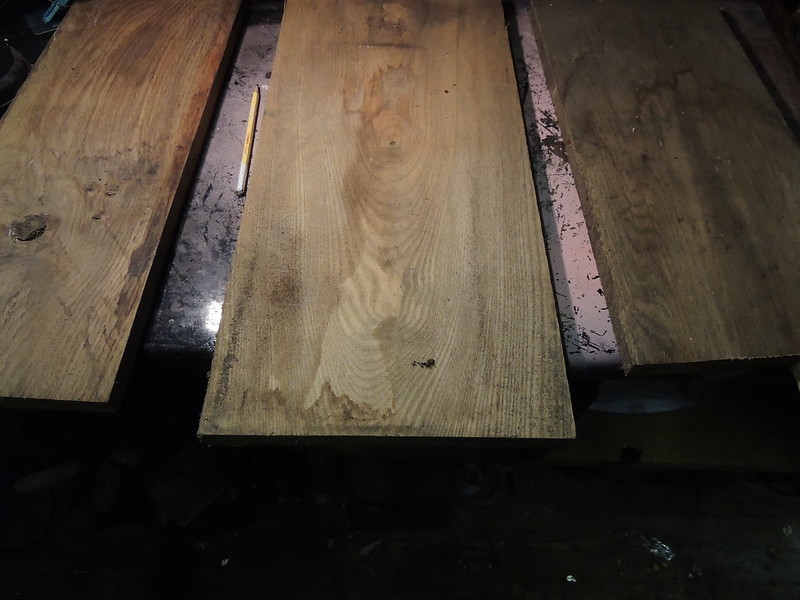
Oak Planks
To get started, cut a block of wood a bit bigger than you'll need for the handle
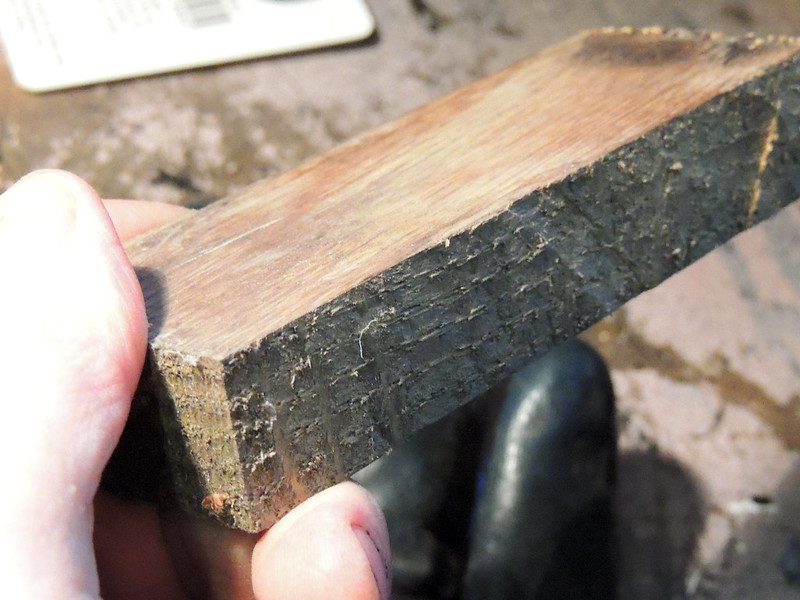
Oak plank cut roughly to size, ready to draw the handle profile on
The exact shape of the wooden handle profile needs to match the blade it is intended for. Here is a blade of a folding knife being used as a drawing template to ensure the handle works with it

Designing the handle shape to match the blade profile ()
The handle should be drawn to scale on paper, and then it can easily be transferred to the wood using the old classroom tracing technique. On the reverse of your drawing, rub soft pencil, then place the drawing on the wood and draw again with a hard pencil to transfer the pattern
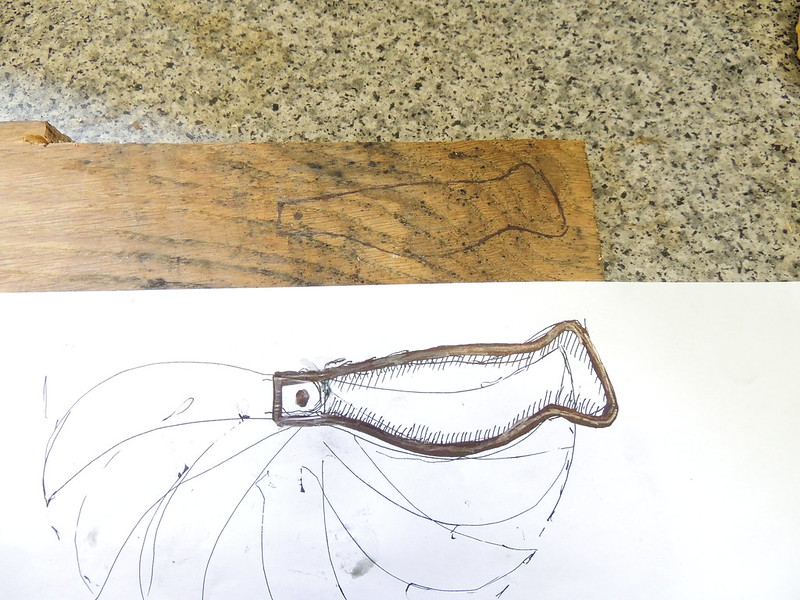
Designing the handle shape to match the blade profile ()
You can cut the pattern out using a fret saw or bandsaw. I used a chisel, but used stop cuts to prevent accidentally splitting the handle. This can happen quite easily otherwise, if you accidentally over-hit the chisel along the grain.
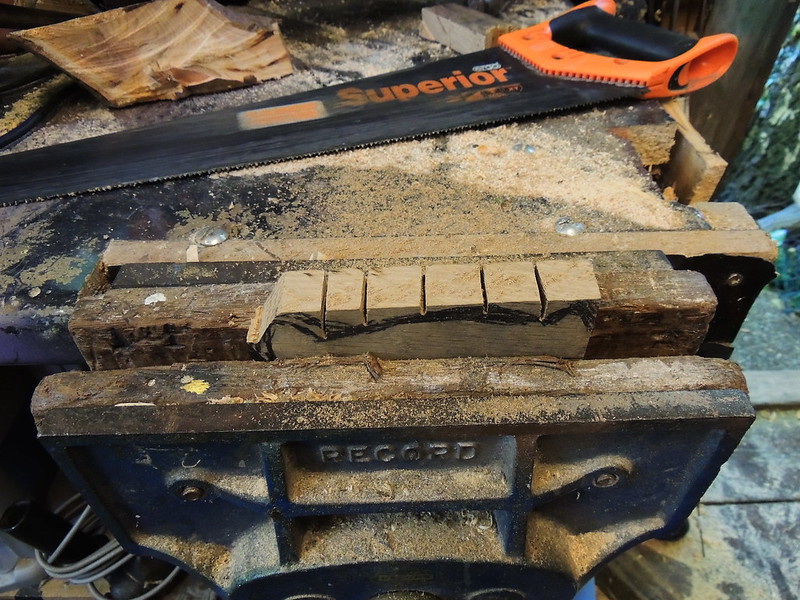
Cutting stop cuts
Here is the same handle after rough shaping with the chisel.
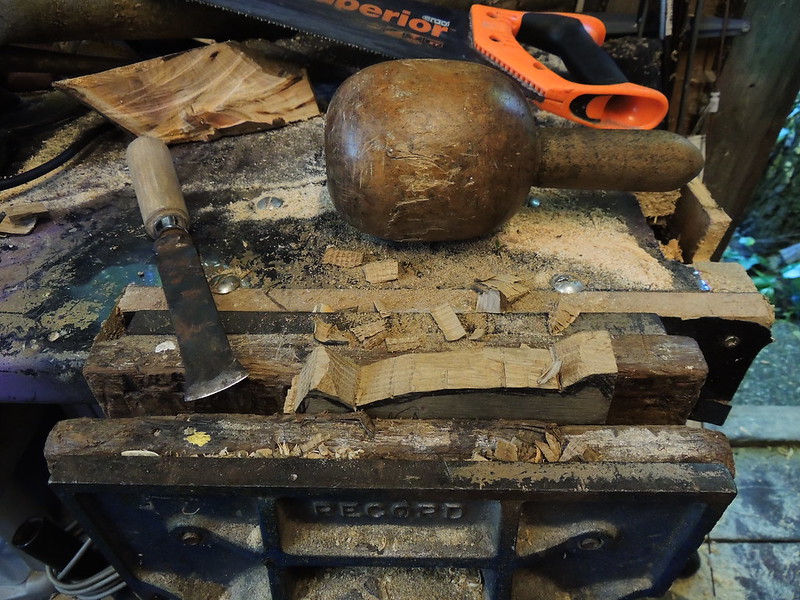
Carving a handle to shape
The real detailed contouring is done on a belt sander. This will produce a smooth result. You need to work the handle over the moving belt starting with a coarse grit (80 or less) then change belts to finer ones (down to about 120 grit). Eventually, you can also switch over to the finer orbital sander (in the background) and really smooth it down with 240 grit.
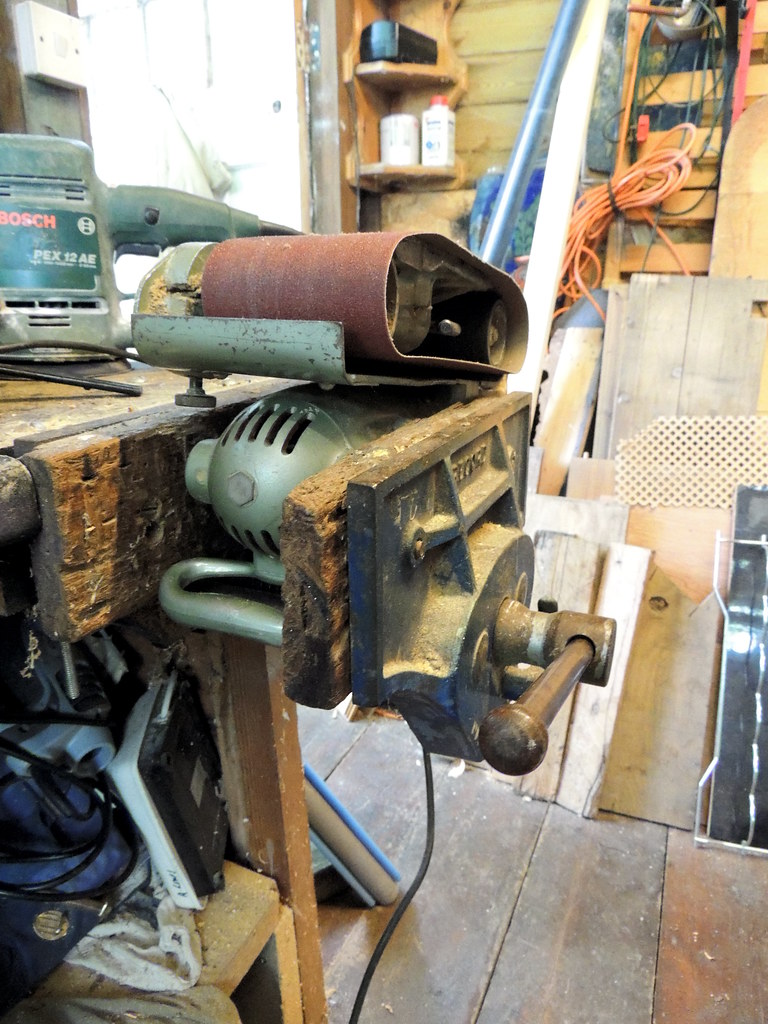
Heavy duty belt sander clamped into the vice, used to grind the handle shape after cutting out
Here's one that has been roughed out
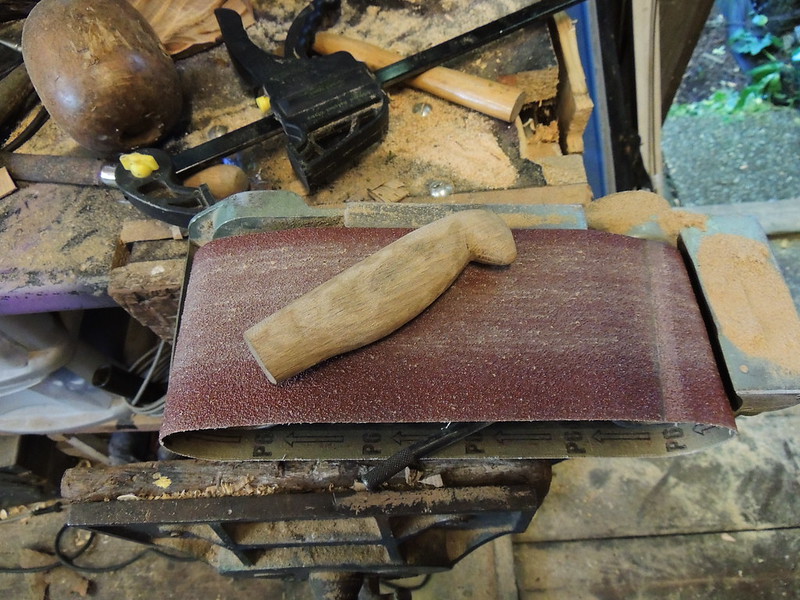
Oak handle after shaping on the belt sander, prior to fine sanding and polishing (carving knife)
Here is the raw cut out of one handle
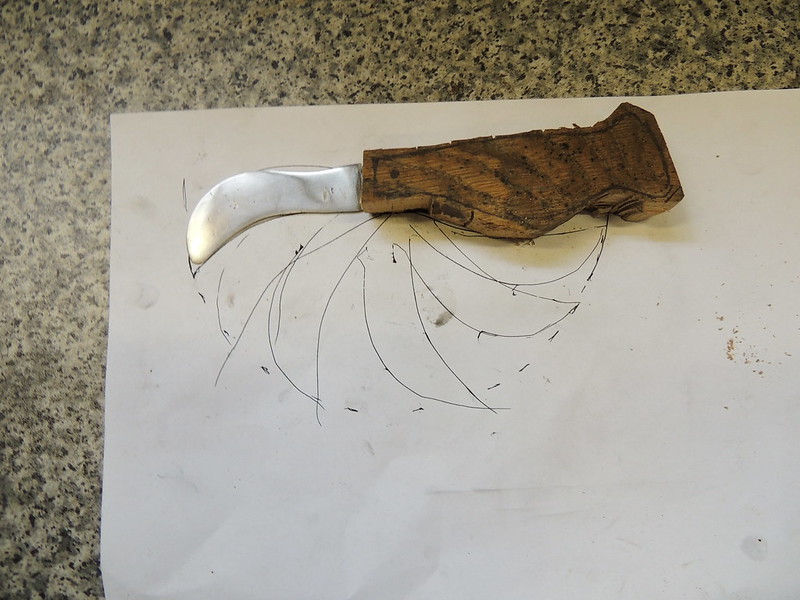
Mushroom handle rough
The same handle after initial clean up on the sander

Mushroom - first sand
After further sanding, the rounded contours are shaped up

Mushroom knife handle shaped
Then the blade end is subtly sanded to match the blade.

Mushroom handle - ferrule barrel shaped
Here is another handle after final fine-sanding. This is yew, which has an awesome grain, although is more prone to splitting.
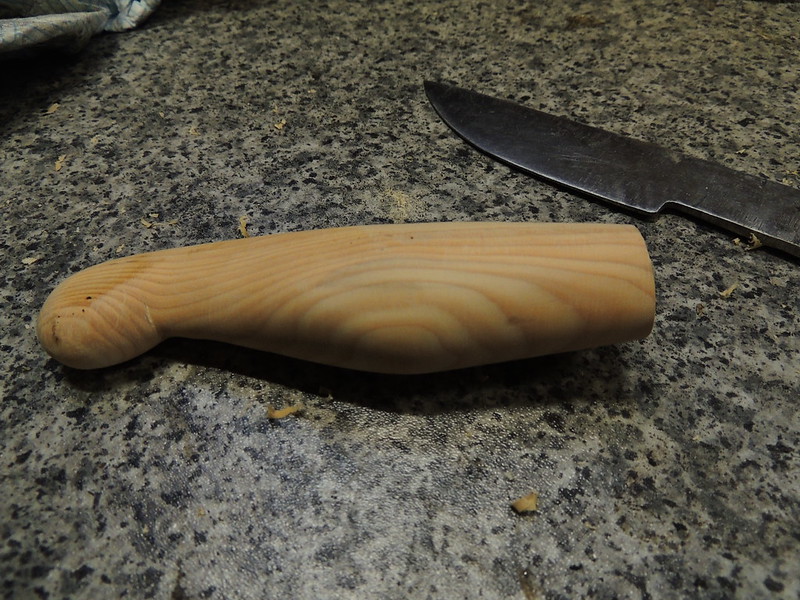
Yew handle after fine sanding (hunting knife)
Finally, varnishing is not essential, but protects the handle from moisture changes that can make the grain stand out and the handle feel veiny in the grip.
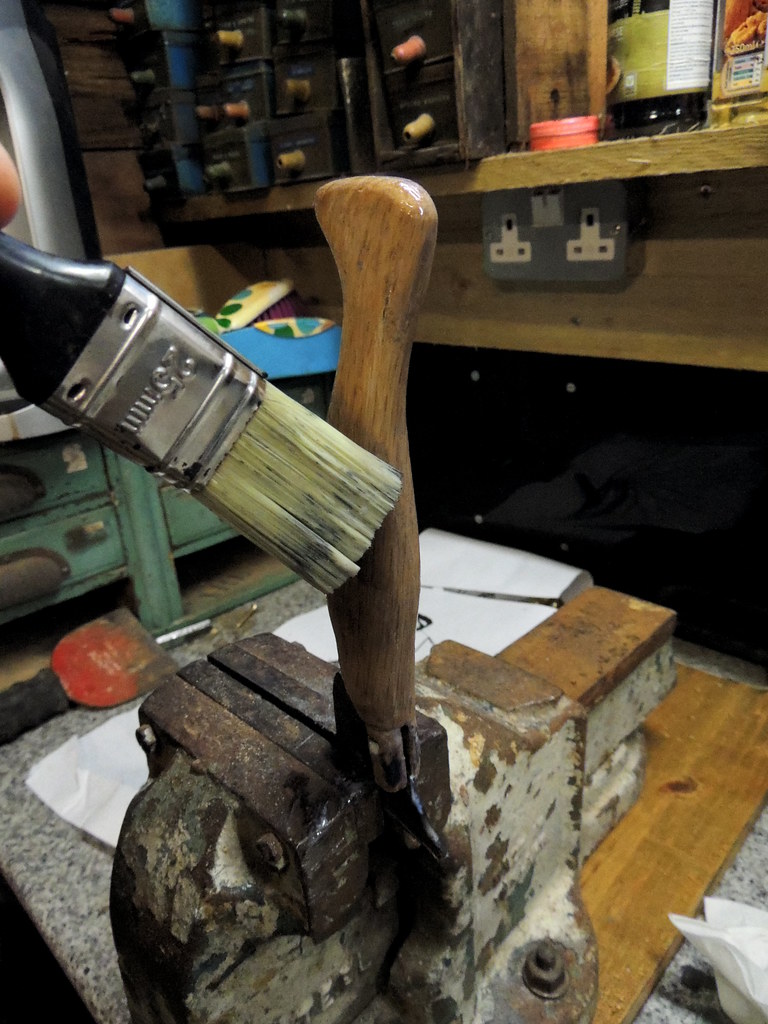
Varnishing fine sanded oak will stop moisture getting in and raising the grain
Method 2 - using raw wood from branches
This method is much less predictable as you have to season the wood. This can take a year or more to do properly, but you can risk it with small pieces as they dry out quite fast. I left this one for about 2 months and got a few minor cracks.
dd
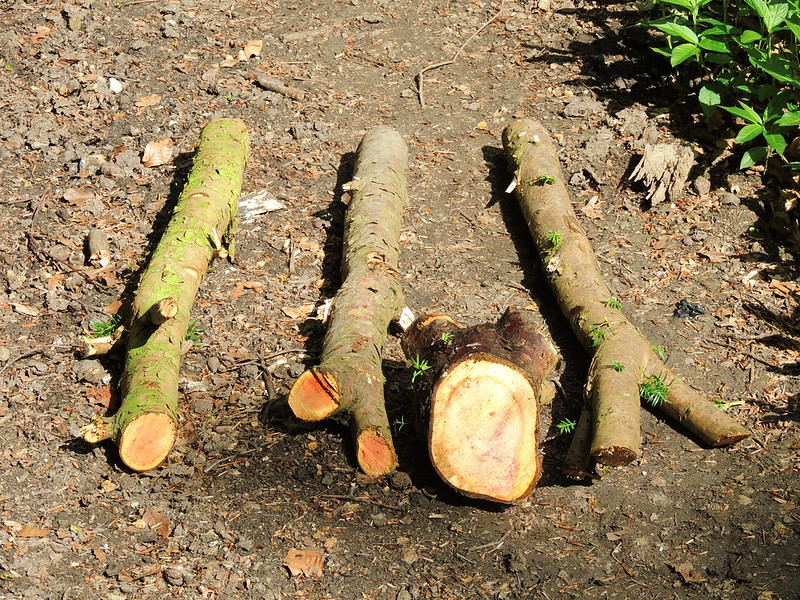
Yew logs as they were found in the woods
Log ready to rip down to make square.
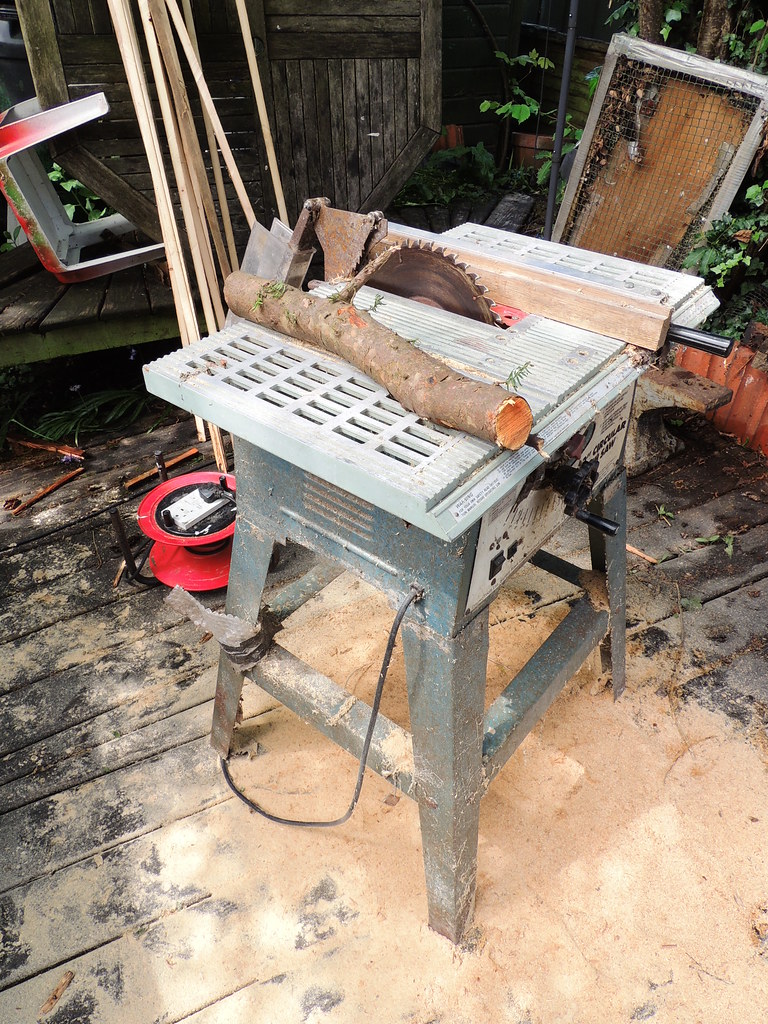
Yew log ready for cutting straight
First cuts to square it off...

Yew log being cut square
The same log with all bark removed and edges squared lengthways. The wood needed is the lovely reddish heart-wood. This is the hardest part and best for making the handle. It still needs to be stored in a cool dry place for a long time. 6 months to a year would be best.

Yew branch cut straight on the table saw
Fitting handles
The blade of the knife needs a recess in the handle to be fitted. This can be cut out using a dremel.
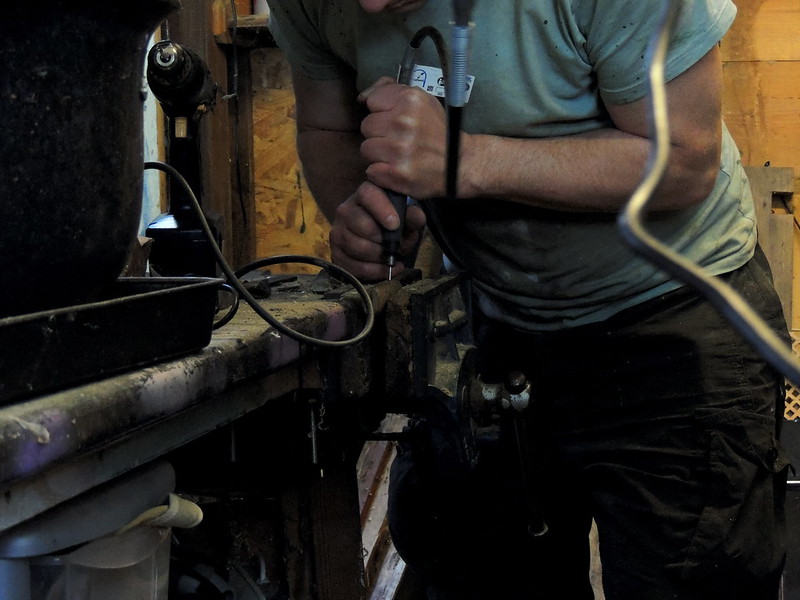
Routing out the blade recess in a handle with a Dremel and a tungsten burr tool
As it progresses, you need to check the fit...
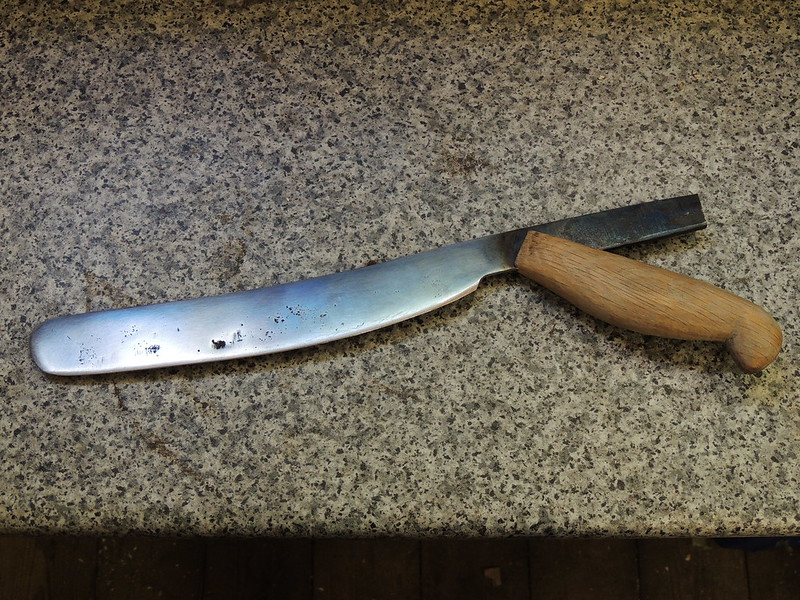
Checking handle fit (carving knife)
You can use a drill for this too. This is better for the initial cutting out but not very good for subtle finishing.
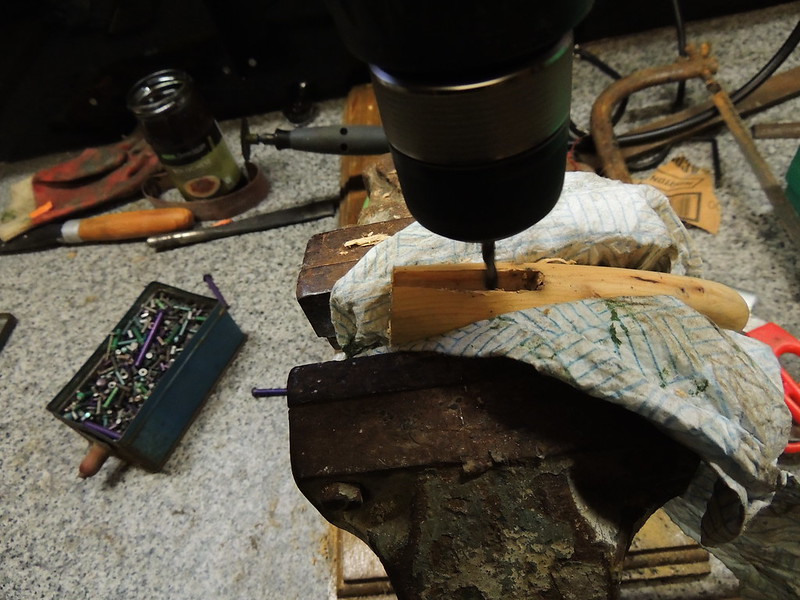
Drilling out the handle recess (hunting knife)
The stubby end of the knife (the tang) should be checked for fit as you go.
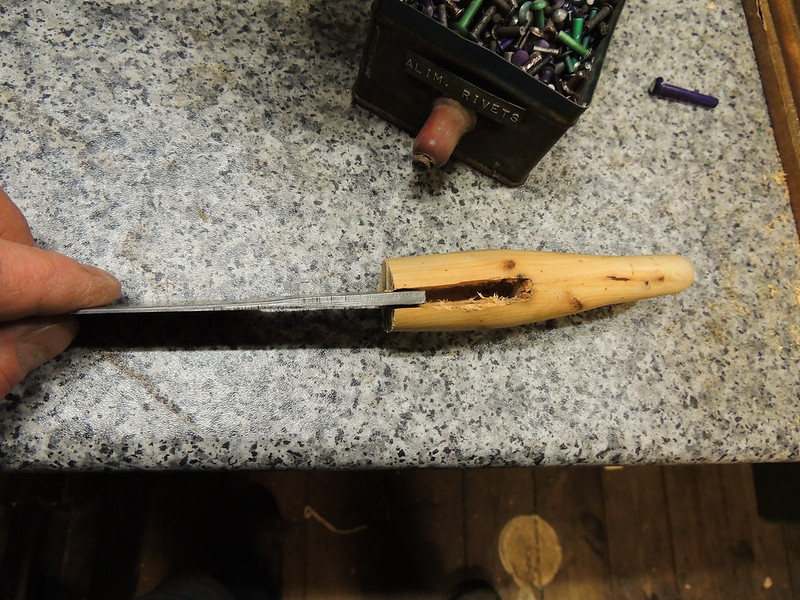
Testing tang of blade fits handle (hunting knife)
Here it is looking almost done.
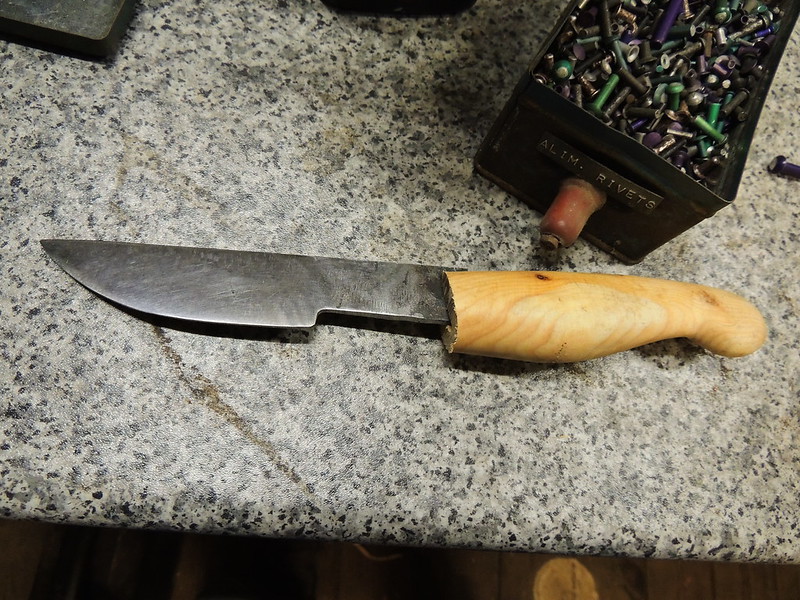
Testing tang of blade fits handle (hunting knife)
Finally the handle needs fixing. Here is the same knife with the handle and tang drilled while fitted together, with rivets in place, ready for hammering

Hunting knife with handle drilled and ready to rivet
And the final rivetted knife after sanding the rivet heads flush and smooth
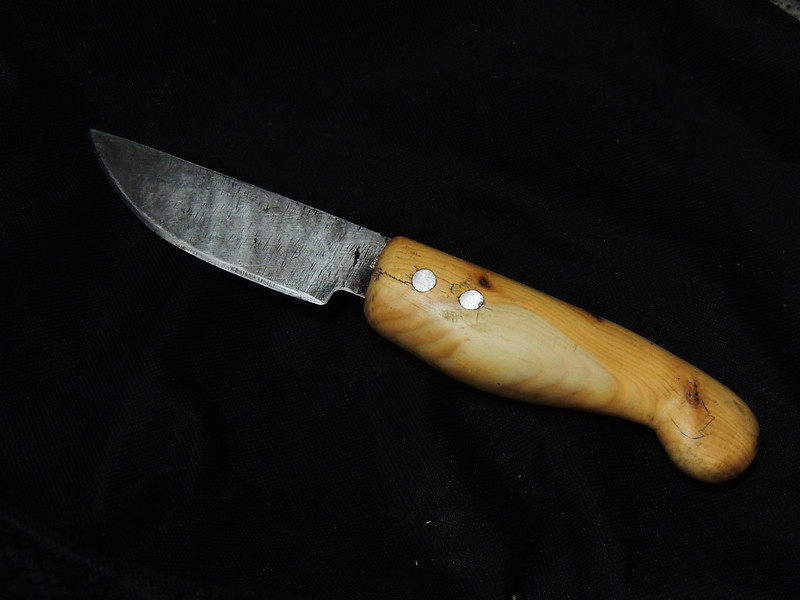
Finished hunting knife
a Simple Hunting Knife From Bike-lock Steel


This was my first attempt at making a knife totally from scratch using reclaimed materials. It's not perfect, but the things that didn't quite work taught me a lot about how to improve the process. It was a test project really.
The knife is a simple, stout, tapered stainless steel blade set in an oiled yew handle. I use it for fishing and gardening as a general purpose knife. The blade is not hardened so that is can be sharpened on stones easily when out and about and that works very well.
The steel for the blade was forged from the abandoned U-shaped part of a standard bicycle D-lock
I use it as a rough knife round the garden. It is good for cutting under the tap roots of dandelions.
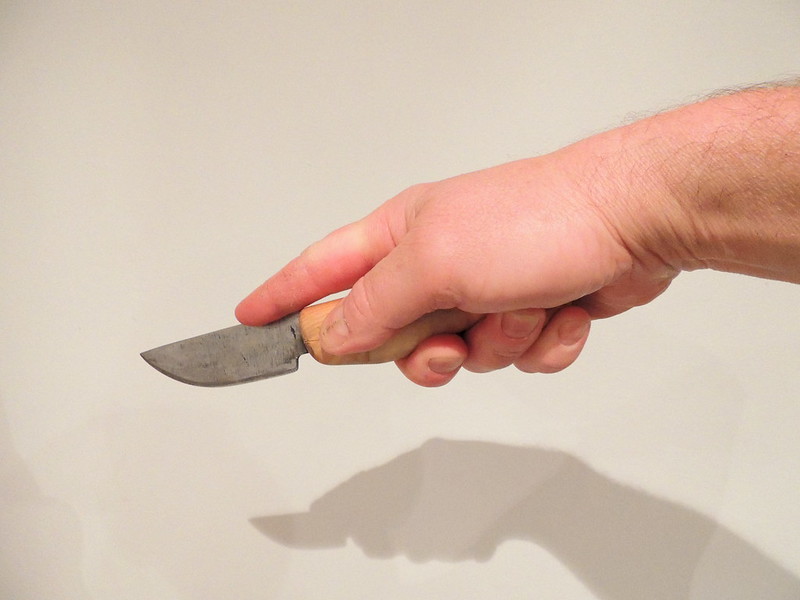
Hunting knife
But it is also quite nifty for cutting veg like this onion.
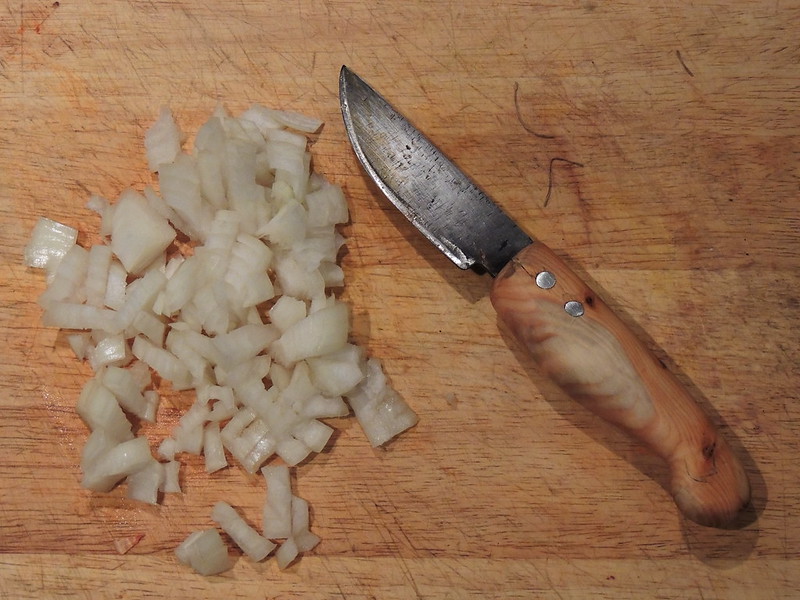
Hunting knife
You can tell this was a pilot experiment. I didn't worry too much about grinding the blade perfectly. I quite like the obvious sander marks.
You can also see a tiny crack in the handle. This was partly caused by using inadequately seasoned green wood - yew wood from a log out of the forest.
A Folding Pocket Saw for Foraging


This is an awesome tool. I made it for cutting sticks in the woods whilst out walking It's really light and portable, but lethally sharp and makes light work of sticks and even small branches
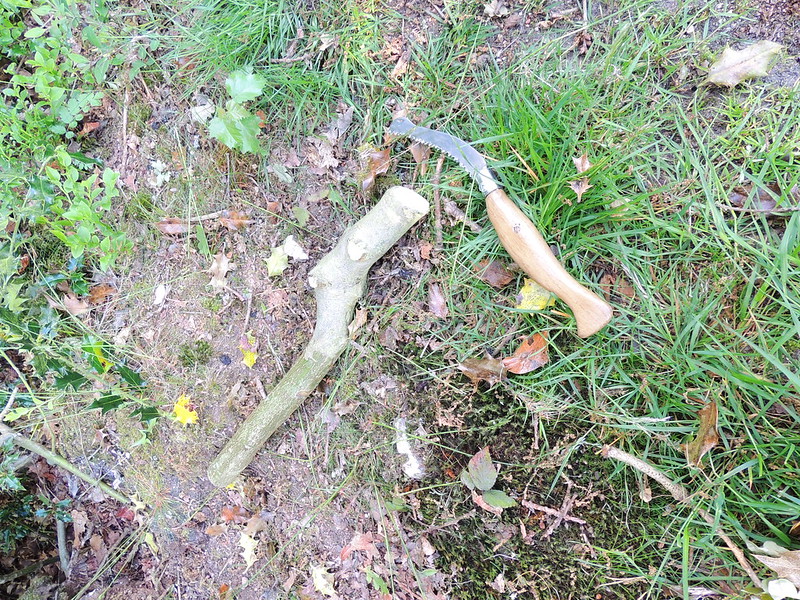
Folding saw and cut branch
Cutting a thick branch for a future tool handle. This is a holly branch, just under two inches thick. It has a curved blade. This allows the blade to be used on the draw (pulling towards the body). This was deliberate, because it is safer to pull you hand out of a hedge firmly, than it is to push it into a hedge firmly!
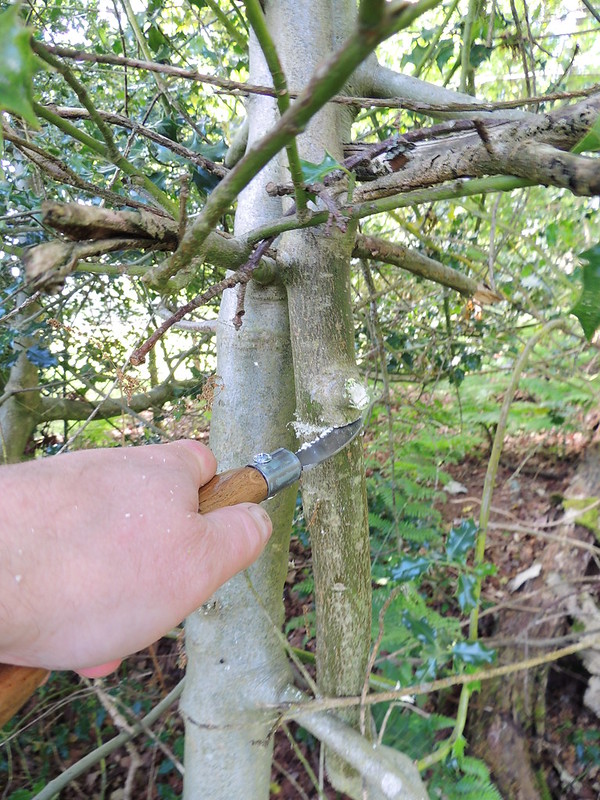
Folding saw in action
Apart from the basic forging and shaping described earlier, this tool also needed to be portable. The handle is quite thin to keep weight down. It is made from oak, which allows it to be quite delicate due to the wood's high strength.
The other obvious need was for it to fold away. Here is the design drawing. The curved blade has been redrawn in various positions to check it will work.
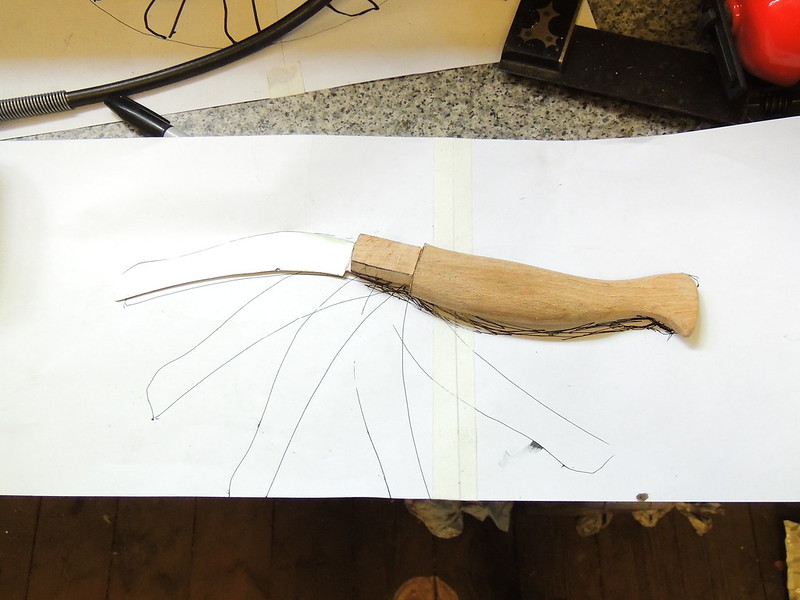
Saw handle blank and blade
Oak is good for a tool with a folding blade, as it is very strong. But even oak needs reinforcement. This is done with a steel ferrule (a split cylinder that encases the hinge). Here you can see the handle being shaped to accept the ferrule.

Cutting ferrule barrel into handle
Here the slot is being cut to form the hinge with the end of the folding blade

Cutting blade slot
Once the blade was fitted, both the handle and blade needed to be drilled whilst in final position.
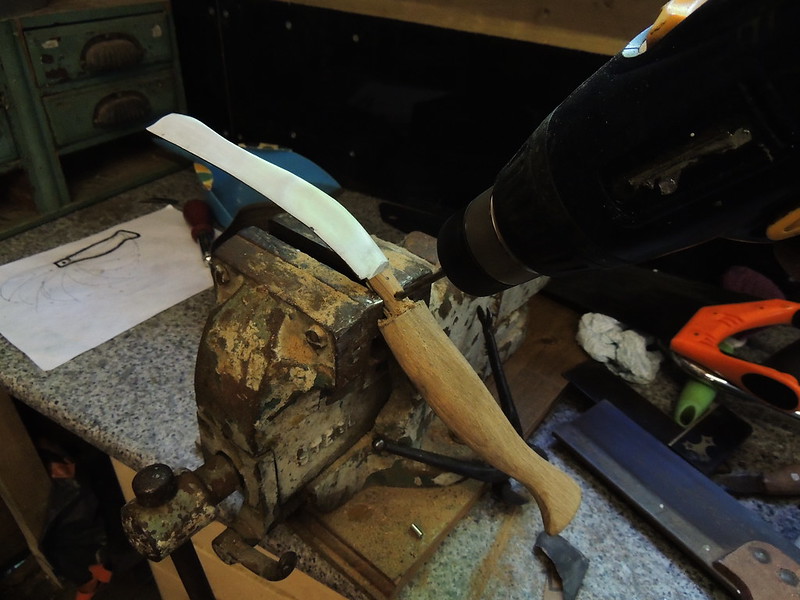
Drilling ferrule hole
The ferrule was cut from a piece of an old towel rail using a dremel. A hacksaw would do this too.

Cutting ferrule
The ferrule was cut lengthways to allow the hinged blade to pass. Here it is being tested for a good fit.

Ferrule
The hinge was completed with a cupboard joining bolt from an IKEA cupboard. This is a bolt with a threaded cylinder to match. They are used to hold adjoining cupboards together in kitchens.
Here is the finished saw with ferrule and blade hinge locked in place
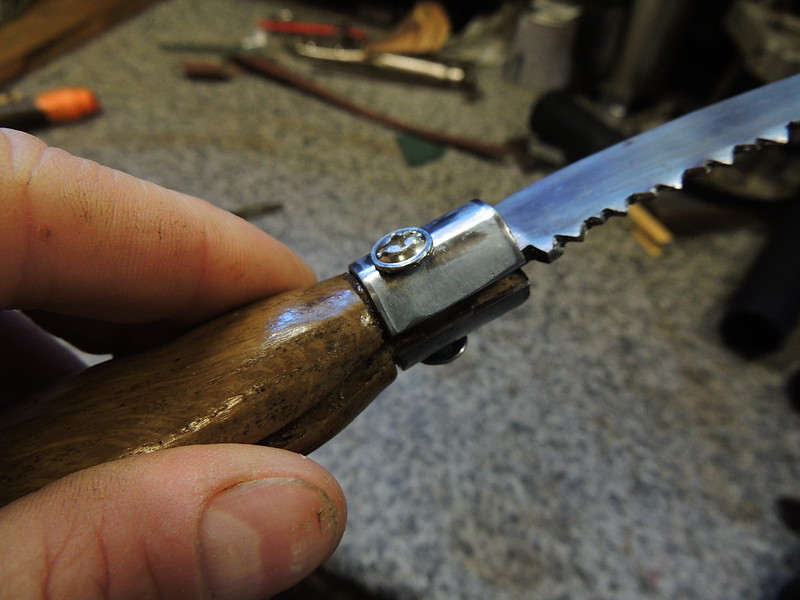
Finished ferrule with blade locked in place
Of course, this is a saw, not a knife. The raw blade before filing teeth looked like this.

Raw blade before filing teeth
The saw teeth were filed with a small, standard 60 degree triangular saw
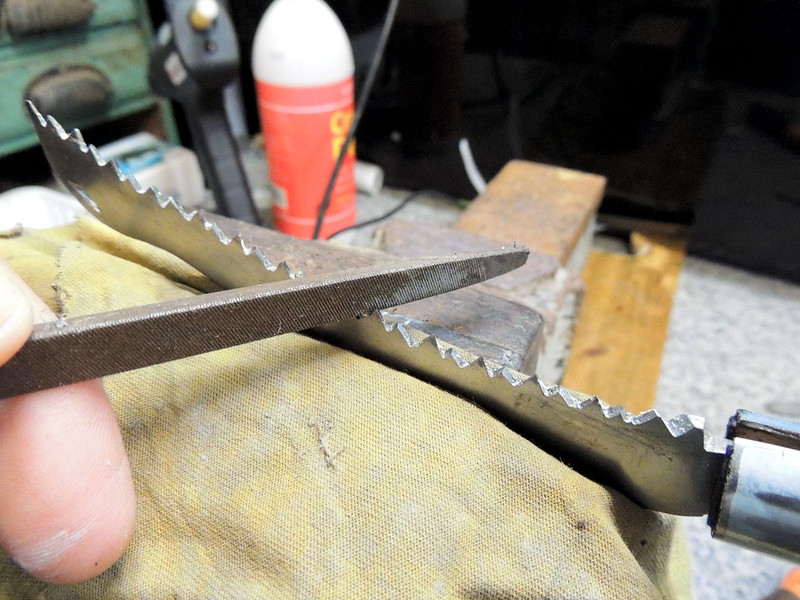
Filing saw teeth
A Carving Knife/ Ham Slicer


This is the least complicated knife described here, but I love its elegant simplicity. It has a rounded tip to avoid injury and give a grip if needed. There is a small finger space at the end of the sharpened blade to allow control if needed. The blade is deliberately wide so that the slices come out nice and smooth and even. This also helps transfer cut food from board to plate.
I love using this. It glides as it slices. It's a joy. It is featured in the step on forging and handle making so there isn't much to add here.

Carving knife/ ham slicer
A Folding Mushroom Harvesting Knife


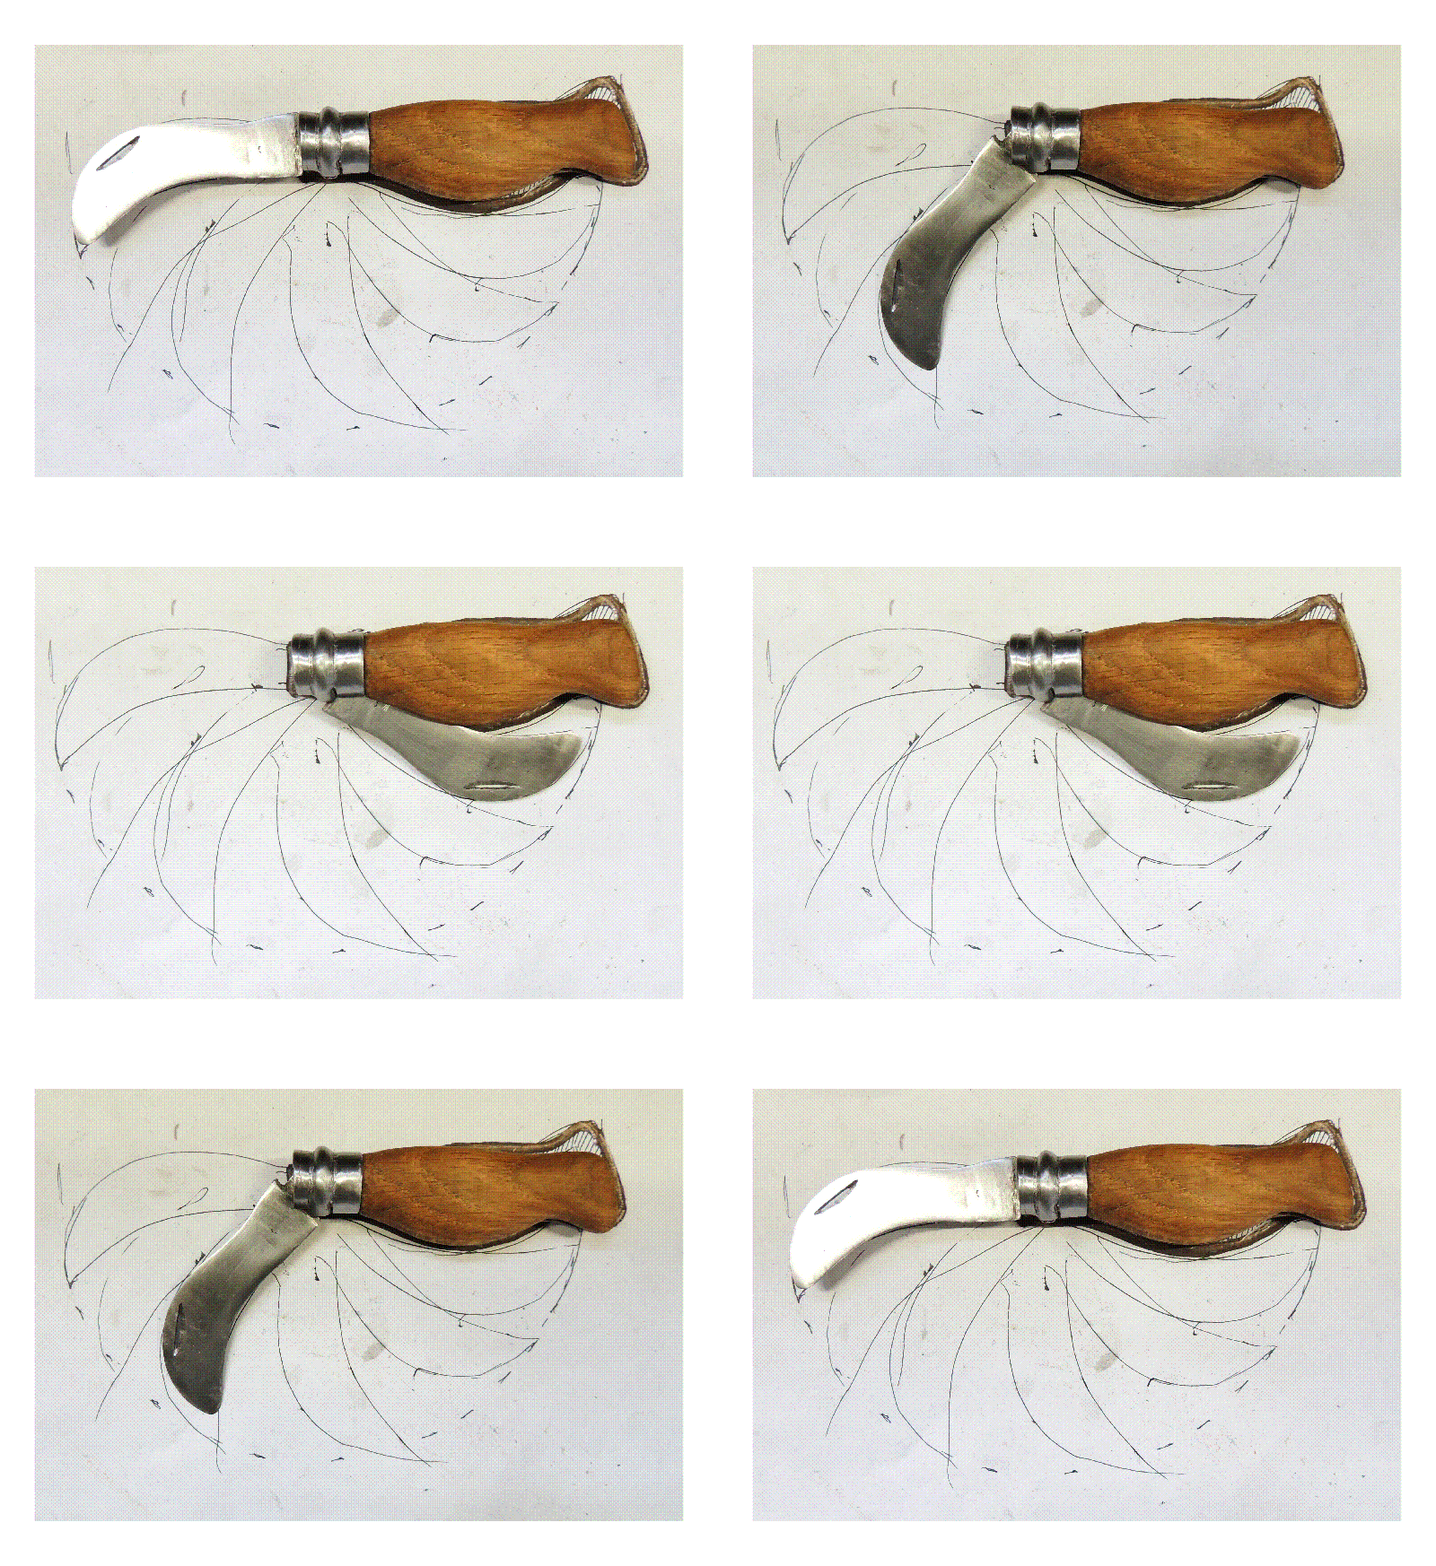
Mushroom knife showing folding action
Making this was one of my favourites. It's based on a rather obscure and specialist knife made by the legendary French knife company Opinel.
It is a little over 3" long when folded and very light for carrying about in the field. I made it for a friend who shares a passion for foraging mushrooms. He always finds huge Ceps when he is out. This is the tool for clean-cutting the fruit off the stem without disturbing the underlying mushroom roots network (the mycelium).
Here you can see how the short curved blade allows you to get a clean cut through the stem of a mushroom easily

Mushroom knife in action
The lock ring is the characteristic element of an Opinel knife and this was tricky to reproduce. This took quite a few attempts with various methods, before I worked it out.
The steel for this was cut from a stainless steel pedal bin from Ikea. A groove was created by hammering the steel plate over a nail, then shaping in a vice.
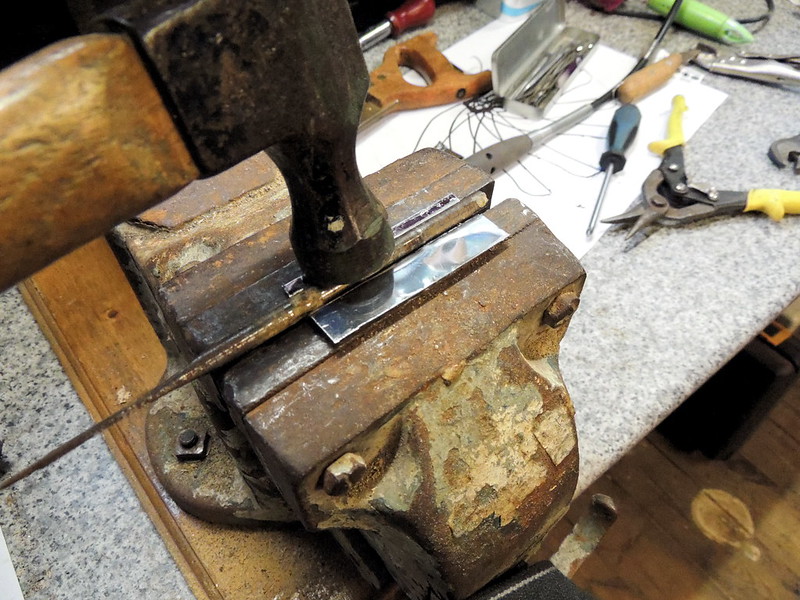
Forming lock ring
And shaped with a cold chisel

Forming lock ring
Finally, once the groove was formed, the sheet was hammered round a metal tube to form the ring. The steel you use needs to be a bit springy if possible as this ring needs to be opened up slightly to fit it later.
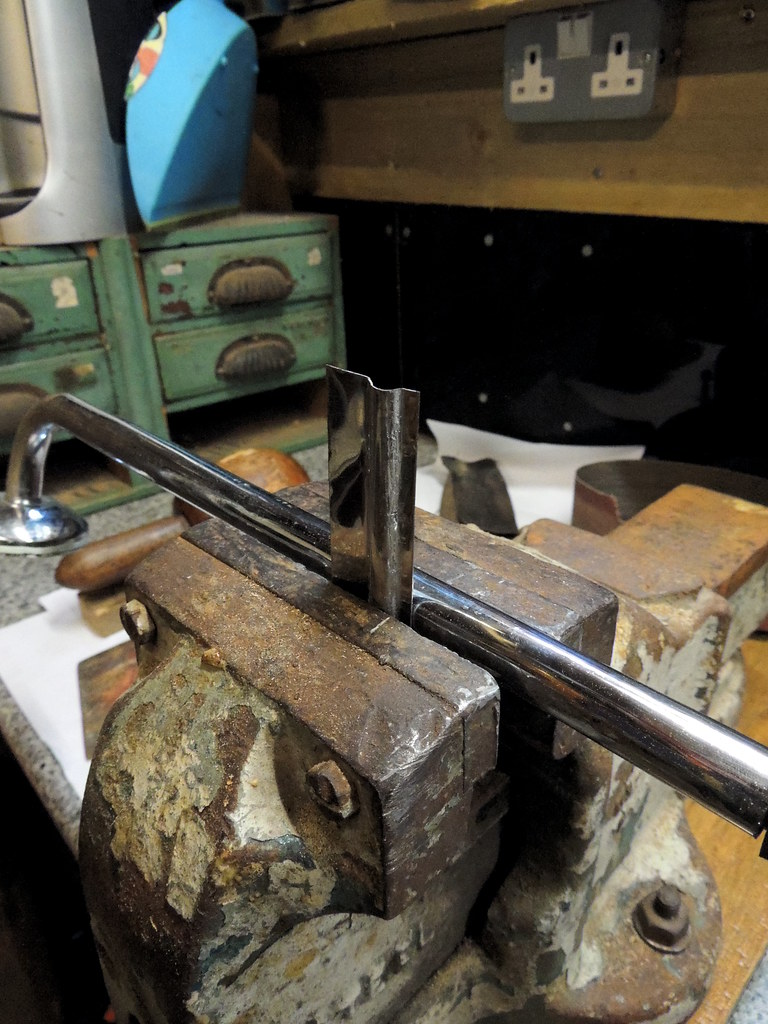
Forming lock ring
Conclusion


Hopefully the example here show that a barbecue really makes a viable small scale forge. Love to get feedback and links to any you make