Design Tinkercad | How to Make a Komainu
by 2430 in Workshop > 3D Printing
947 Views, 3 Favorites, 0 Comments
Design Tinkercad | How to Make a Komainu


The Kanagawa University asked us to create 3D printed copies of cultural artefacts to share with students who cannot access them. After selecting an artefact, thorough research and planning, a 3D print version of the chosen artefact will be created. Then, the design will be actually printed and finalised through sanding.
*The size measurement of objects that I mention are in length x width x height format.*
Context- What is a Komainu?
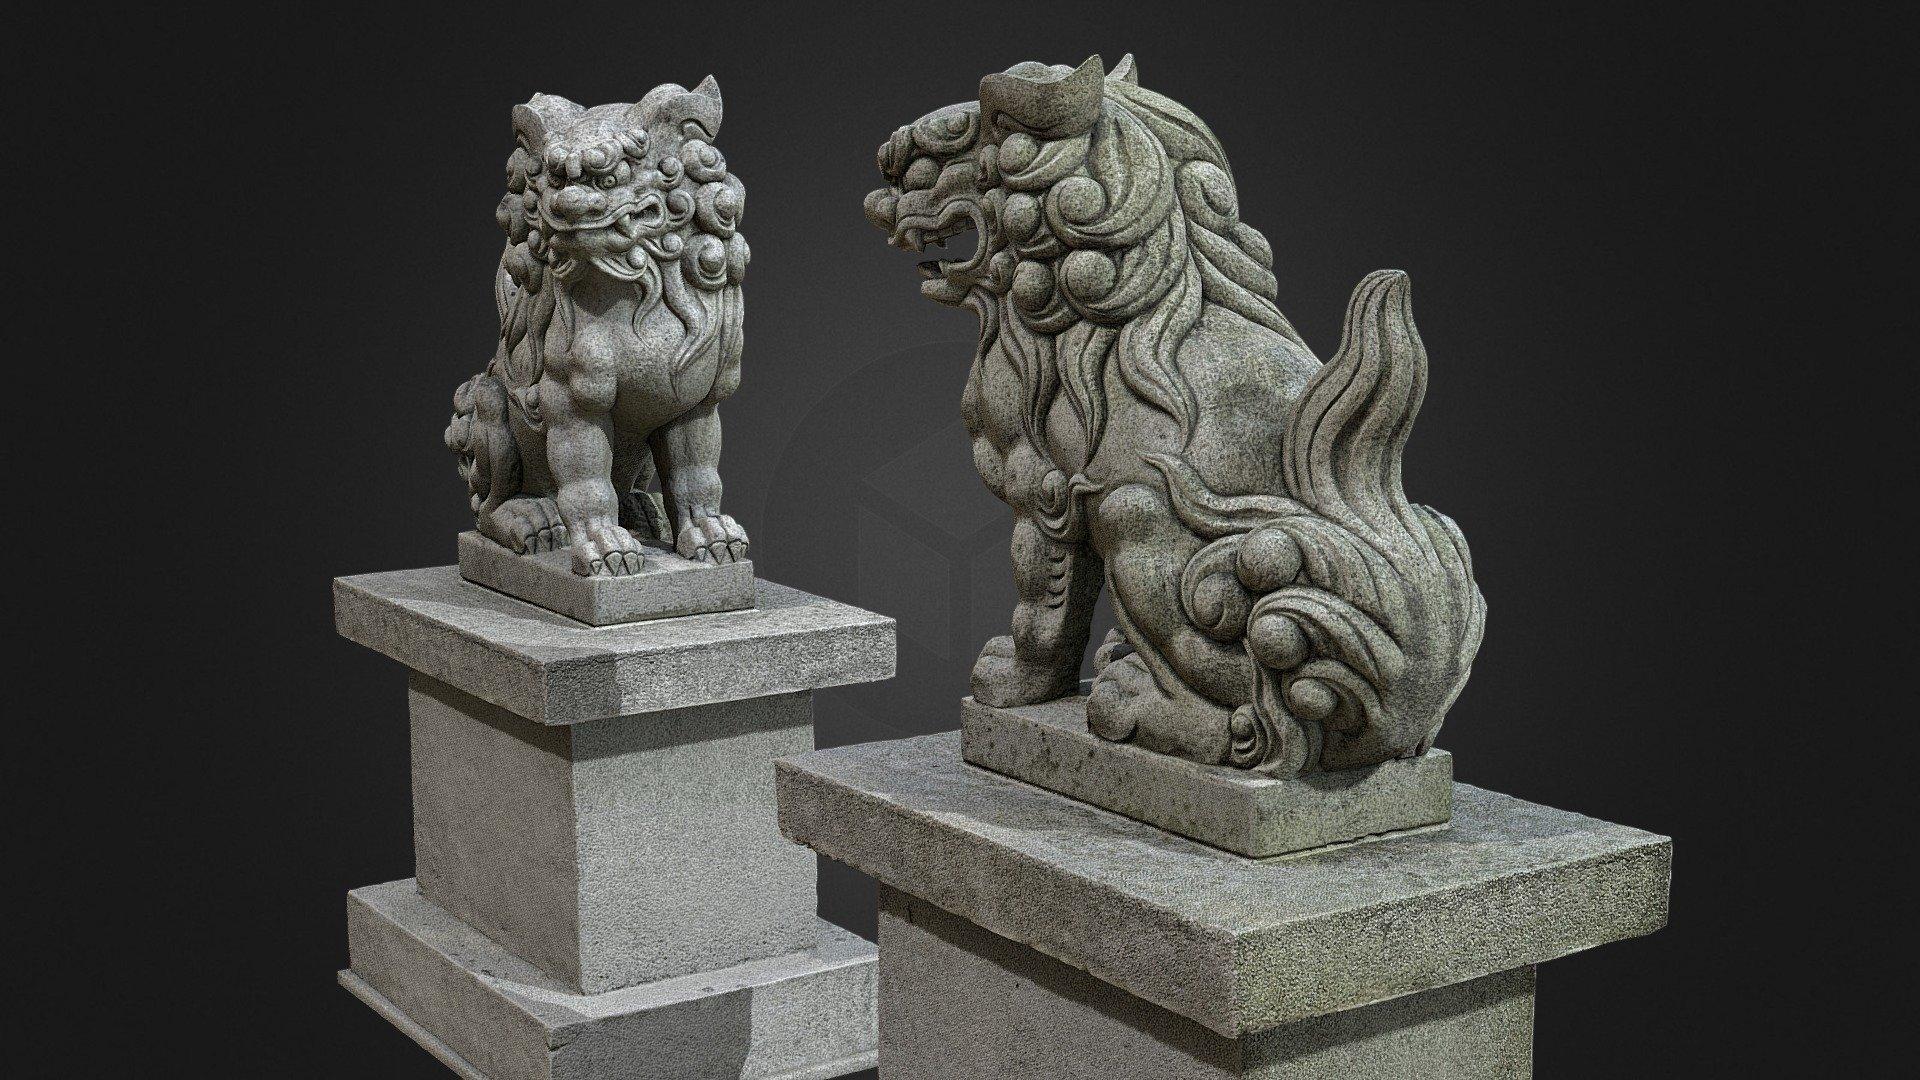
The komainu are statues, formed like a dog, that guard Japanese shrines. The official name is shishi (lion form) / komainu (dog form). Usually, the guarding statue on the right, as there are two statues that guard shrines, is a shishi that has its mouth open. On the left is often the komainu, which has its mouth closed and has a horn. The guarding statues used to be placed outside the shrines and were made of wood, but when they started getting placed outside, they began crafting them out of durable stone to beat the weather. In the Edo period, records show that they were made from granite. Depending on the area, the model of the shishi and komainu vary.
Supplies
- Reference pictures
- Paper to sketch on
- Writing utensil (pen, pencil, anything that could be used for sketching)
- Tinkercad
- Slicer tool
- Sanding paper
- 3D printer and filament
Find Reference Pictures and Briefly Sketch


Find photographs or 3D replicas (from other artists) of Komainu. Make sure that you have different angles; side, top, 3/4, etc.
Sketch a Komainu (do not trace or copy) using those reference images so that you will have a rough idea of what your model will look like.
Create a New Project in Tinkercad

Title it, and get a feel of Tinkercad. There are introductory lessons available in the "Learn" tab; familiarise yourself with the platform.
The Base


- Using the "box" tool, create 4 rectangles; two 84 x 91x 5, one 67.34 x 43.68 x 5, and one 58.71 x 49.41 x 20. (width x length x height)
- Layer the boxes in the following order (bottom to top): the 84 x 91x 5 box, the 58.71 x 49.41 x 20 box, the 84 x 91x 5 box, then the 67.34 x 43.68 x 5 box.
- Select all 4 boxes and group them & colour them grey.
The Front Paws/Legs


- To create the legs, use 3 spheres (6 x 6) for the leg and 1 half sphere (6 x8) for the foot for each leg.
- Lay each sphere on top of each other on an angle (around 30º).
- Flatten the half sphere so it resembles a foot, and place under the sphere at the very bottom.
- Group them and colour them dark grey. The dark grey will be used for the rest of the Komainu so make sure to remember the shade of grey.
- Duplicate the leg so that you have two front legs. Place them parallel to each other.
The Back Legs


- Use the 1 extrusion (6 x 13) shape and 1 half sphere (8 x 18) shape for each back leg.
- For the extrusion tool, try and replicate the above image.
- Angle the extrusion tool so that it's diagonal (65º) and place it above the half sphere.
- Group them and colour them dark grey.
- Duplicate the back leg so that you have two back legs.
- Place them behind the front paws so that you have four legs.
Lower Body


- Use one sphere (18.95 x 18.95) and one shoulder screw shaft shape (16 x 20) to create the lower body.
- Angle the shoulder screw so that it's diagonal and it's on a 25º angle. (Try and resemble the pictures)
- Place the sphere in between the back legs and the shoulder screw in the middle of the sphere. (Look at the pictures for specific placement)
- Group the legs and the lower body together and colour them.
Torso


- Use one shoulder screw shape (18.3 x 16) to create the torso.
- Place the shape so that the protruding shoulder screw from the lower body is covered. The base line of the torso-shoulder screw shape should be 12 units from the "ground".
- Group with rest of the body and colour.
Forehead and Ears


- Use Four spheres and two heart shapes to create the forehead and ears.
- One sphere should be the "base forehead" (16 x 18) and flatten it so that it is half as tall as its original height.
- Three of the spheres should serve as the "eyebrow curves" (each should be 8.7 x 8.7 x 8.7). Place them at the front of the big sphere.
- Create two hearts shapes (11 x 5 x 7.92) and angle them by 102º. (Look at attached images)
- Place the hearts so that the pointed bits are poking out of the spheres.
Eyes

- Use two spheres (5.85 x 7.7 x 4.38) to create the eyeballs and the pupil will be painted on after printing .
- Place them under the forehead/ears (white spheres are there to estimate where the pupils will be drawn on).
- Group the eyes with the forehead/ears and colour them grey.
Nose


- Use three spheres to create the nose and use two cylinders to create the nostrils.
- Have one big sphere for the middle (6 x 6 x 3) and place two smaller spheres (5.14 x 5.14 x 5.14) on both sides of the big sphere.
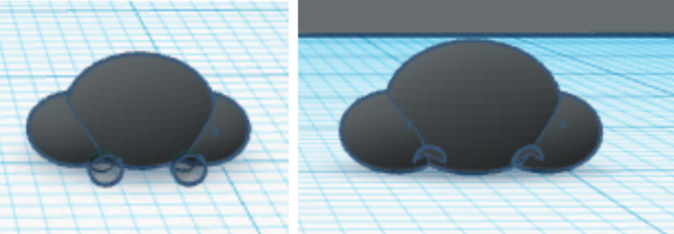
- Create two "Hole" cylinders (1.6 x 1.3 x 1.3)- make sure that you are selecting the "Hole" option to make clear shapes. Place them under and in between the nose spheres.
- Group them- you should have two delves where the clear cylinder used to be.
Mouth and Teeth


- First create the mouth (jaws)- the blue coloured "scribble" objects in the first image. To do this, draw the third picture using the Scribble tool; this shape should be the side profile of the jaw.
- Rotate the shape by 90º on the y-axis and expand the width so that the size is 19 x 13.66 x 5.8.
- Duplicate the shape so that you have two, and flip the duplicated object so that it is facing down.
- Place the jaw objects so that they are facing each other (like in the fourth image)
- To create the teeth, use two cones. The size of those cones should be 3.45 x 4.5 x 3.4.
- Rotate the cone by 45º on the y-axis. Embed the base of the cone in to the jaw pieces. (look at the first two images for reference)
- Group them and colour them grey.
The Back of the Head


- The back of the head consists of two rectangles. The pink one (in the first picture for clarity) goes on top of the mouth & teeth and the red one connects the mouth & teeth area to the head.
- Create one 13 x 13.5 x 5.2 (pink) rectangle and one 13.4 x 8.3 x 6.5 (red) rectangles.
- Place the red rectangle at the back of the mouth & teeth area.
- Place the pink rectangle on top.
- Group them and colour them grey.
Assembling the Head


- On top of the shape that you created in Steps 12 (mouth, teeth and back of the head) place the forehead/ears/eyes shape on top of the former-pink rectangle (box on top of the Step 12 object). The forehead/ears/eyes shape should be completely covered and "inside" the box. No part of the forehead/ears/eyes shape should be sticking out of the box.
- Place the nose in between the eyes. The tip of the nose should be slightly sticking out compared to the top jaw. Reference to the image for accuracy.
- Once assembled, group them and colour them grey.
Assemble the Komainu


- The head and the body should be made. Elevate the head so that the bottom of the head is aligned with the top of the torso. (Look at image 2)
- Place the head so that the protruding forehead is fairly in line with the torso.
- Group them.
Create the Tail


- Using the Scribble tool, replicate the first attached image. Then, resize the tail so that it is 10.78 x 6.35 x 23.2.
- Rotate the tail by 90º on the y-axis so that it is vertical.
- Place the tail in the middle of the sphere (part of the lower body).
- Group the tail with the rest of the body and colour them grey.
Add Swirls


- Using the Castle Tower Stairway tool, create the swirls on the Komainu.
- Create 10 Castle Tower Stairways that are 7.4 x 3 x 7. Create 4 that are 5.3 x 2 x 6.
- Make sets of three Castle Tower Stairways; two 7.4 x 3 x 7 and one 5.3 x 2 x 6. To do this, place them according to the first image and group them. You should now have 4 sets of three Castle Tower Stairways.
- Place one set on both sides of the head. The top Castle Tower Stairway should be next to the ear.
- Rotate the remaining two sets by -161º and place them so that they cover the sphere "line" on each side of the lower body. (Look at image 3)
- Group them and colour them grey.
Complete! You now have a Komainu online!