Diy Modular FPV Pod, a Beginners Guide to FPV (for Any Platform)
by Team Dogoman RC in Workshop > 3D Printing
7908 Views, 153 Favorites, 0 Comments
Diy Modular FPV Pod, a Beginners Guide to FPV (for Any Platform)

Hi, I'm Dogoman! In this Instructable I will be showing how to build and use, you're own 5.8ghz FPV pod for use on any R/C model!
FPV is a very fun and useful aspect of the R/C hobby, but sometimes it can be a huge hassle to use, especially if you're trying to use the same system for all you're models. Thats why I created the 3D printed FPV pod! Here are some key features of the Pod!
The FPV pod or just Pod for short, is designed to be used on any and all you're models! The Pod can be easily moved from model to model, with absolutely no tape,hot-glue, or any other adhesives. The Pod is fast and easy to assemble, with convenient velcro straps, and light weight yet strong 3d printed parts that snap in place.
The Pod has a modular camera mounting system, for those models where you just don't want, or just can't have you're VTX and Camera mounted next to each other. Theres to main pieces to the Pod, the main pod and the camera pod. The camera pod nest inside the main pod for storage,and regular mode. But, for those instances where you need to mount the the main pod away from the camera, you have the option of removing the camera pod from the main pod and extending it up to 210mm away!
Now this project does require a basic understanding of soldering, and of course requires a 3d printer, but other that that theres no other tools involved in the making of the Pod and everything that goes in it. Even if you don't own a 3d printer, but still want to try out FPV feel free to read this Instructable.
Now you may be asking what is FPV ? Well here's an excerpt from http://www.droneflyers.com/ that will answer that! This article talks about FPV on arial vehicles, but FPV can most certainly be used on ground vehicles as well. So don't let that fool you!
"What FPV means is “First Person View” which means a video camera is mounted on the vehicle and broadcasts the live video to the pilot on the ground so the pilot is flying the aircraft as if he/she was onboard the aircraft instead of looking at the craft from the pilot’s actual ground position. FPV allows you to fly much higher and further than you can from the looking at the aircraft from the ground. FPV control allows for more precise flying around obstacles especially with vehicles like quadcopters which can easily fly indoors and through forests via FPV where you wouldn’t be able to see obstacles from a fixed position.......
Understanding You're FPV System: Video Transmitter and Recievers


Understanding you're system and the basics of how to use it is very important! So in this section I will be showing and explaining the basics of how FPV works and how to use it! :)
There three main components to you're FPV system, the video-transmitter and receiver, the camera, and antennas. Well start with the VTX and VRX.
Frequencies
There are many different options of frequencies available for FPV, but for the most part you will find 5.8GHZ to be the standard.
Channels
Channels are are the sub-frequencies of your main frequency. Basically they allow you to choose the exact frequency of 5.8(or whatever frequency you use) that your on. If your with a group be sure to space each other out a few channels apart, because if your to close you may interfere with each other.
Bands
Basically all a band is, is a group of 8 channels. Most FPV systems nowadays have five bands, however you will find that there are still allot of systems that only have four. If you don’t use it with large groups (like at an FPV race) don’t worry this will not really effect you.
To get your FPV TX and RX working together, all you have to do is choose what band and channel you’ll be on. Then but both your TX and your RX on the same band and channel and you’re all set to go!
Heres a chart i found to help you understand all this…
Understanding You're FPV System: Cameras

There’s several things to consider when choosing a FPV cam, so heres a list of things you need to consider.
CCD vs. CMOS (Camera imaging device)
Theres two main camera imaging device types, CCD (Charged Coupling Device) and CMOS ( Complimentary Metal Oxide Semiconductor).
CCD cameras do much better than CMOS cameras, in low, and high light conditions. As apposed to CMOS cameras that do really bad in dark, or cloudy conditions, and don’t do too good in really hight lighting conditions ether.
So for most cases CCD cameras are way better. However CCD cameras tend to be more expensive, and sometimes a bit larger and heavier, and also use a bit more power. I used a CMOS camera due to the difference in cost, but thats up to you.
NTSC vs. PAL (Camera video encoding type)
Choosing in between NTSC (National Television System Committee) or PAL (Phase Alternating Line) video types is not a difficult decision to make. I would recommend just picking the same system that is used in your country so that all your video equipment is completely compatible.
I use NTSC because thats whats used in the US.
TVL (Camera definition)
Theres a bit of a compromise when choosing what TVL you use. A higher TVL camera will have a higher resolution, but will also have more latency. A Lower TVL camera will be lower resolution but will have less latency. I would recommend somewhere in between a 600-700TVL. If you’re into fast flying/driving you will want something like 600TVL, because it has little to now latency. But if you don’t fly/drive really fast you will most likely want something with a higher TVL such as 700TVL. And of course a higher TVL camera will cost a bit more so thats another thing to consider.
Understanding You're FPV System: Antennas

Theres two main antenna types that are used for FPV , Linear Polarized (also known as dipoles), and Circular Polarized antennas (also known as clover leafs or skew planers).
Linear Polarized Antennas
Linear Polarized antennas, are what normally come your FPV systems, but are really not that great for FPV. The reason that dipoles are not that good is they send a linear signal, and are also more prone to reflecting signals. Linear antennas send and receive the signal in a straight line, so if one of your antennas tilts only the part where the two cross will be received. This is especially bad for FPV on aircraft because you’re constantly flipping and rolling.
Circular Polarized Antennas
Circular Polarized antennas are normally the best choice for FPV. Unlike dipoles they don’t receive reflecting signals. They also work great at any angle since they transmit a circular signal. When choosing a circular polarized antennas you need to make sure they match. Right hand polarized to Right hand polarized, left hand polarized to left hand polarized. All this means what direction the antennas spiral the signal.
Recommended Electronics


Here is list of the electronics i used and recommend!
Camera: http://goo.gl/83YRmP
VTX: http://goo.gl/mo758k
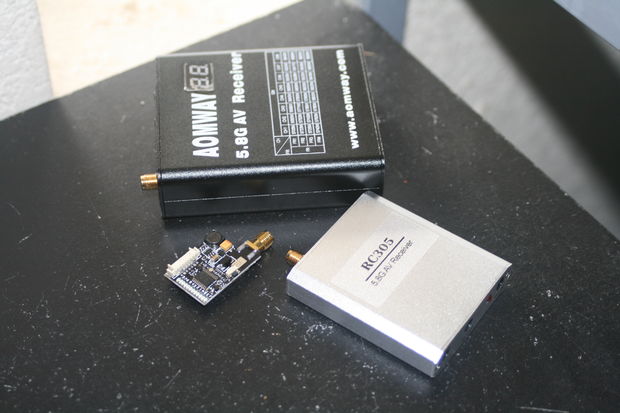
VRX with DVR:http://goo.gl/R6pC9t
VRX without DVR:http://goo.gl/K9Y9kw
You will also need a way of viewing your video this could be an lcd or a pair of goggles. Most goggles have a built in receiver so if you go that route you won’t need a external receiver.
Printing the Parts

Printing the parts is pretty straight forward, and if you do have a 3d printer I imagine you know how to use it. So I'll show the settings and all that basic stuff (and of course give the STL files).
here's a link to the STL files http://www.thingiverse.com/thing:1534218
Heres the settings i used. I printed everything in PLA, but feel free to play around with different filaments, and settings!
FPV Pod.
Infill- 30%
PrintSpeed- 60mms
LayerHeight- .1
Support- Yes_Type_lines
.
.
FPV Camera Pod.
Infill- 30%
PrintSpeed- 60mms
LayerHeight- .1
Support- Yes_Type_lines
.
.
Pod Lid.
Infill- 30%
PrintSpeed- 60mms
LayerHeight- .1
Support- Yes_Type_lines
.
.
VTX Holder.
Infill- 30%
PrintSpeed- 60mms
LayerHeight- .1
Support- Yes_Type_lines
.
.
Front Cover
Infill- 30%
PrintSpeed- 60mms
LayerHeight- .1
Support- Yes_Type_lines
Setting Up, and Upgrading the VTX and Camera


The main issue I had with this system was the wiring. So in this step I will be showing how to setup/upgrade all the wiring, so that your FPV system will be able to withstand the demanding needs of R/C!
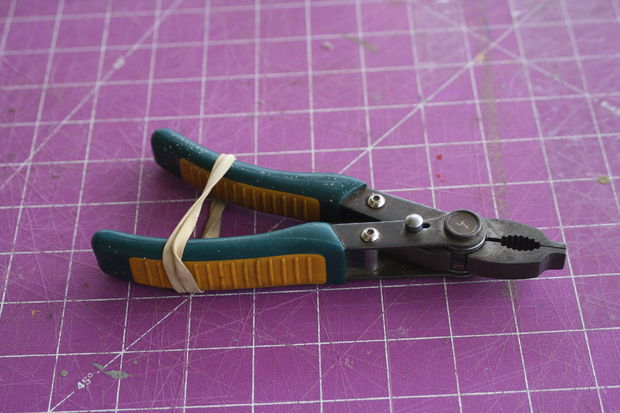
Lets get started! Start by getting out your VTX, camera, a soldering braid, or solder sucking pump, your favorite solder, one male JST pigtail (plug with wire), about 300mm. of 22AWG silicon servo wire, the stock VTX wiring (with plug), a pair of helping hands, or a pair of pliers with a rubber band, and finally you favorite soldering iron!
.
.
Step #1: begin by carefully unsoldering all the wires and the microphone, from the camera. When doing so be very careful to not overheat or melt any of the IC chips, or components on the board.You can use either a soldering braid or a soldering pump, but I would recommend using a solder braid.
.
.
Step #2: Take the VTX wire and carefully pull out the power out+ cable, then cut the JST pigtail and all the VTX wires down to a 15mm length. Now you can strip all the wires, but when doing the VTX wires be very very careful to not rip any out on accident. I accidentally ripped one out when striping them but luckily I happened to have one lying around.
.
.
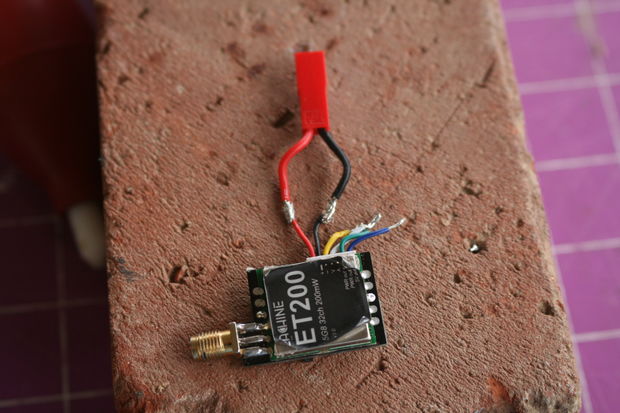
Step #3: Now that you have striped all the wires its time to tin them! There are many ways of doing so, but I find it easiest to use a brick and lay my wire up against it then heat up the wire and melt the solder into it. You want to put enough solder on so that its covered but not so much that you have big blobs of solder on the joint. A good tip when soldering anything, is to always continuously wipe the tip of the iron off to prevent your solder from blobbing.
.
.
Step #4: Once you have tined all the wires its time to to the actual wiring. First twist the audio and power out- wires together, and tin the joint. Next solder the JST on to the power in wires. Obviously black to black and red to red. Now solder the 5v out to +on camera, power out/audio to - on camera, and video to video on camera using the 30mm long silicon servo wire.
.
.
Step #5: Now all you have to do is insulate all the wires! You can use heat-shrink, E-tape, hot-glue, or even liquid E-tape! I'll leave that up to you! ;)
Assembling the Pod


So now all thats left to do is assemble the pod! :D
For this step you will need all the printed pieces (main FPV pod, camera pod, pod lid, VTX holder, and front cover), peel and stick velcro. You will also be needing an X-acto knife or razor blade, and of course your electronics. ;)
.
.
Step #1: Get out your peel and stick velcro and cut 3# 15x15mm, 1# 6x15mm, 2# 14x20, 1# 14x65, 1#20x60, and 1# 14x55mm pieces of velcro. It doesn't need to be exact, just near that.
.
.
Step #2: Unpeel the backs of all the velcro, except for the 14x65 and 14x55 pieces. Those will be our straps. Once you have peeled the paper of all the velcro you can go ahead and place it onto the pod. Look at pictures to understand where to place them.
.
.
Step 3#: Now you can install the electronics! First, carefully slide the camera into its pod. When puting in the camera be very careful to not push to hard and scratch the lens. It should just go right in, if it doesn't you may need to file the inside just enough to get it in. Now you can slide in the VTX, this is the trickiest part. First wiggle the JST plug into its holder, and pull it through. Then slide in the VTX, and push it all the way down to the bottom.
.
.
Step 4#: The last step is putting in the camera pod! Theres two camera mounting positions, inside the pod and outside the pod. I'll start with the inside pod position. It's very simple, first wind the servo cable around inside the pod and the slide in the camera pod. Now if you need put the camera in the out position, all you have to do is unwind the wire to what ever needed length then slide on the front cover, and your all done!
P.S I advise you look at all the pictures, other wise you will have a hard time understanding what i'm talking about. ;)
Build a Carry Case. (optional)


This step is pretty easy, all you need is the box that the VTX comes with, a pencil or pen, and something to cut the foam. The rest is self explanatory, just follow the pictures. :)
Mount the Pod to You're Favorite R/C Models!

Know that you have your pod you can easily mount FPV onto any R/C vehicle, wether its in the air or on the ground!