Gesture Controlled Screen
by hariramanil810 in Workshop > Home Theater
12 Views, 0 Favorites, 0 Comments
Gesture Controlled Screen
.png)
This is a simple project which implies of controlling laptop screen via simple gestures to make them responsive
Supplies
.png)
.png)
.png)
.png)
If you have hard-time 3d printing stuff and other materials which i have provided in this project please refer the professionals for the help, JLCPCB is one of the best company from shenzhen china they provide, PCB manufacturing, PCBA and 3D printing services to people in need, they provide good quality products in all sectors
Please use the following link to register an account in JLCPCB
Pcb Manufacturing
----------
2 layers
4 layers
6 layers
PCBA Services
JLCPCB have 350k+ Components In-stock. You don’t have to worry about parts sourcing, this helps you to save time and hassle, also keeps your costs down.
Moreover, you can pre-order parts and hold the inventory at JLCPCB, giving you peace-of-mind that you won't run into any last minute part shortages. jlcpcb.com/RNA
3d printing
-------------------
SLA -- MJF --SLM -- FDM -- & SLS. easy order and fast shipping makes JLCPCB better companion among other manufactures try out JLCPCB 3D Printing servies
JLCPCB 3D Printing starts at $1 &Get $54 Coupons for new users
Human Machine Interface or HMI is a system comprising of hardware and software that helps in communication and exchange of information between the user (human operator) and the machine.
We normally use LED Indicators, Switches, Touch Screens and LCD Displays as a part of HMI devices. Another way to communicate with machines like Robots or Computers is with the help of Hand Gestures.
Instead of using a keyboard, mouse or joystick, we can use our hand gestures to control certain functions of a computer like play/pause a video, move left/right in a photo slide show, scroll up/down in a web page and many more.
In this project, we have implemented a simple Arduino based hand gesture control where you can control few functions of your web browser like switching between tabs, scrolling up and down in web pages, shift between tasks (applications), play or pause a video and increase or decrease the volume (in VLC Player) with the help of hand gestures.
Introduction
.png)
.png)
.png)
Principle behind the Project
The principle behind the Arduino based Hand Gesture Control of Computer is actually very simple. All you have to do is use two Ultrasonic Sensors with Arduino, place your hand in front of the Ultrasonic Sensor and calculate the distance between the hand and the sensor. Using this information, relevant actions in the computer can be performed.
The position of the Ultrasonic Sensors is very important. Place the two Ultrasonic Sensors on the top of a laptop screen at either end. The distance information from Arduino is collected by a Python Program and a special library called PyAutoGUI will convert the data into keyboard click actions.
.png)
.png)
.png)
The design of the circuit is very simple, but the setup of the components is very important. The Trigger and Echo Pins of the first Ultrasonic Sensor (that is placed on the left of the screen) are connected to Pins 11 and 10 of the Arduino. For the second Ultrasonic Sensor, the Trigger and Echo Pins are connected to Pins 6 and 5 of the Arduino.
Now, coming to the placement of the Sensors, place both the Ultrasonic Sensors on top of the Laptop screen, one at the left end and the other at right. You can use double sided tape to hold the sensors onto the screen
.png)
.png)
Programming Your Arduino to Detect Gestures
The important part of this project is to write a program for Arduino such that it converts the distances measured by both the sensors into the appropriate commands for controlling certain actions.
We have already seen a project called Range Sensor where you can measure the distance of an object placed in front of an Ultrasonic Sensor with the help of Arduino.
A similar concept is used here to measure the distance of your hand in front of both the Ultrasonic Sensors in this project. The fun part starts after calculating the distance.
The hand gestures in front of the Ultrasonic sensors can be calibrated so that they can perform five different tasks on your computer. Before taking a look at the gestures, let us first see the tasks that we can accomplish.
- Switch to Next Tab in a Web Browser
- Switch to Next Tab in a Web Browser
- Scroll Down in a Web Page
- Scroll Up in a Web Page
- Switch between two Tasks (Chrome and VLC Player)
- Play/Pause Video in VLC Player
- Increase Volume
- Decrease Volume
The following are the 5 different hand gestures or actions that I’ve programmed for demonstration purpose.
Gesture 1: Place your hand in front of the Right Ultrasonic Sensor at a distance (between 15CM to 35CM) for a small duration and move your hand away from the sensor. This gesture will Scroll Down the Web Page or Decrease the Volume.
Gesture 2: Place your hand in front of the Right Ultrasonic Sensor at a distance (between 15CM to 35CM) for a small duration and move your hand towards the sensor. This gesture will Scroll up the Web Page or Increase the Volume.
Gesture 3: Swipe your hand in front of the Right Ultrasonic Sensor. This gesture will move to the Next Tab.
Gesture 4: Swipe your hand in front of the Left Ultrasonic Sensor. This gesture will move to the Previous Tab or Play/Pause the Video.
Gesture 5: Swipe your hand across both the sensors (Left Sensor first). This action will Switch between Tasks.
Explaning Code
.png)

Python Programming for the Project
Writing Python Program for Arduino based Hand Gesture Control is very simple. You just need to read the Serial data from Arduino and invoke certain keyboard key presses. In order to achieve this, you have to install a special Python Module called PyAutoGUI.
Installing PyAutoGUI
The following steps will guide you through the installation of PyAutoGUI on Windows Computers. The module PyAutoGUI will help you to programmatically control the mouse and keyboard.
With the help of PyAutoGUI, we can write a Python Program to mimic the actions of mouse like left click, right click, scroll, etc. and keyboard like keypress, enter text, multiple key press, etc. without physically doing them. Let us install PyAutoGUI.
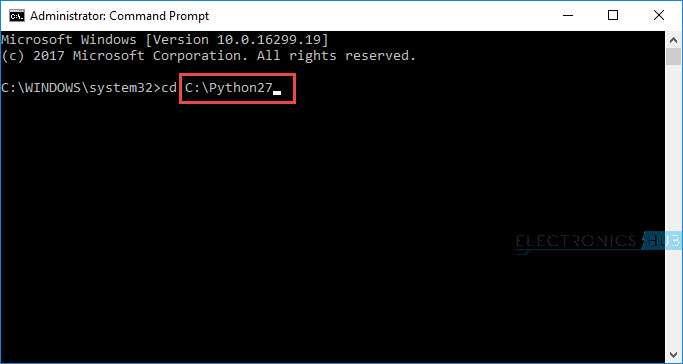
If you remember in the previous project, where we controlled an LED on Arduino using Python, we have installed Python in the directory “C:\Python27”.
Open Command Prompt with Administrator privileges and change to the directory where you have installed Python (in my case, it is C:\Python27).
If you have installed the latest version of Python, then pip (a tool for installing packages in Python) will already be installed. To check if pip is installed or not, type the following command.
pip -V
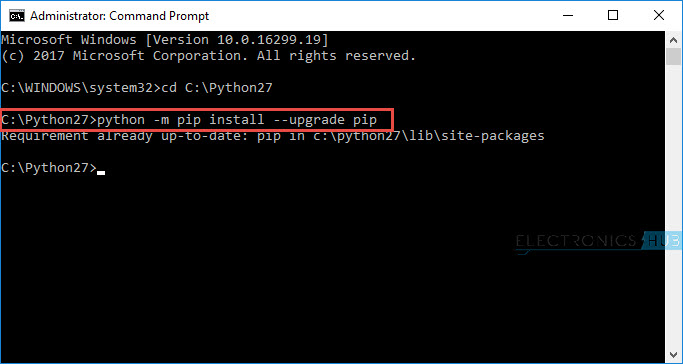
You should upgrade to the latest package of pip using the following command. If pip is already in its latest version, then ignore this step.
python -m pip install -U pip
Or
python -m pip install –upgrade pip
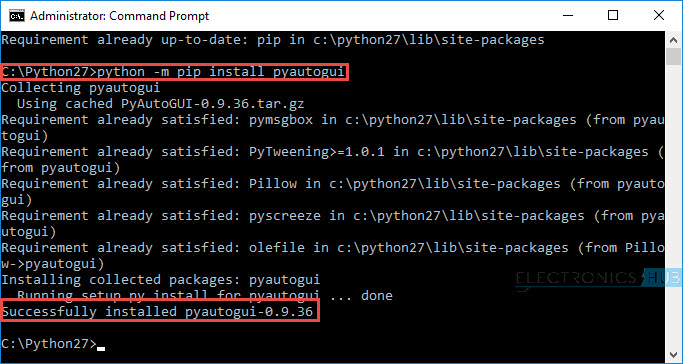
After upgrading pip, you can proceed to install PyAutoGUI. In order to install PyAutoGUI, type the following command.
python -m pip install pyautogui
Or
pip install pyautogui
Python Code
If everything goes well till now, you can proceed to write the Python Code. If you observe the Arduino Code given above, the Arduino sends out five different texts or commands through Serial Port upon detecting appropriate hand gestures. These commands are
- Next
- Previous
- Down
- Up
- Change