How to Remove a Stuck Drill Chuck
by toolrepair in Workshop > Tools
42615 Views, 9 Favorites, 0 Comments
How to Remove a Stuck Drill Chuck

Most drill chucks come off their drills using normal chuck removal methods, like the chuck removal steps we offer in our article, "How to Remove a Drill Chuck."

However, drill chucks can be difficult to remove for a number reasons that require an extra trick or two to get the job done.
The steps and suggestions below explain how to remove keyless drill chucks from drills with broken gear boxes. We also explain how to remove sticky chuck screws.
See this article's repair video for a professional demonstration!
How to Separate a Chuck Collar from a Drill Chuck
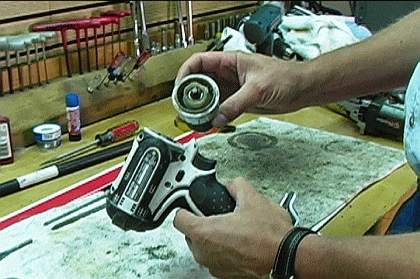
Our example drill in this article came into the shop with its gearbox already broken.
In cases like these, drill chucks usually come off the drill with the arbor shaft and chuck collar still attached to the chuck. The first step to remove the chuck then is to first take its collar off.
Use a Pair of Snap Ring Pliers to Remove the Snap Ring

Press the Chuck Out With a Shop Press

- Position the drill chuck collar between clam shells for support, align a punch on the chuck's arbor shaft, and then press it out.
- Pressing the arbor shaft will take the drill chuck with it, leaving the chuck's lower collar behind.
How to Remove a Drill Chuck From Its Arbor Shaft

1. Flatten the arbor shaft with a grinder and grinding wheel.
The arbor shaft must be placed into a vise in order to remove the chuck screw. The shaft will have to be made flat on at least two sides to accommodate the vise.
Be careful to avoid touching the arbor shaft while it is still hot.
Title This StepSecure the Flattened Chuck Spindle in a Vise and Unscrew the Chuck Screw

- Remember that chuck screws are reverse threaded, so you must turn them in the direction of the drill's forward position.
- Because chuck screws are usually held into position with loctite, it often takes a lot of force to turn them.
Tighten a Large Allen Key Into the Chuck

Turn the Allen Key to Spin the Chuck Off the Arbor Shaft

Unscrewing the chuck is easy with the help of a "cheater bar."
Tips to Remove a Stuck Chuck Screw

Follow the professional repair tips below for to remove a stuck chuck screw.
Tip #1- Heat the arbor shaft.
Use a blowtorch on the arbor shaft to loosen up the loctite on the chuck screw. This is the best way to loosen the screw in most cases.

Really tough chuck screws may require more than one heating.
Tip #2- Use a wrench for leverage.
If the screwdriver you're using to turn the chuck screw has a square shaft, you can attach a small wrench to it for some extra leverage.

Tip #3- Strike the chuck screw with a screwdriver and hammer.
Carefully position your screwdriver on the chuck screw and gently strike its end with a hammer to loosen the screw's loctite bond.
This should be considered a last-resort method since it risks destroying the chuck if done incorrectly.
Conclusion
To get started with your home tool repair, visit our Drill Parts page to find your drill model's replacement drill chuck.
We're dedicated here at eReplacementParts.com to get tool owners the parts and know-how they need that will save them time and money.
Visit us again for professional tips that will get you past the snags in your own repairs!