How to Design Your Own Back Board for a Trash Can
by nono in Workshop > 3D Printing
127 Views, 0 Favorites, 0 Comments
How to Design Your Own Back Board for a Trash Can

.jpg)
.png)


So I tried to think of something that would make throwing away trash easier and more fun. I decided on designing a backboard for a trash can. This instructable will show you how to design your own and feel free to be creative and customize yours. This design is 5 in x 4.466 in. x 1.300 in.
Supplies
Tools needed:
Computer or laptop
3D design software (Preferably Tinkercad because that is what I used)
Optional:
Mouse (A mouse can make designing easier and more convenient)
Sizing Up Your Cube

.png)
.png)
To start change the grid to inches by selecting the edit grid button and selecting inches. Now you can place your cube onto the grid. Next, you change the length of the cube to 4.466 in. and change the width to 5 in.. After this is done you can finally change the height of the cube to 0.3 inches.
Rotating Your Cube

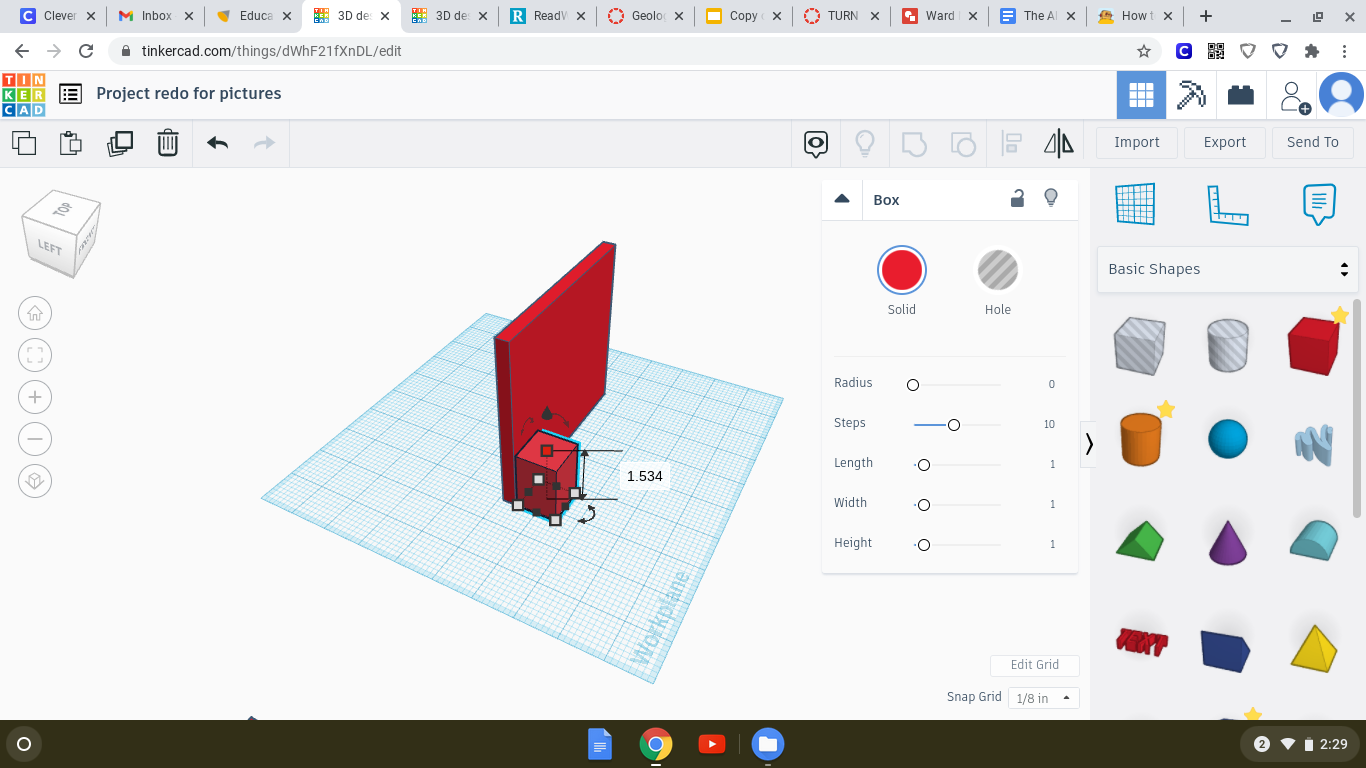
Now that you have your object sized upright you rotate it 90 degrees so that it is up and down.
Starting Your Clips for the Back


We are now almost done with the design! You place a cube on the back surface of your backboard. After that is done you place a new cube 1.526 in. x 0.405 in.. Now you set a half-circle on the top of your cube and make that half-circle the same dimensions of the other cube.
Finishing the Clips
.png)

.png)
Now to finish the clips you group the half circle and cube together and make it a hole. After you made it a hole you place that hole into that cube. Once that is inside of the cube you group it and your clips are done.
Copying and Pasting the Next Three Clips


.png)

Now that you have that clip you can click copy and paste twice and center the next two clips. Now you are done with the clips and can now move on to the text.
Adding the Text and Finishing the Design
.png)
.png)

Now you place the text onto the grid and this is where you can customize your design because you can change what the text says for yours. Once you change your text to what you want you change it to a hole and you want to rotate your text and raise it to where you want. once you do that you finish the design by putting the surface tool to the front of the design and lowering the text into the design as far as you want.
Finished!
Great job! You hopefully made the design without problems. If you changed the text for yours than great but if not thats great too. I hope you enjoyed designing this!