How to Draw Graffiti Style

Hello! This is Simon here to show some basics of drawing bubble letters in graffiti style. The most important part of this tutorial is not only learning the basics of graffiti style but inspiring yourself to further explore this art and come up with your own style. Here we will be basing it off multiple graffiti styles found on the internet which is a good way to start. However, after choosing your favorite techniques from different drawing styles you should try to develop your own. Let us start! Below are the materials you will need.
Supplies
1. Paper
2. Pencil
3. Thin Marker
4. Thick Marker
5. White marker (if you don't have you can use a different method later explained)
6. Two different colored markers
7. Rulers (Optional)
8. Pen (Optional)
Graffiti Alphabet


Find a graffiti alphabet on the internet by searching "Graffiti alphabet". Choose the one you like a lot and find it easy to do.
Pencil First

Before drawing, choose a word to your liking. I chose Simón, which is my name.
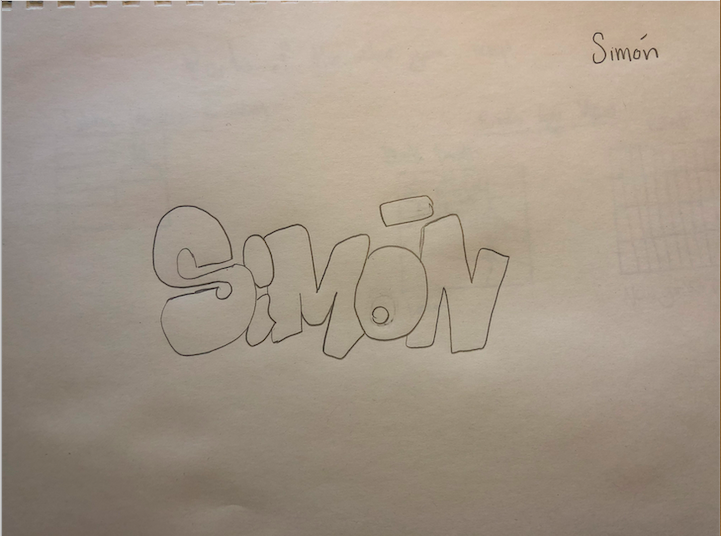
Let us start drawing! Once you have chosen a word, look at the graffiti alphabet and start putting together the letters from the alphabet into your name. Do this in pencil first. Feel free to add small details if you like and erase if you come across a mistake.
Outline With Marker

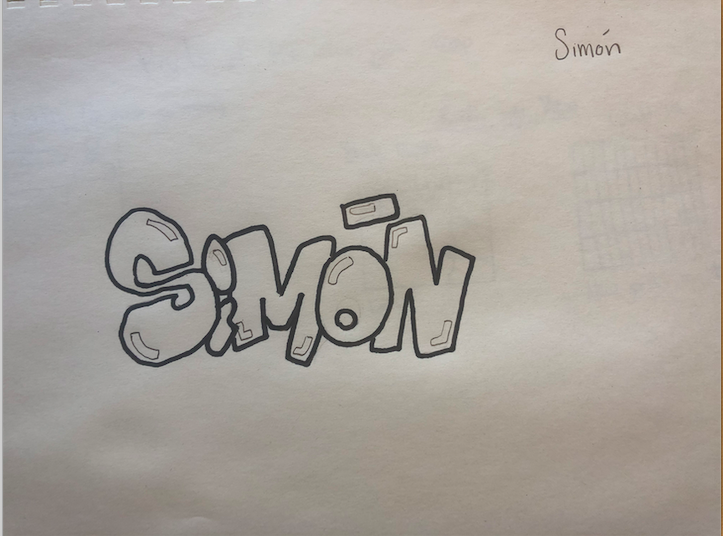
After you have finished drawing the letters with your pencil, grab your thin marker or the material you have and carefully go over the pencil with this marker. This will make the word more visible.
If you come across any pencil marks after finished outlining with the marker, go over the market and word with an eraser to get rid of these.
Shining Effect

Before filling the word in with color, you should add a shining effect. These are little bubble-like shapes that go in the corners of each of the letters. DO THIS WITH PENCIL!! After you color in the letters, you will use your white marker if you have one and fill these spaces in with the white. If you don't have a white marker you will just leave those spaces blank.
Color In!

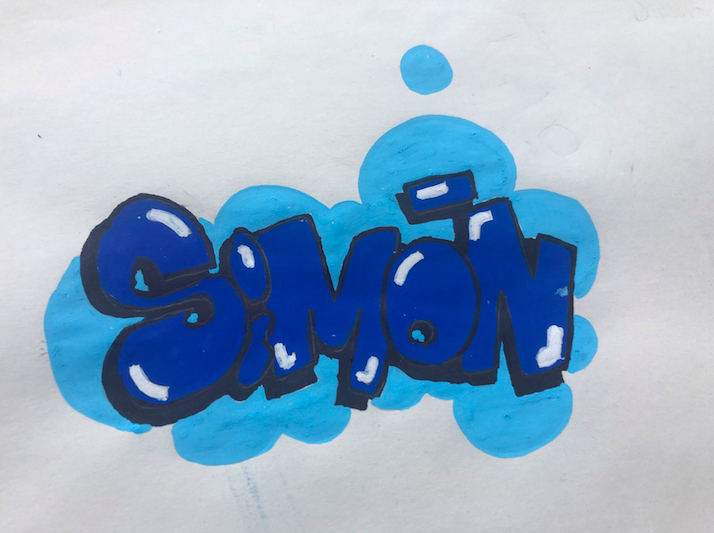
After everything is ready, choose one of your colors and fill the letters in! Be careful to not fill in the shining effect bubbles.
After this is done, grab your white marker and fill in those shining bubbles you drew before. Erase the old pencil marks with our eraser. If you do not have a white marker, simply leave them like that and erase the old pencil marks/
3D Effect/shadow

This is a very important step. This makes the letters pop out more and make them more engaging. The first part of this is to choose a light source. You should imagine a light source shining on the letters, creating a shadow from the letters. As you can see in my drawing I chose the light source to be from the top right. This means that the 3D effect of the letter will be on the left and bottom of the letters. After you have established this, try to be as detailed and precise as possible and make those letters pop out! (Use your thick marker for this if you have)
Background!

After you have added that 3D effect, the next step is another form of making your letters pop out more. Grab your pencil and outline a background around the letters. In the drawing, I chose to make mine look like circles/bubbles. After you have outlined your background, grab your 2nd color and fill it in! Be careful, as you don't want to go over your letters. Remember, be creative!
Done!

You have finished! Now, sign your drawing and take a photo. The next step is to explore graffiti on the internet and see what they use as the background, effects, colors, size & letters, and words! Try to come up with your own style and be creative! This can lead to not only drawing letters but drawing characters and faces.