How to Make Colorful Bookmarks
by thunderlaser-nolan in Workshop > Laser Cutting
11 Views, 0 Favorites, 0 Comments
How to Make Colorful Bookmarks

Let’s make a set of laser cutting paperclip-style bookmarks that are both fun and practical! These colorful little bookmarks are perfect for adding personality to your books, journals, or study notes.
Great for students, teachers, or book lovers, these laser cut designs are easy to customize and make reading or organizing pages more enjoyable. Whether you’re using them in the classroom, at home, or as cute gifts, they’re sure to brighten up anyone’s day.
Start your laser cutting project today and add a splash of creativity to every page you mark!
Supplies
Machine Used
Thunder Bolt 30W
Material Needed
Colorful paper
Settings
- Cutting
- Speed:10mm/s
- Max Power:70%
- Min Power:10%
Downloads
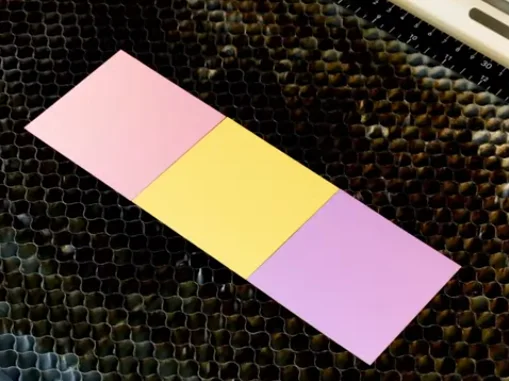
Place the Colorful Paper on the Laser Honeycomb Bed
Choose flat sheets of paper and place them gently on the laser honeycomb bed without wrinkling them.
Tips:
Flat magnets or painters tape are great for holding colorful paper in place!
Before your work begins
- Verify the lens is clean or there's no problem in the laser.
- Make sure the exhaust fan is working well.
- Ensure the air assist is on.
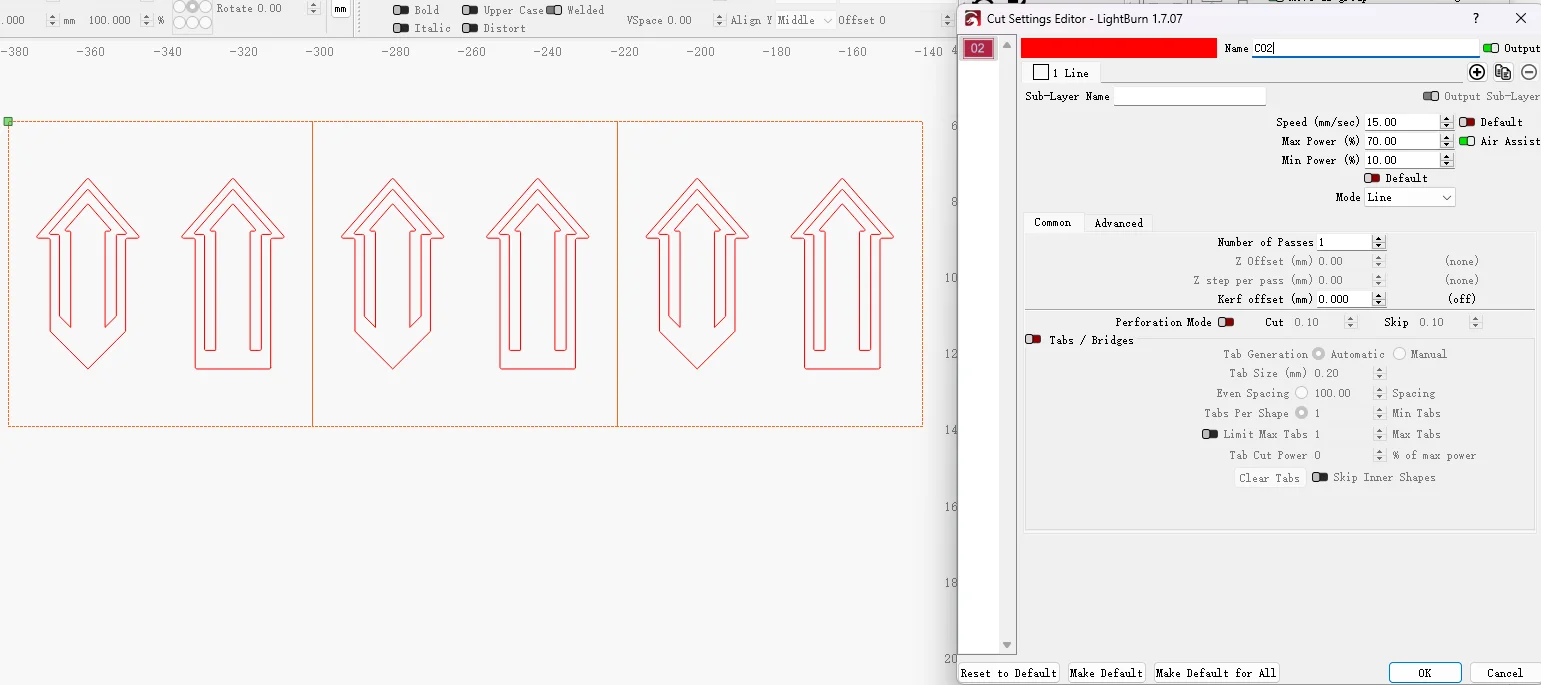
Open the BookmarksFile and Check the Laser Paper Settings
Import the bookmark design in LightBurn and check if your paper size is large enough. Double-check everything, and ensure that the parameters are set correctly to achieve the ideal laser cutting bookmarks.
For the laser cutting layers, pay extra attention to the minimum power setting. If the min power is too low, it will cause the cutting corners will not cut through; if the min power is too high, the laser cutting will be bad at the corners.
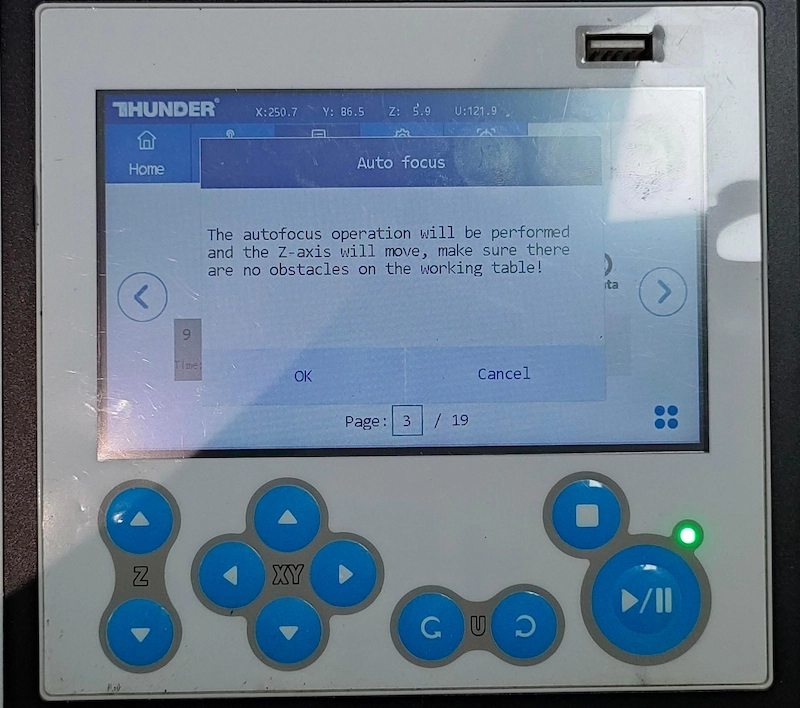
Focus on the Paper
Without focusing, your outcomes may fall short of expectations. So before starting, make sure you’ve rightly focused.
For focusing, you have two options: Auto Focus, which is simple—just press the AF button on the Thunder Bolt screen. If you prefer manual focus, adjust the z-axis height to ensure the focal stick touches the paper surface.
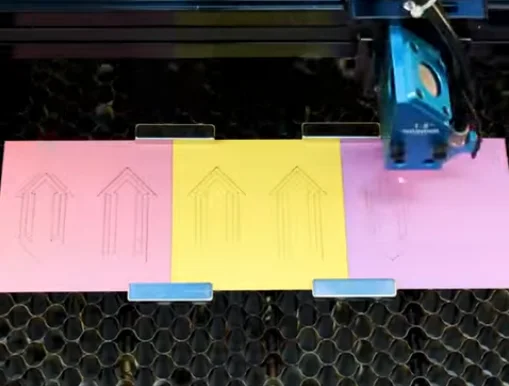
Frame the Bookmarks Design and Start Laser Cutting
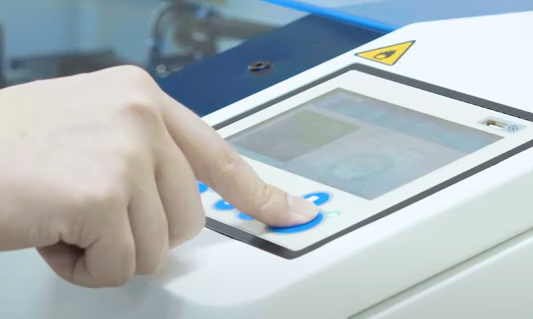
When you click “Frame”, the red light will display the laser cutting area. This is a safe process, and the frame will align with the paper.
Once aligned, simply press “Start” to begin the paper laser cutting with the Thunder Bolt!
Frame the Bookmarks Design and Start Laser Cutting
To avoid any issues, carefully monitor the laser cutting, especially when unusual conditions like alarms arise.
Considering the laser cutting energy, for safety reasons, we advise against staring directly at the cutting process, even with the laser door closed.
Complete the Colorful Bookmarks Cutting
When the laser cutting colorful bookmark is completed, it’s time to get it out! No special treatment required, just take it out and lightly wipe the dust off the surface.
TIPs:Paint tape is a great tool for quick and easy cleanup of paper scraps from laser honeycomb bed!

Come and Try!
Easy to design, quick to cut, and lightweight to package, these laser cutting colorful bookmarks are perfect for craft fairs, online shops, classroom gifts, or as thoughtful tokens at events. With the flexibility of laser cutting, you can explore endless shapes, seasonal vibes, or custom touches that make each piece feel extra personal.
Whether you’re crafting for yourself, your customers, or your community, these cheerful bookmarks are more than just accessories—they’re a simple way to turn creativity into connection, and perhaps even spark your next favorite side hustle.