How to Make a Bulgarian Shevitsa Necklace
by eliscety in Craft > Jewelry
642 Views, 22 Favorites, 0 Comments
How to Make a Bulgarian Shevitsa Necklace


It's been a long time since I showed you how to create something.This jewelry contest inspired me to show you how to make a traditional embroidered Bulgarian Shevitsa necklace.I will admit it takes quite some time to make but the end result is so worth it.It's the perfect accessorie to wear or maybe even make as a gift.The history of the Bulgarian Shevitsa is really interesting.Each region in Bulgaria has a unique Shevitsa design and you can see it in the traditional clothing called nosiya.
Gather your supplies and let's get started!
Supplies


- A needle
- An embroidery hoop
- Embroidery threads
- A Shevitsa pattern
- Scissors
- Clamps
- Chain
- A base for the necklace
- Cardboard
- Hot glue
- Embroidery fabric
- Wool
Cross Stitch


Start out by putting your embroidery fabric to the embroidery hoop.Next,take the red embroidery thread and separate it so that you have two strands.Thread the two strands through your needle and begin the embroidering process.
The first stitch we will be making is a classic cross stitch.Imagine a square and follow these steps:
- Bring the needle up at the bottom left corner. Leave a tail an inch or two long on the back and tie it up so that it doesn't move
- Bring the needle down at the top right corner
- Bring the needle up at the bottom right corner
- Bring the needle down at the top left corner
Congrats! You learned how to make a cross stitch.You can print out your pattern or follow it from the computer screen like I did.Continue making the next cross stitches according to your pattern.
The Next Cross Stitches


In my pattern the next stitch was underneath the first one.Follow the same steps here,too.Up at the bottom left corner,down at the top right,up and the top left corner,down at the bottom right.
Continue Stitching


Follow the pattern and count how many stitches you have to make for the row before you move on to the next row.I had to make two stitches on the second row and three on the third.This small triangle needed to be stitched once again.
Small Square


When you are done with the first part of the pattern and need to leave some blank space between the stitched part and the next stitch just simply count how many squares there are on the pattern and bring your needle up at the right place.Make the small square and continue stitching according to the pattern.
Moving to the Left


Once you have stitched the top right side of the pattern it's pretty much the same on the left but it's mirrored.At this point I leared a few tips and tricks to make things easier.Make a couple of diagonal stitiches vertically - bring the needle up at the top right corner and down at the bottom left.Repeat this for as many stitches you have in the pattern.Then bring the needle up at the top left corner of the first stitch and bring it down at the bottom left.Repeat for the next stitches.
This way you don't have to make a cross stich one by one and you are making the process easier.
Complete the Top Right Side


Continue stitching with the same stitch and technique I described in the previous step and complete the top right side of the pattern.
Moving Clockwise

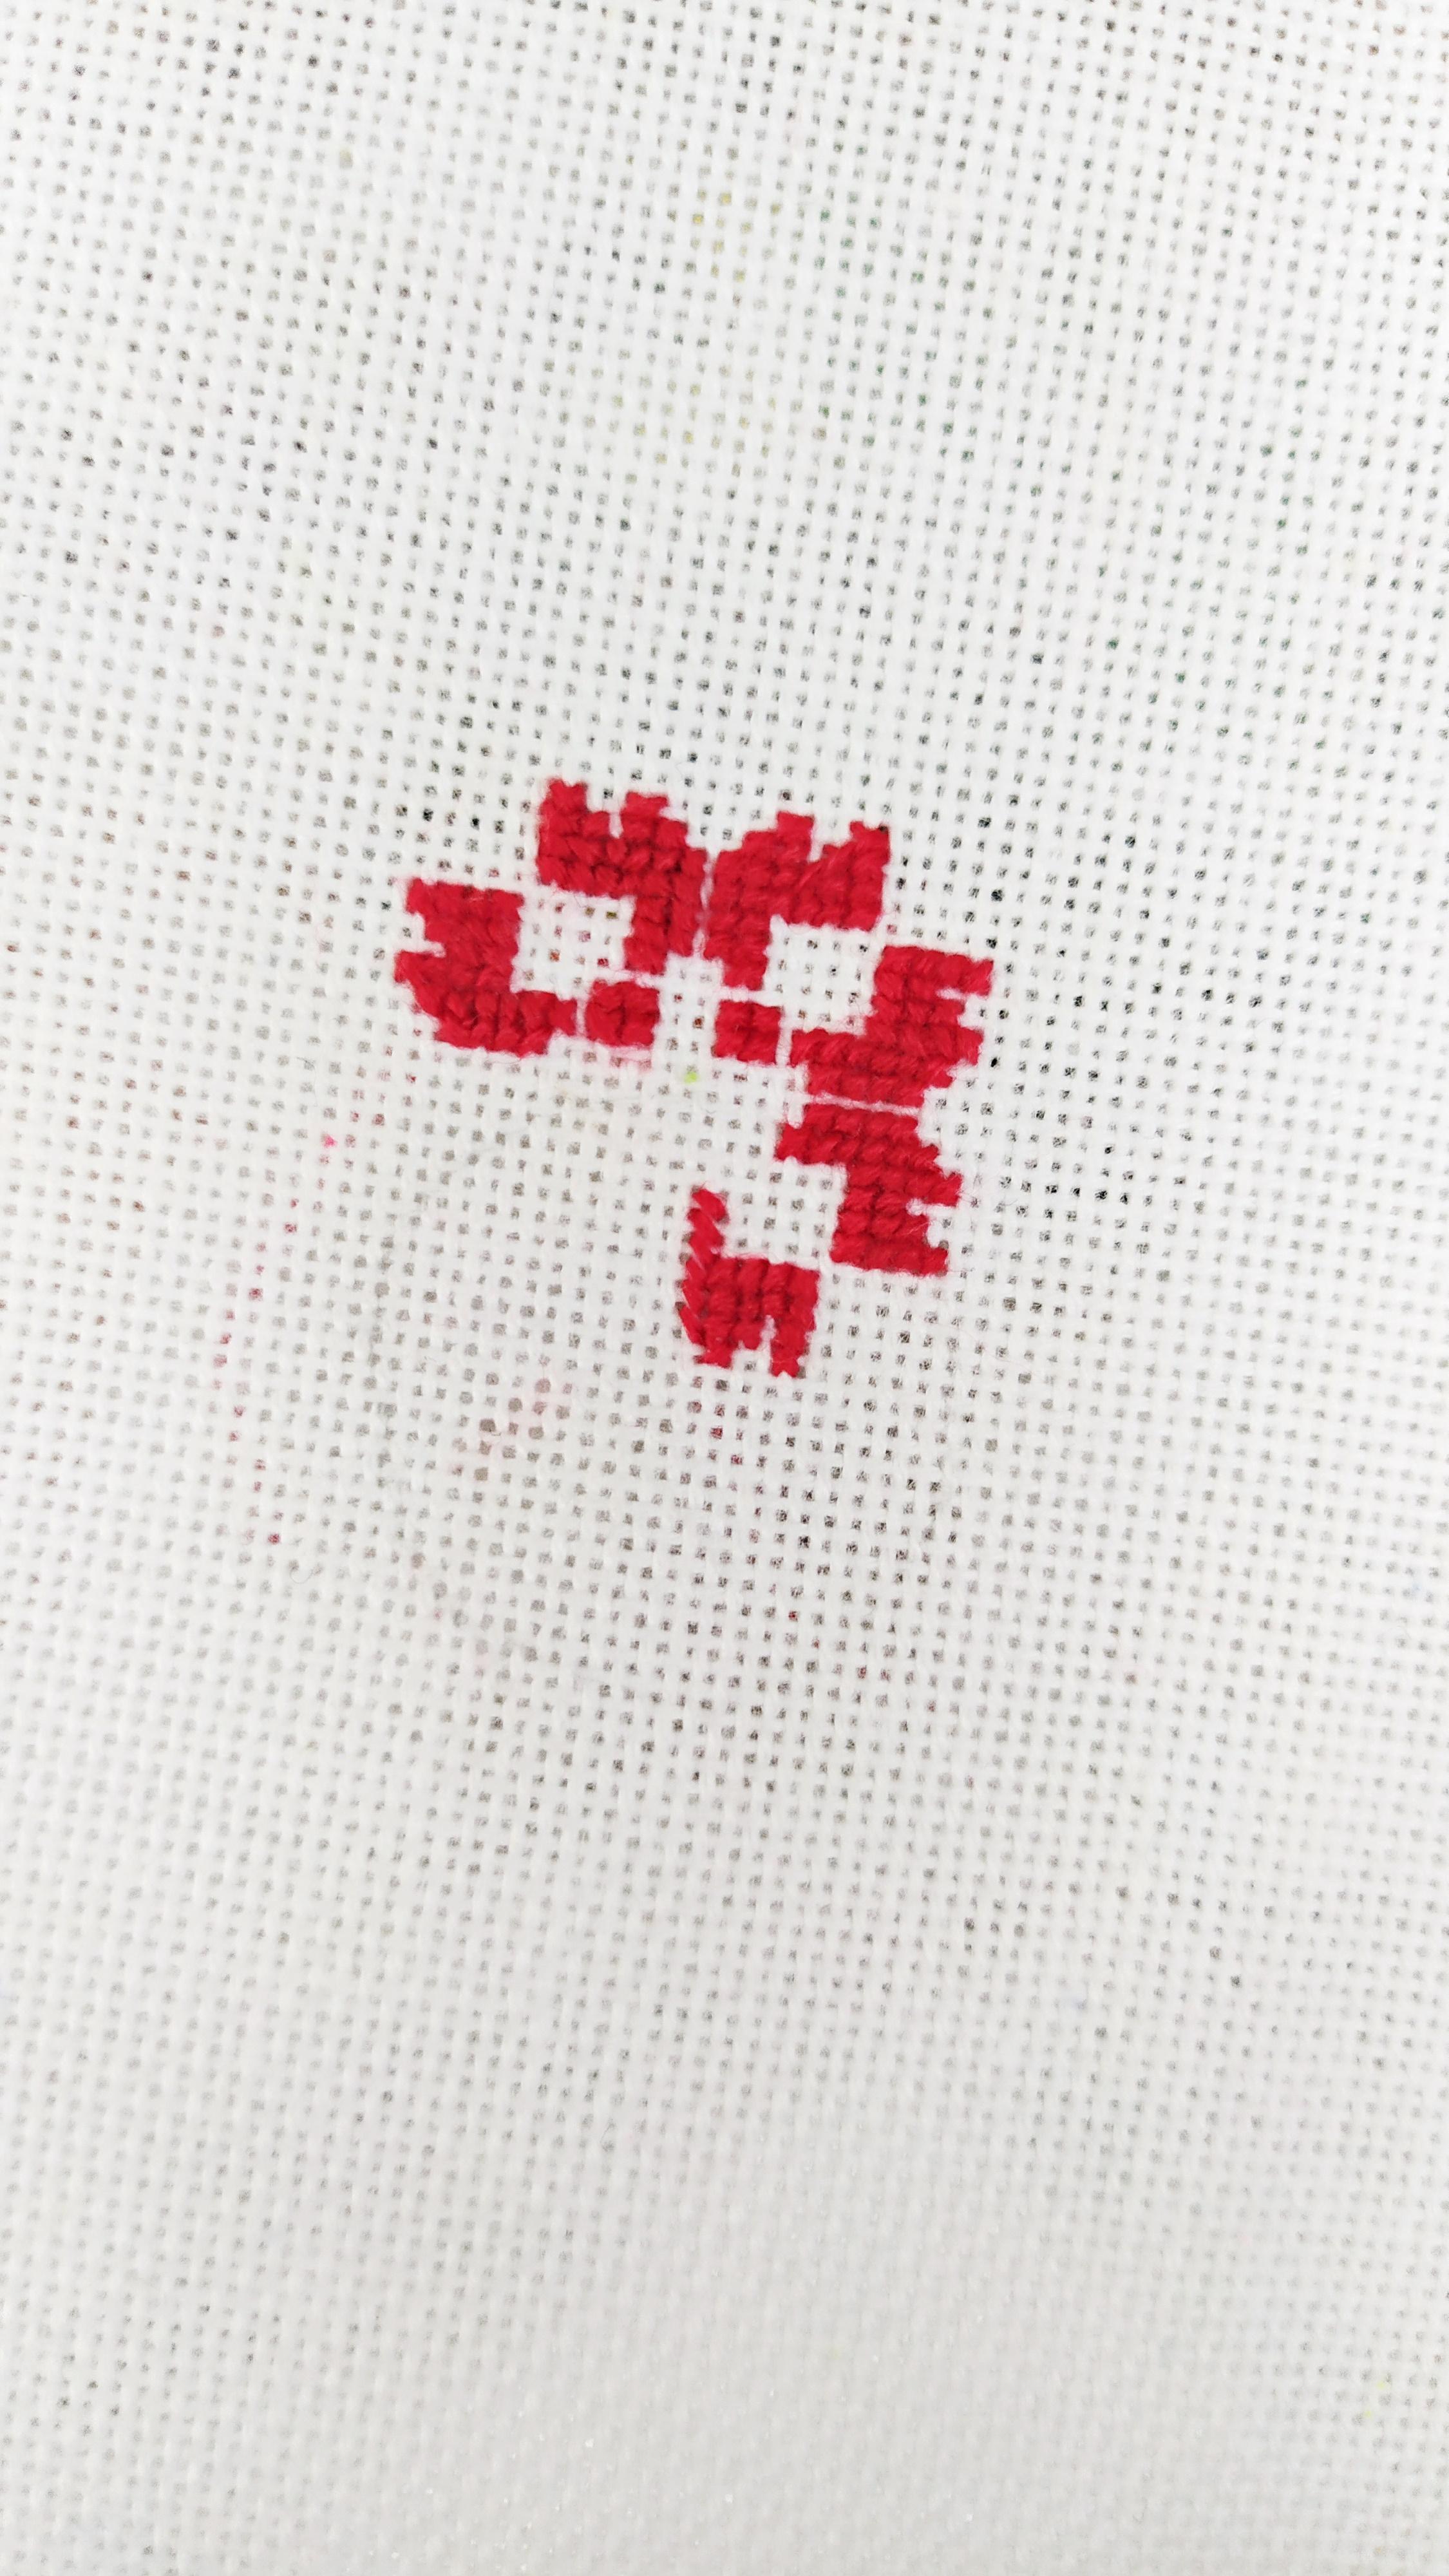


Moving clockwise,following the same instructions stitch the bottom right side.
Final Steps


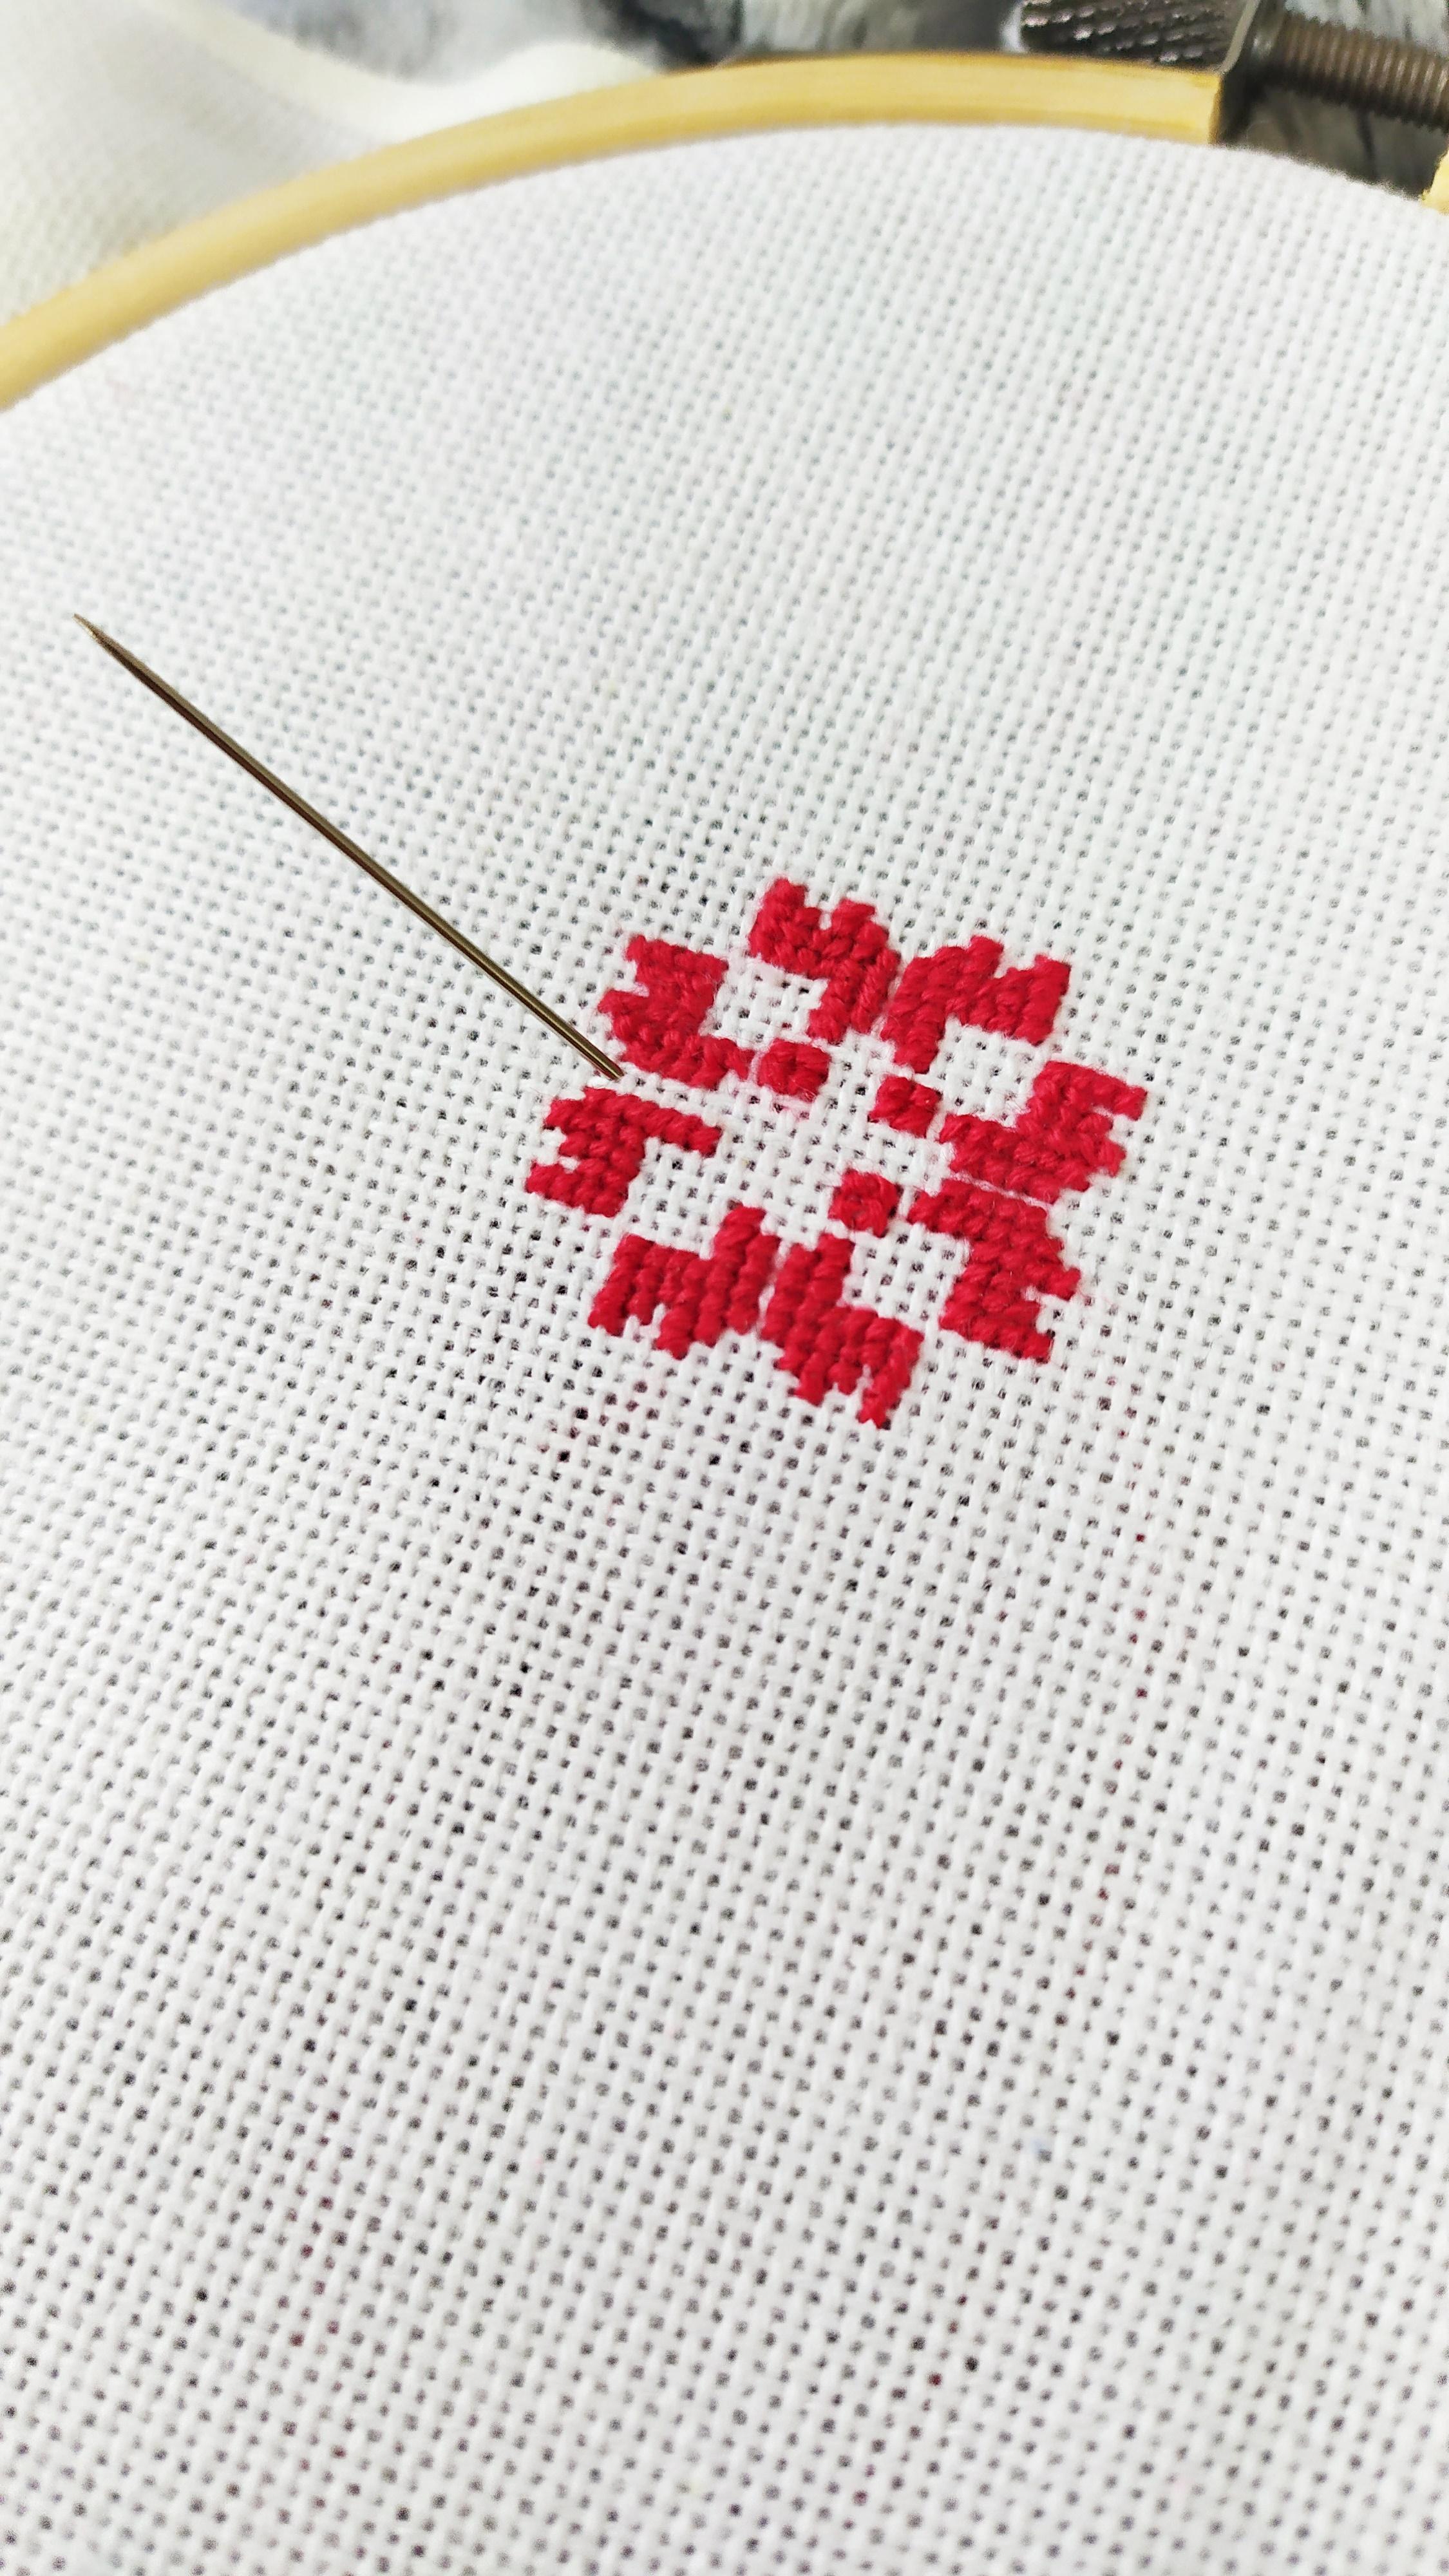
Moving onto the last part of the pattern,stitch it the same way and complete the Shevitsa.
Finishing Touches


Add the final few stitches in the middle and you are done with the red part of the Shevitsa.
Tie the Back


Tie the thread in the back so that it doesn't move.
Something Blue


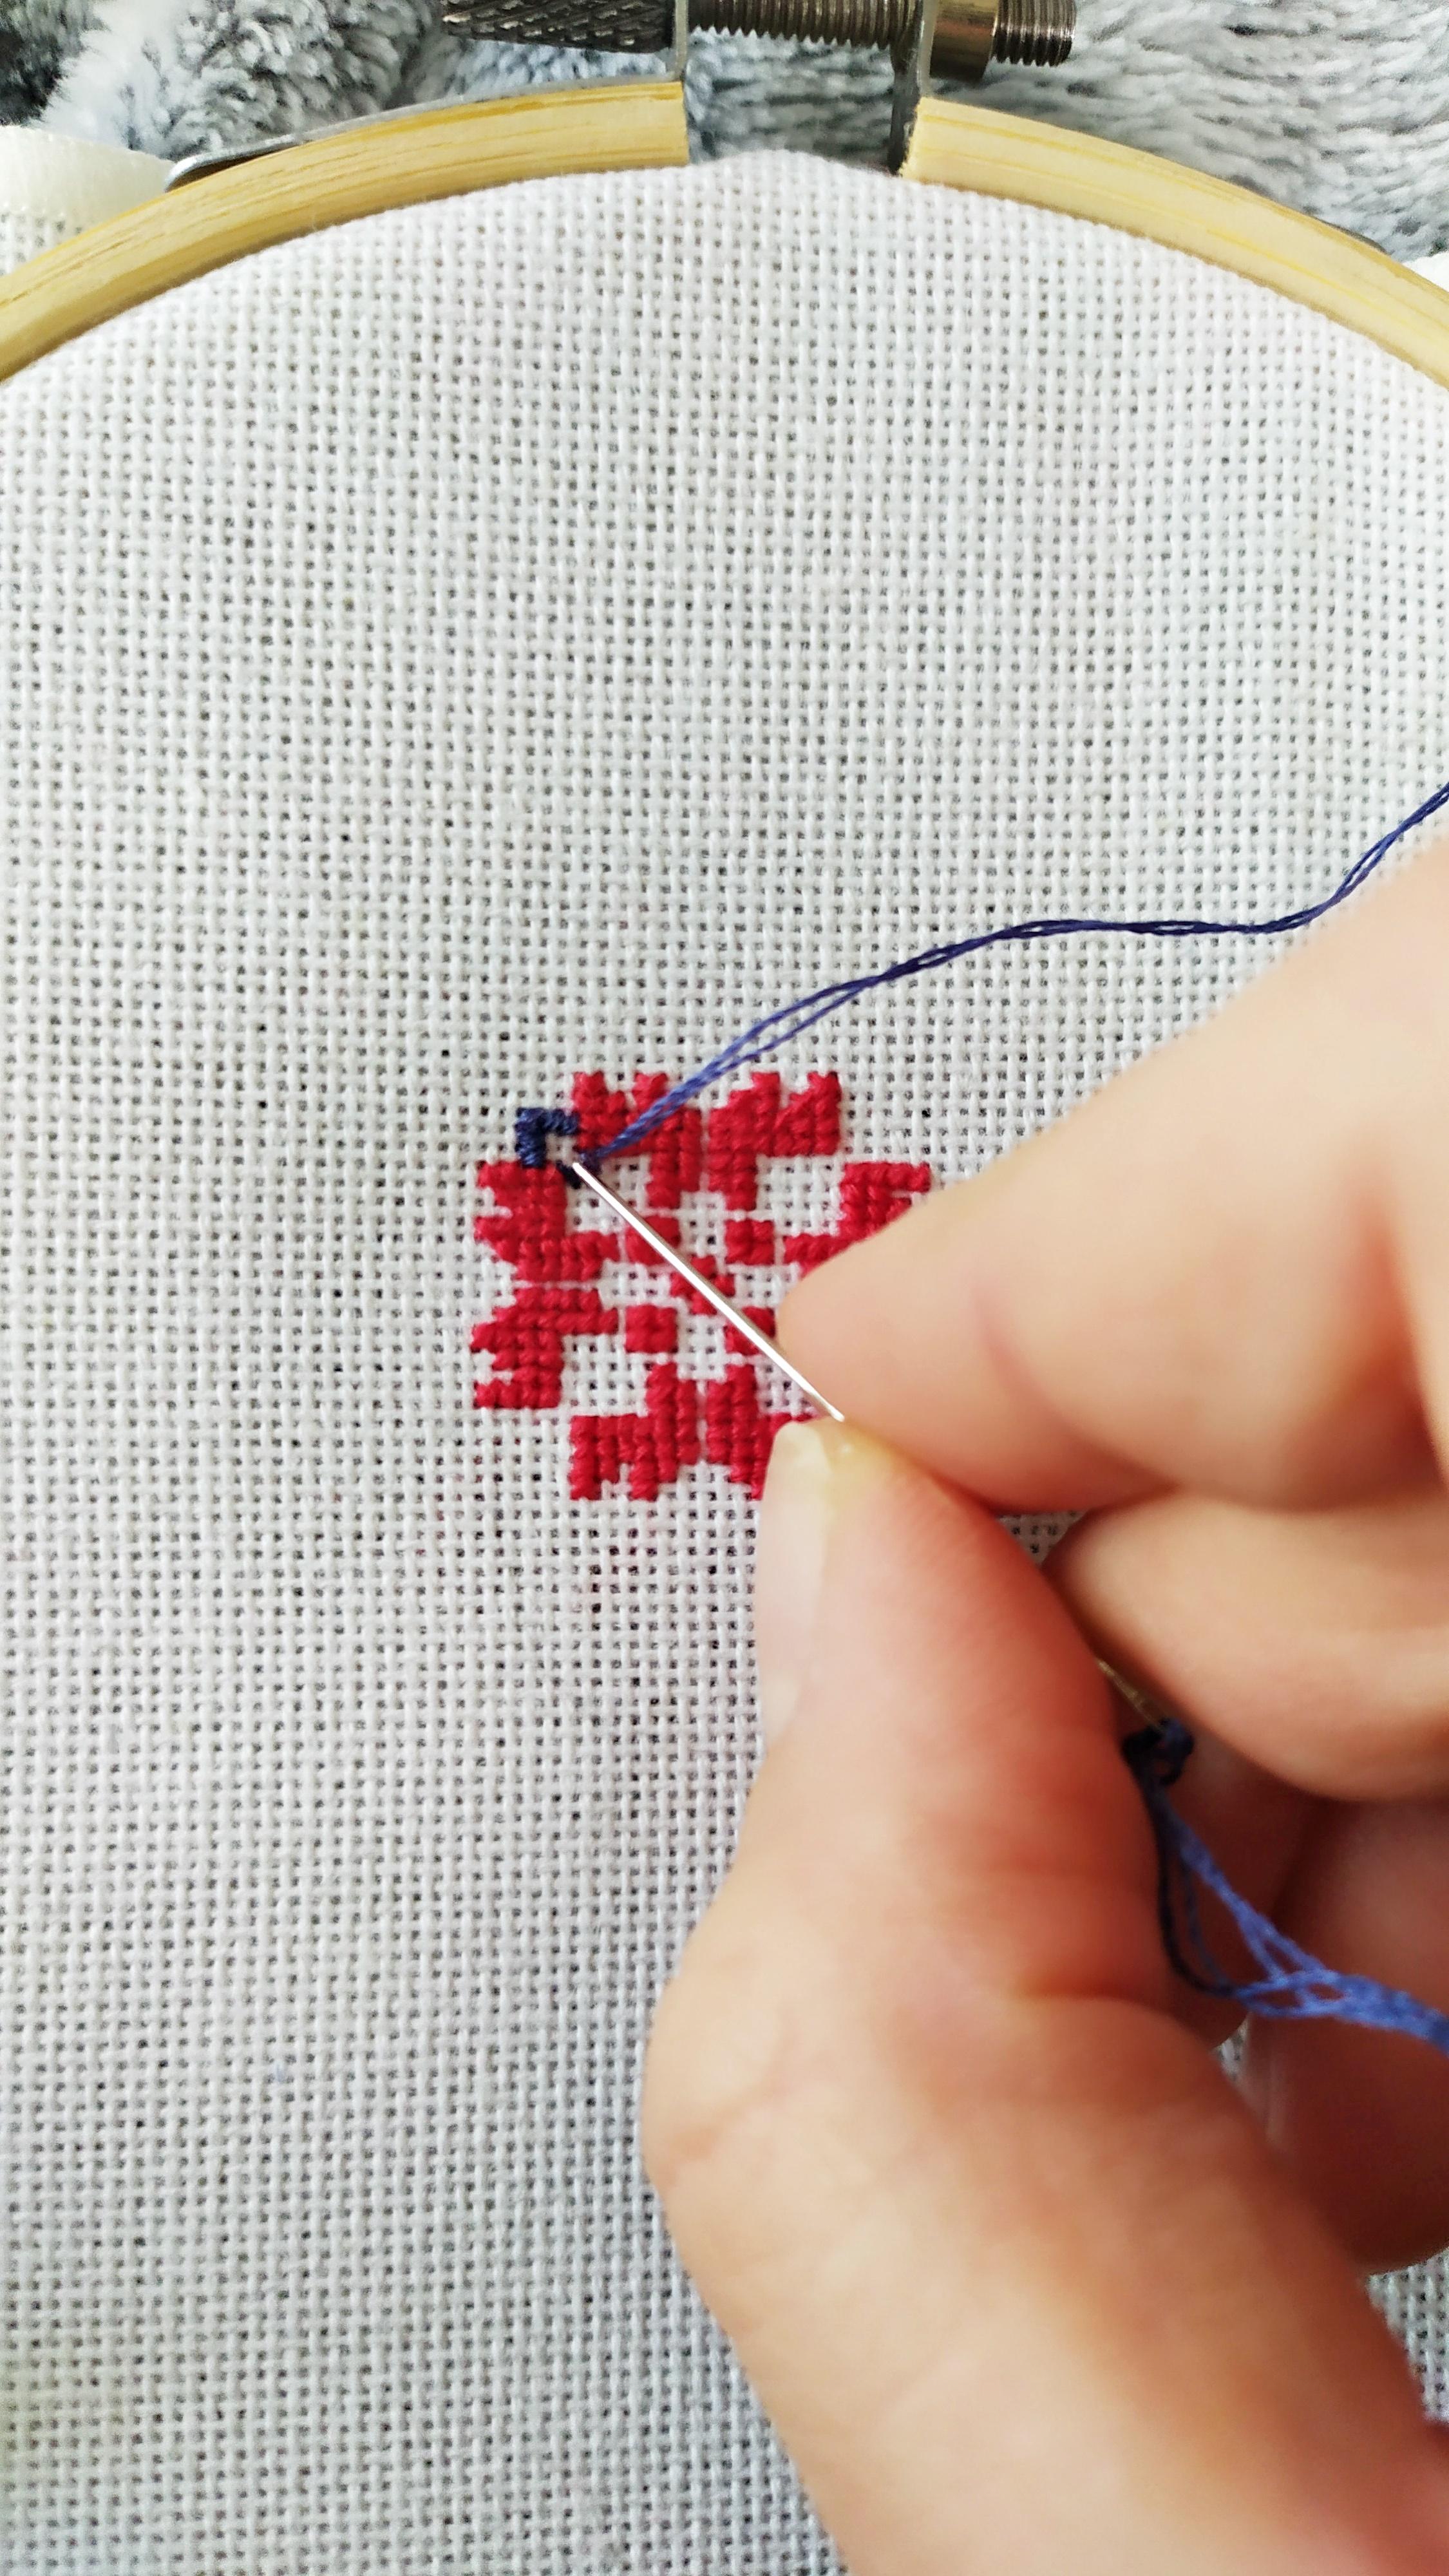


Moving on,take the blue tread and separate two strands.Thread the strands through the needle and begin stitching the top right part using the same cross stitch and tips I gave you.In this pattern the blue is on the top left and bottom right parts.When finished tie a knot in the back again.
Adding Green


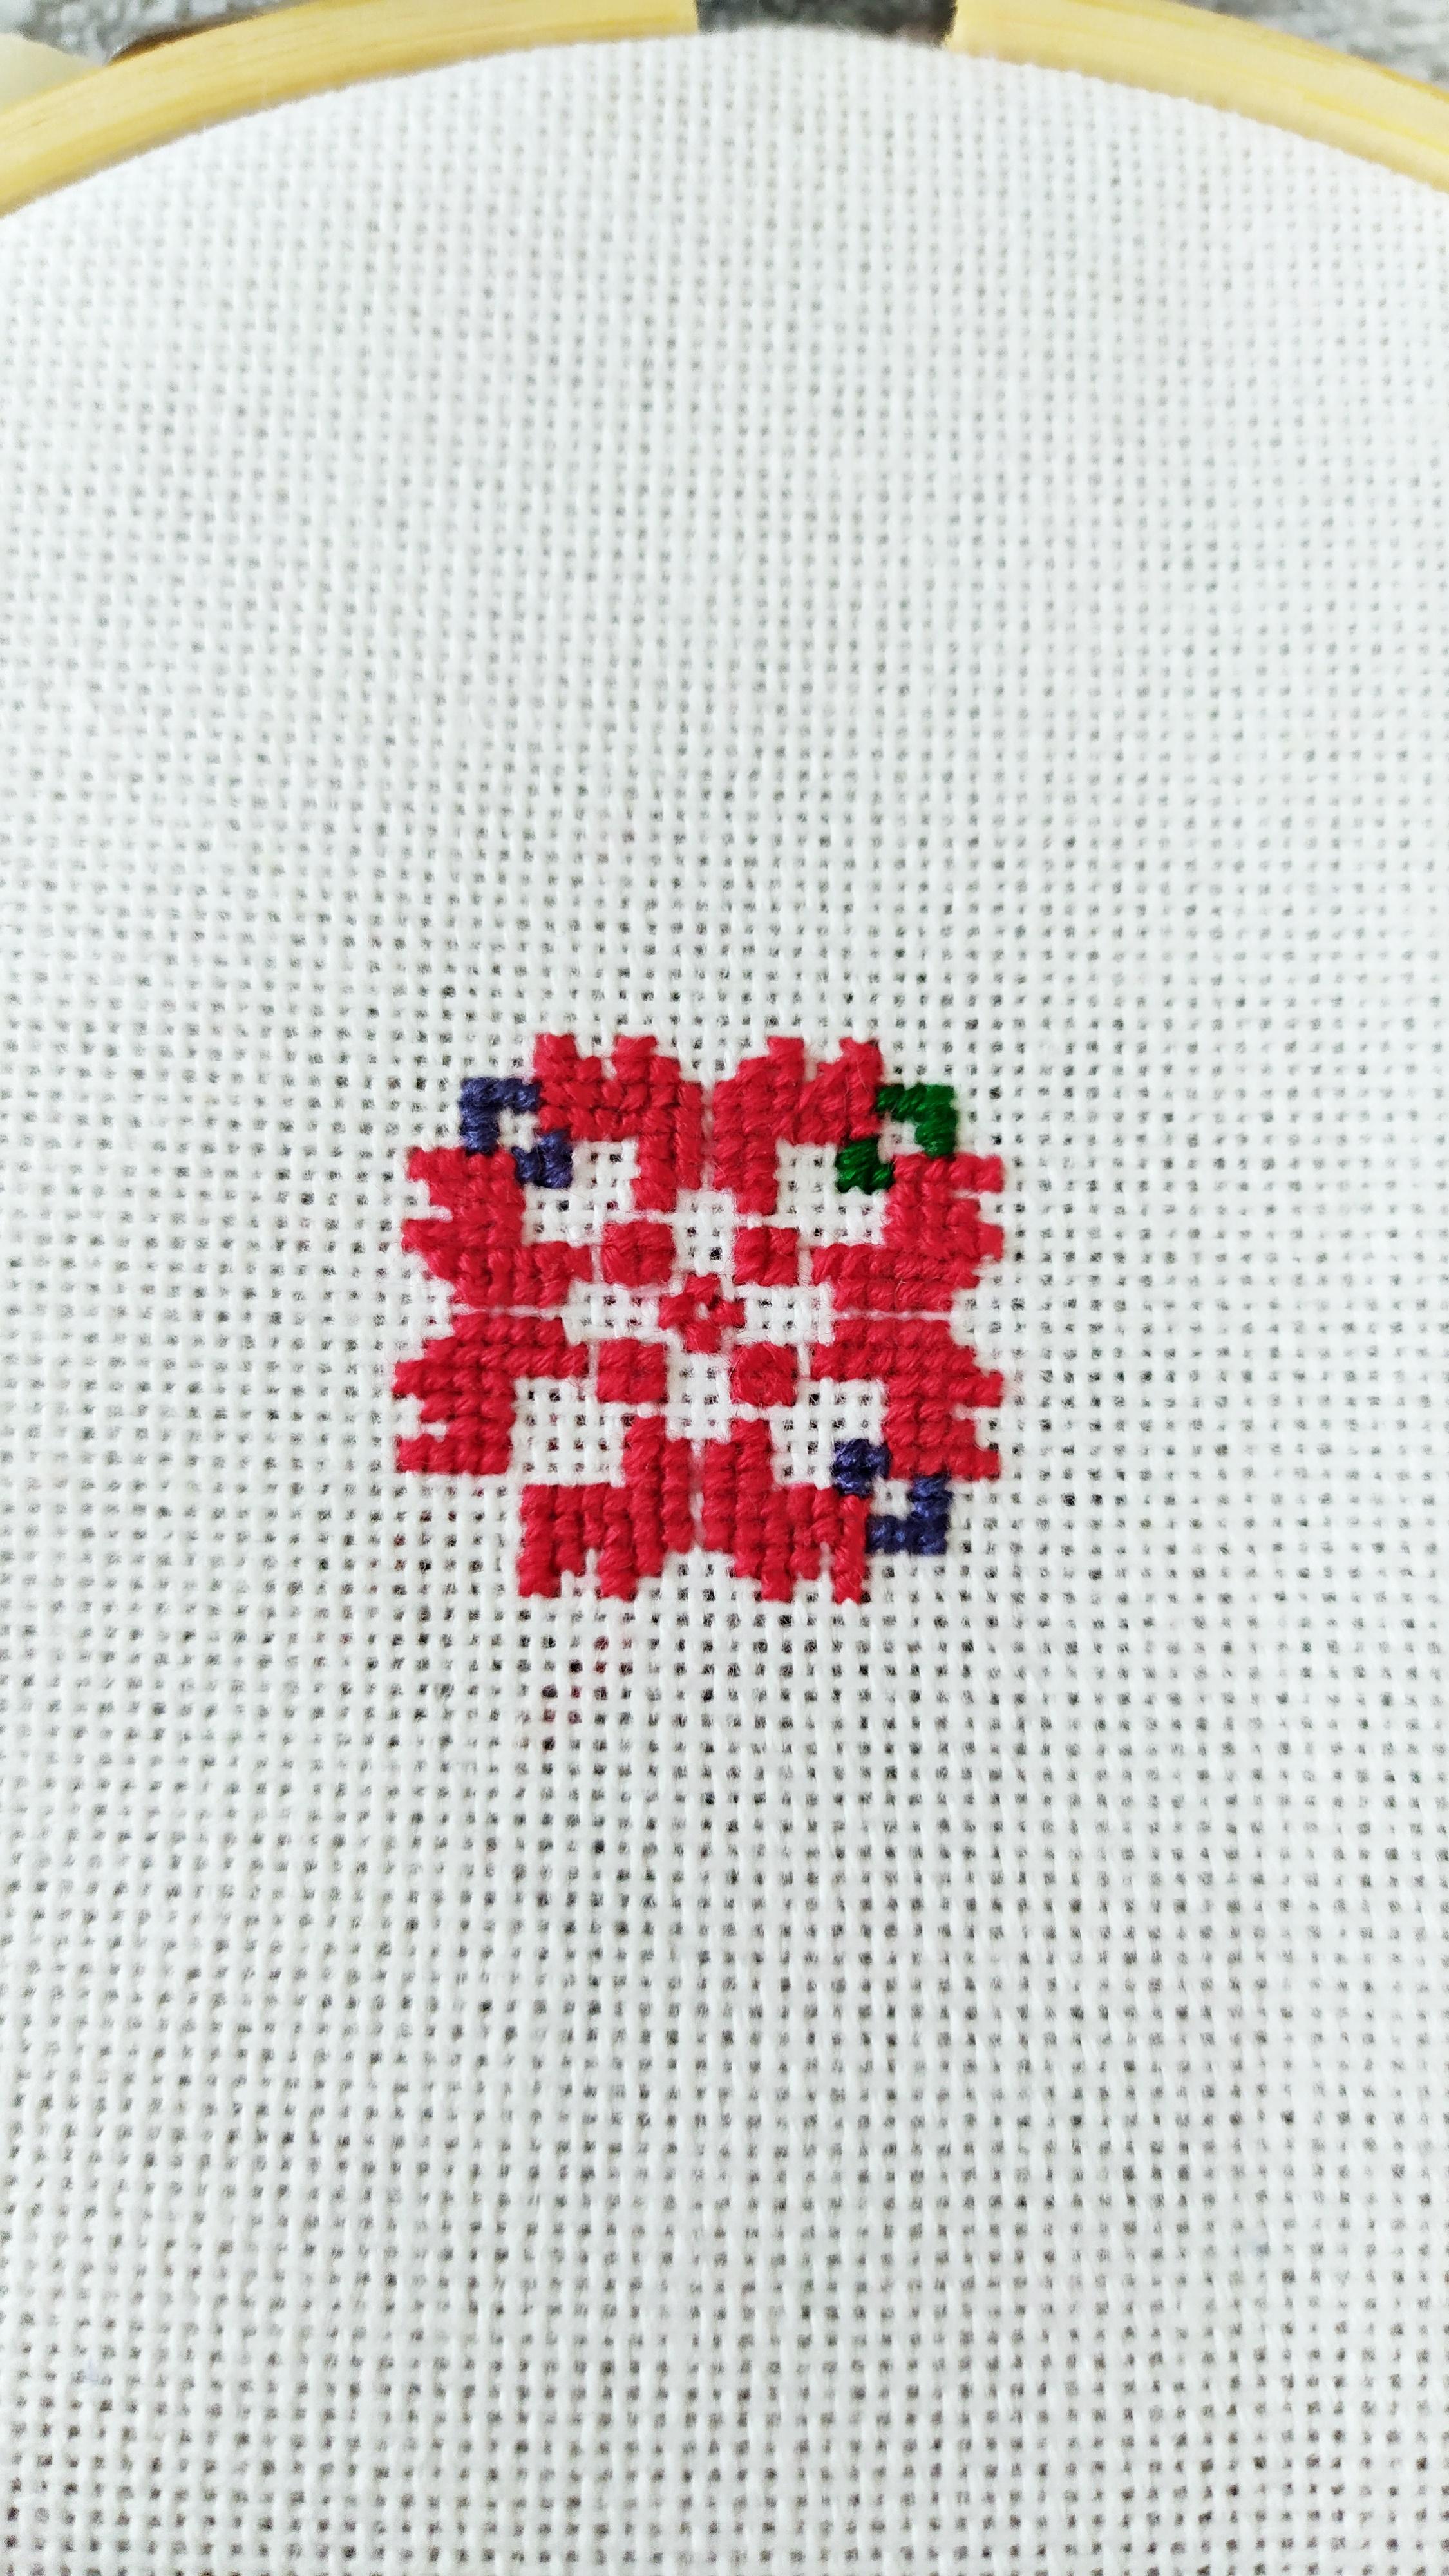


After the blue comes the green.We will be adding some green to the top right and bottom left side of the Shevitsa.Begin by separating the thread into two strands,thread it through the needle and cross stitch the number of stitches you see on the pattern.When finished tie a knot in the back and complete this part of the pattern.
Yellow


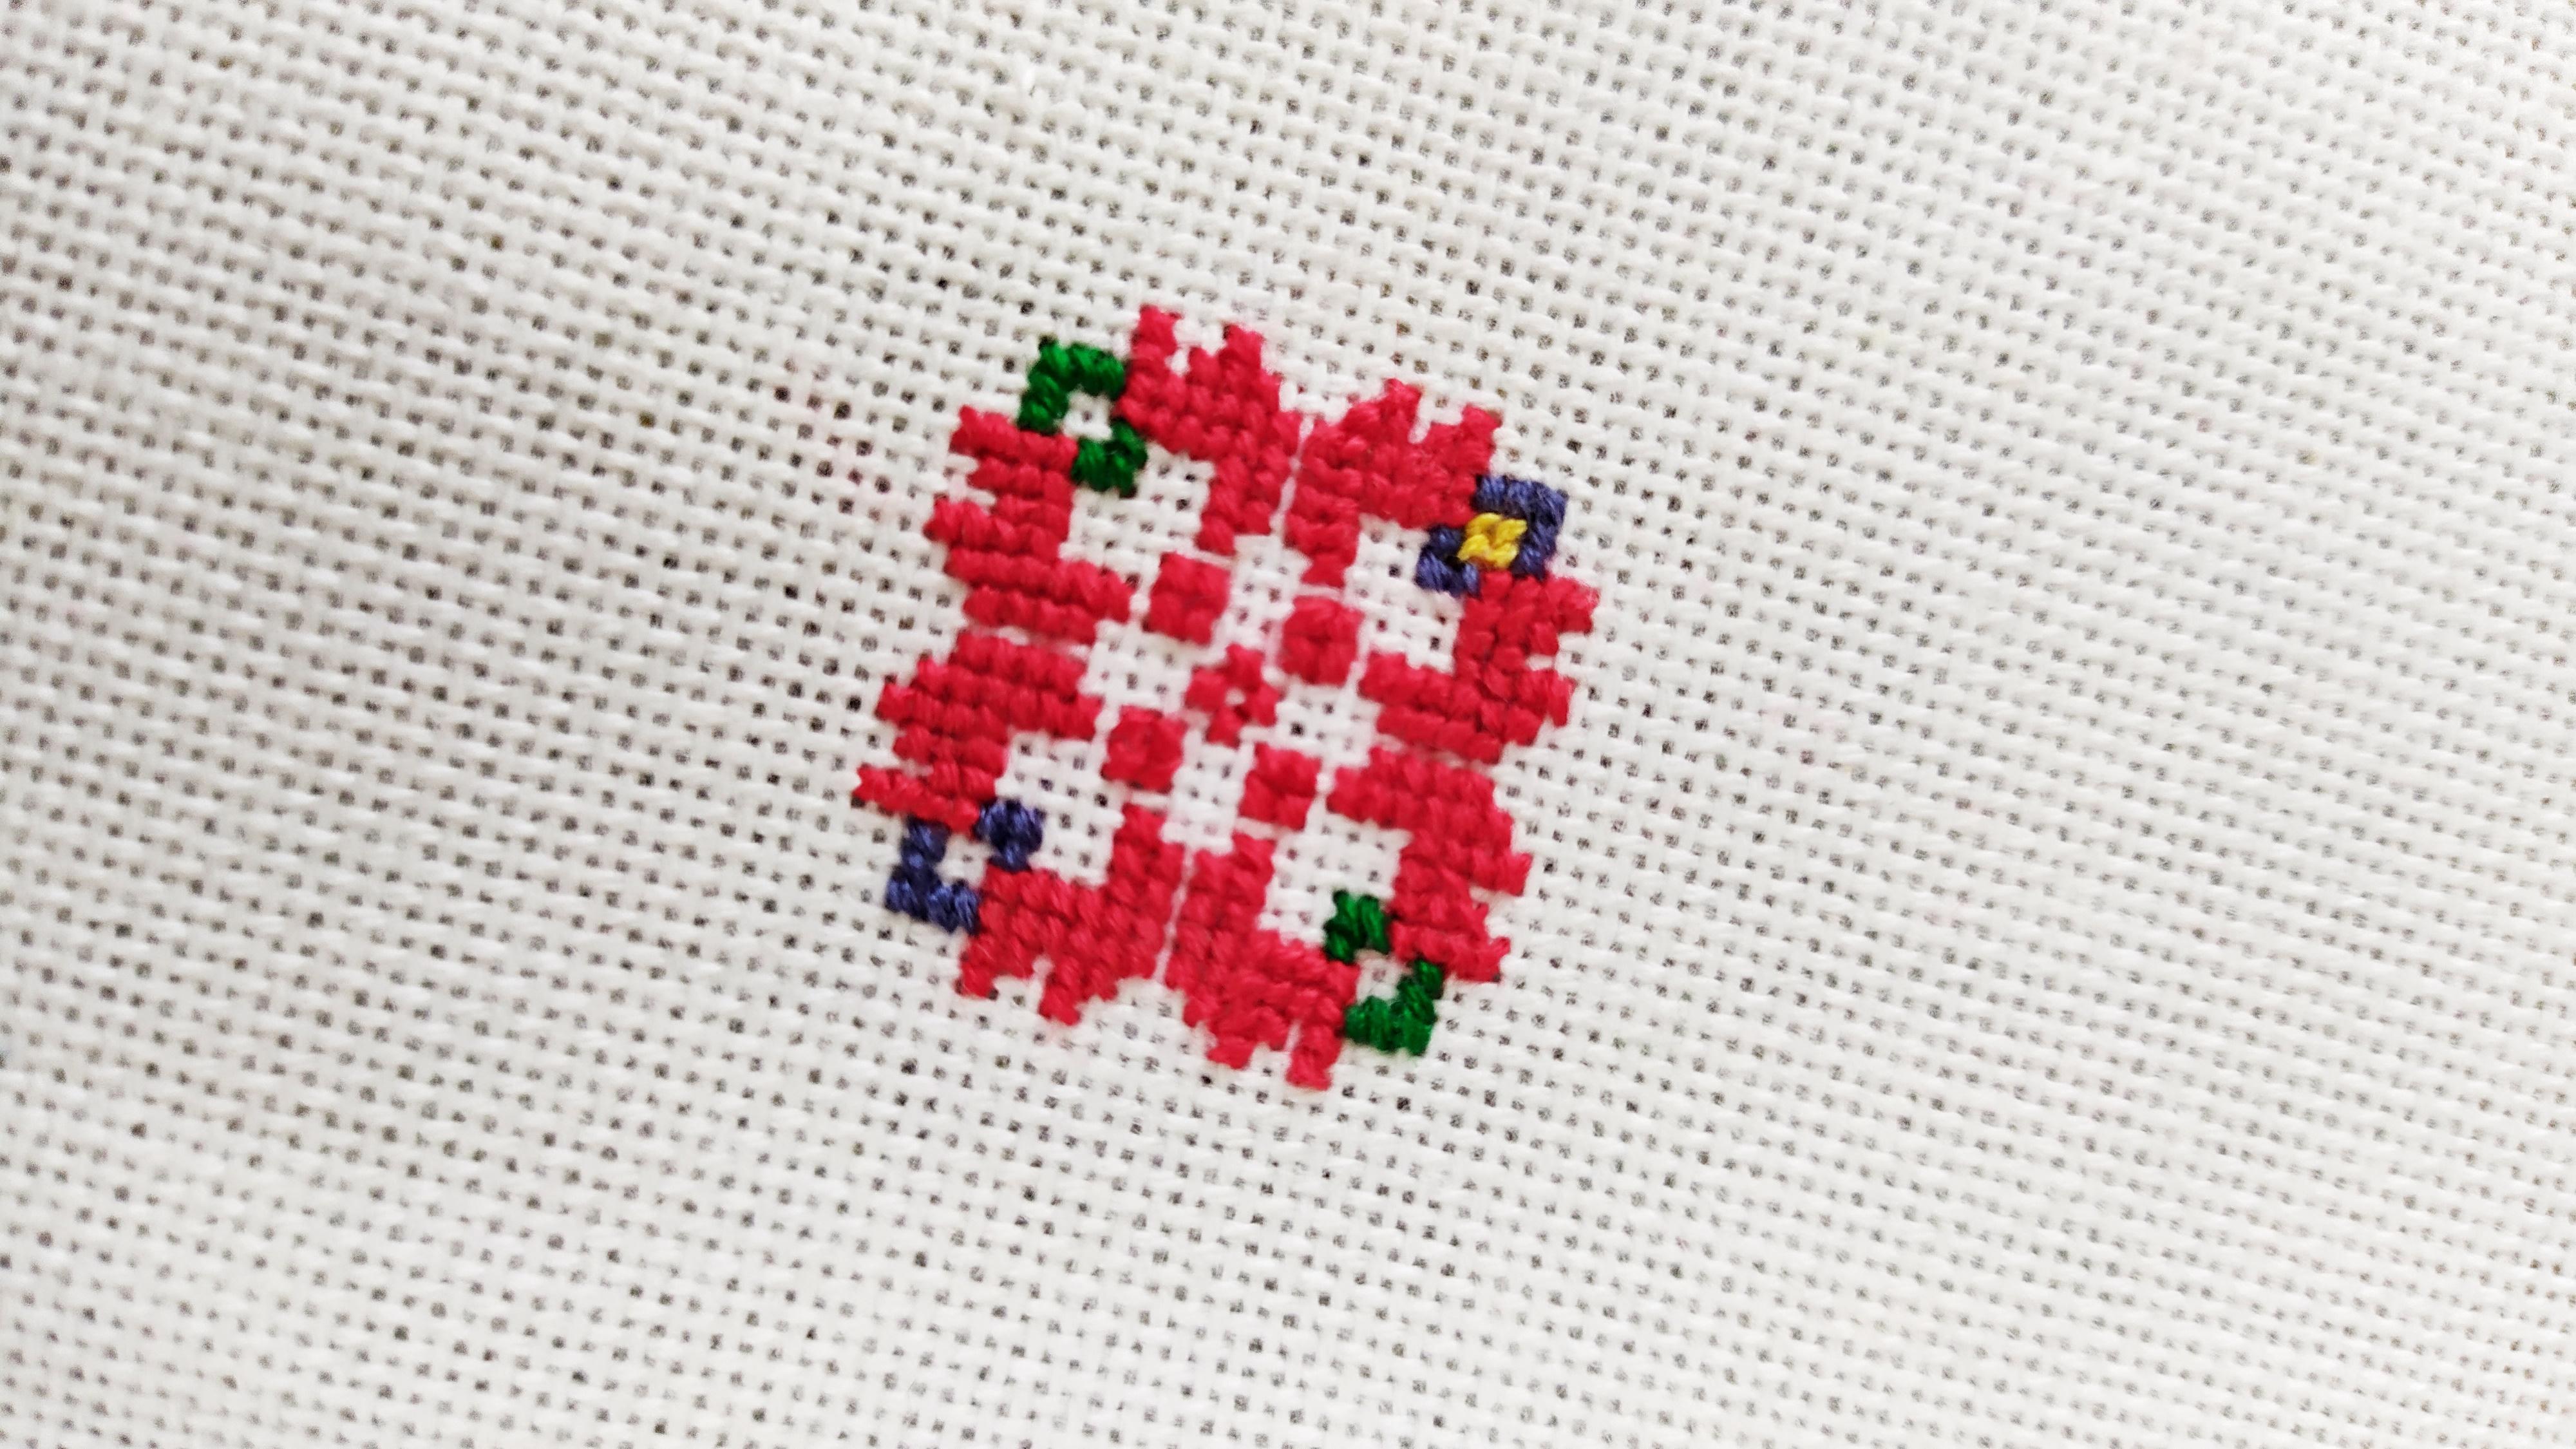


Add the yellow to the small square parts inbetween the red and blue and red and green.Follow the same steps:
- Separate into two strands
- Cross stitch
- Tie in the back
Contouring


Now comes the fun part and here you will learn the second stitch you need to complete this project - the back stitch.
Begin by taking a black thread and separate it into a single strand.Thread it through the needle and begin at the top left corner where you stitched the Shevitsa with blue thread.Bring the black thread up and make a diagonal - bring it down at the top right.Next,bring it up at the top right and bring it back down at the bottom left.This is called a back stitch.Continue by bringing the needle up at the top right corner and down at the bottow left,which is where the two stitches meet.Follow the pattern and using the backstitch finish this part of the Shevitsa.
Begin contouring the whole Shevitsa from the blue part by using the same stitch.Continue doing so until the whole Shevitsa has black outlines.
Outlines


Make one back stitch after the other and outline the whole pattern.
Making the Swirls


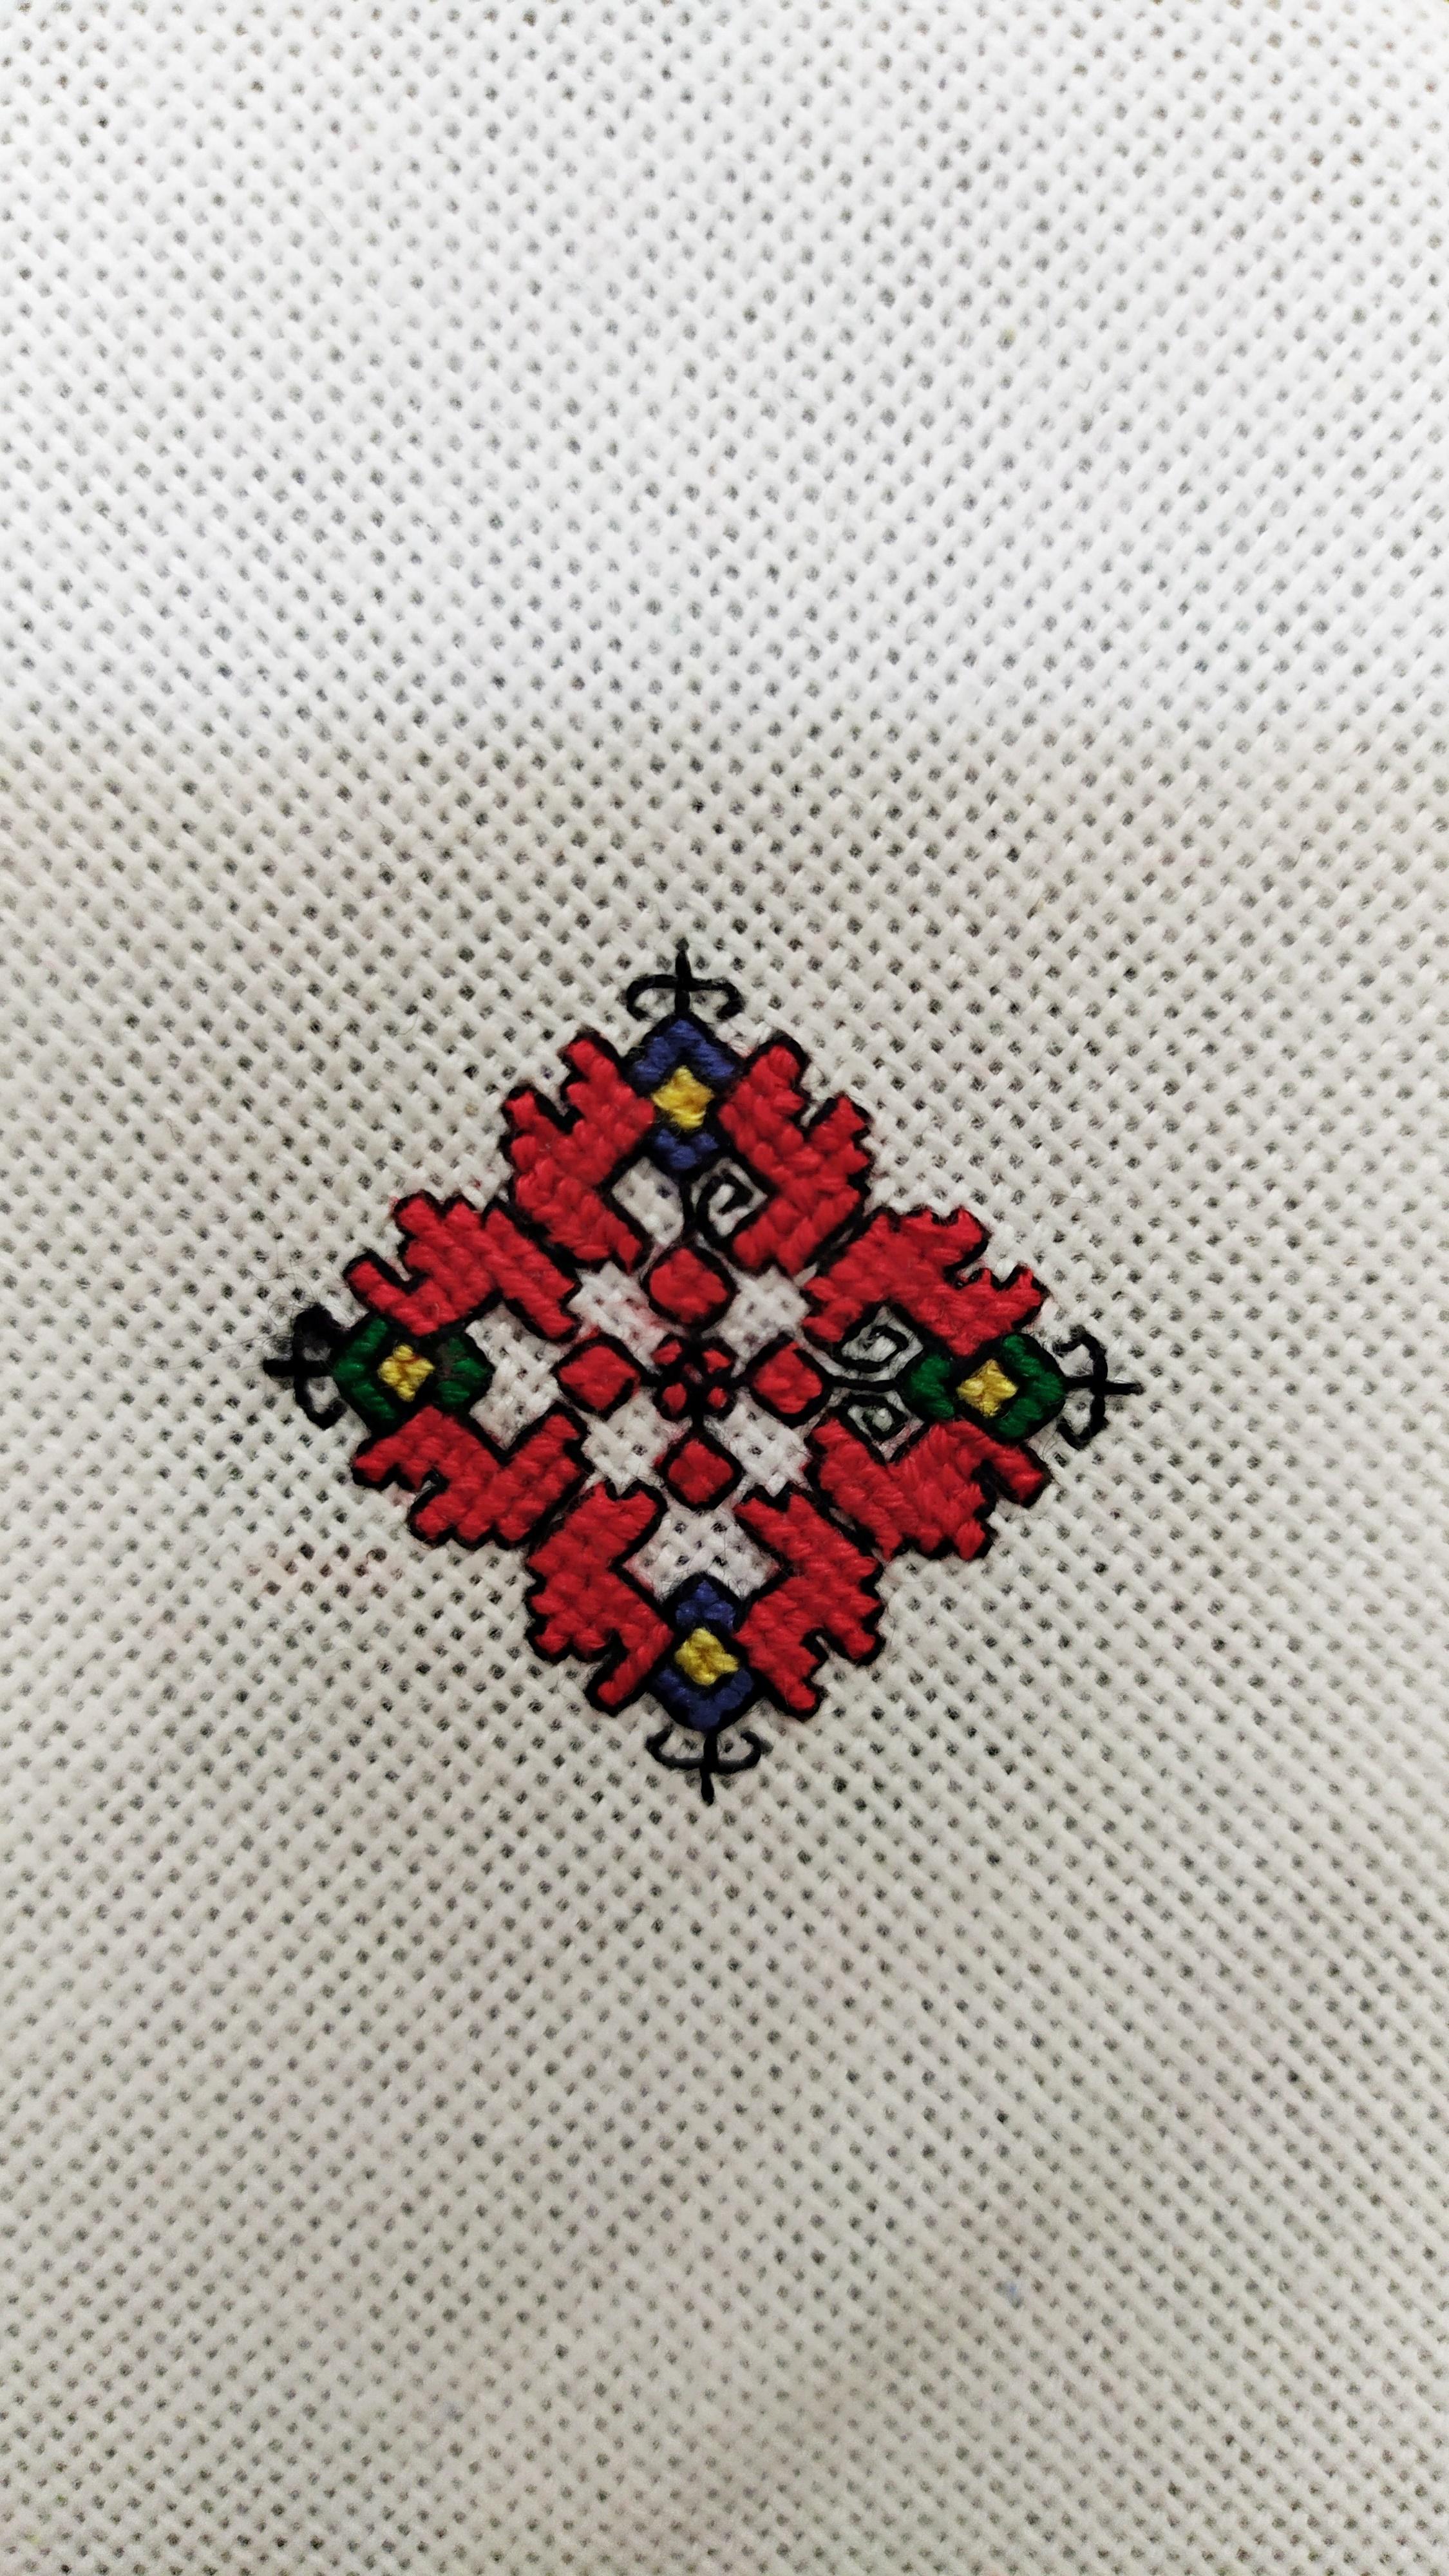


The final touches to this already beautiful Shevitsa are the swirly bits on the inside.Using the back stitch start stitching imagining a square again.Make a bunch of back stitches as if you are making a square but stop before you close it.That's how you get these beautiful swirls.Repeat the same process of the other side and on the three remaining parts.
The Pendant Base


Now that you are done with the stitching set the hoop aside and begin creating the base for the pendant.
Take the metal pendant and press it hard against the cardboard so that there are traces of the circle.Cut it out and see it it fits inside.
Remove the embroidered Shevitsa from the embroidery hoop and cut it in a large cirle.
Wool


To make the Shevitsa puffy I used some wool.Fluff the wool up and place it on the backside of the Shevitsa.Place the cut out cardboard on top of the wool and begin folding the fabric over but don't stitch or glue it yet.
Turn it around and see if you like the placement ot the Shevitsa.If you don't now is the time to move it around and place it in the centre.
Stitiching


Once you like the placement begin stitiching the back of the necklace.There is no particular order here - just stitch and turn it around until you like what you see on the front.When you are done tie a knot.
Gluing to the Base


Finally cut another cardboard circle and glue it to the back of the Shevitsa using hot glue.Glue the whole thing onto the metal base and press.If there are any parts that are not glued as well,gently put some hot glue and press.Remove the excess glue and your Shevitsa pendant is ready.
Making the Necklace
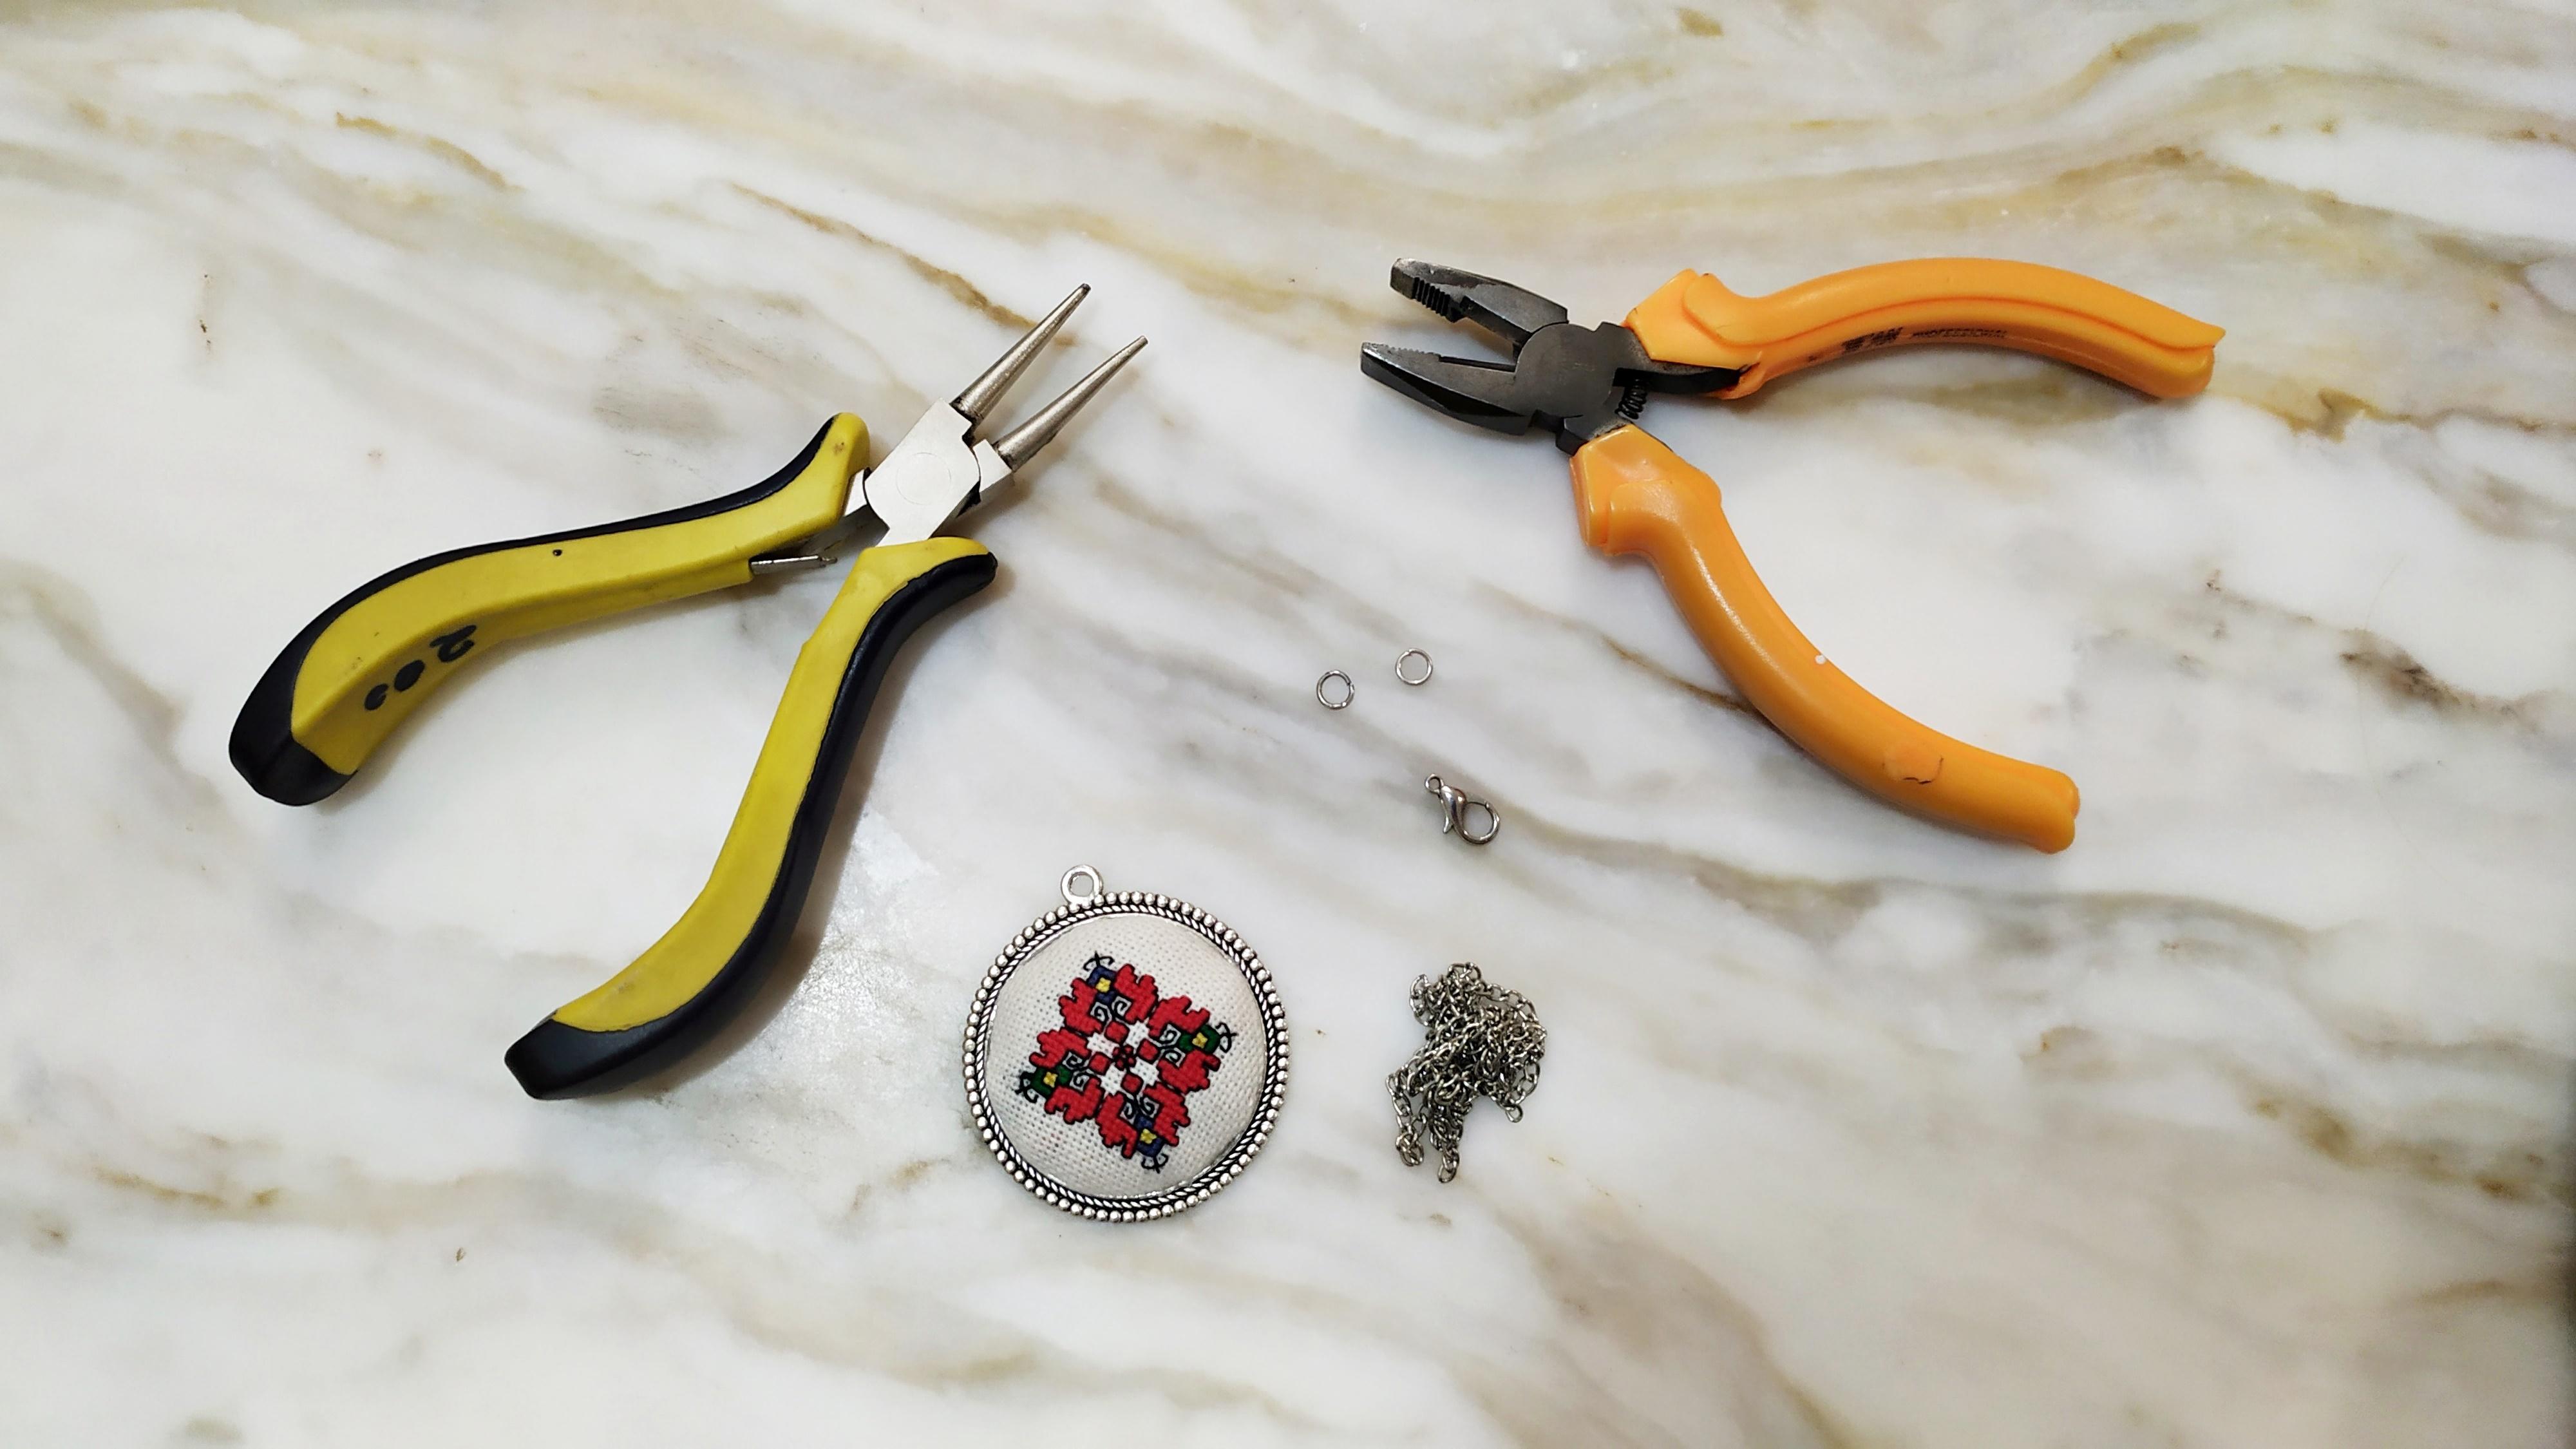


The last step is making the necklace - take your chain and add a metal ring and clasp.Close it up.
Add another ring to the other side of the chain and close it up.
Finally,attach the pendant to the necklace.
Ready to Wear


After 20 steps your necklace is ready to wear or gift! It's truly a unique piece of jewelry that anyone would love and appreciate.It's a part of my culture and I'm proud of it.
Thank you so much for taking the time to read or scroll through this Instructable!
As always if you recreate this necklace I would love to see it,so share it with us here.