How to Make a Long Straps Dress

Dreamy dresses does exist, so as I show the steps to make this light and fresh dress to look dashing on warm days such as sunny or under the moon.
And you will need these materials: the fabric that I choice is cotton jersey, scissors, pins, sewing machine, a t-shirt and chalk. Don't forget to add energy and magic style!
Also, I want it to comment that today my country, Paraguay, is 200 years of independence. Join me this little journey touring the capital, this main street is called "Palma" wich symbolize the peace in the Paraguayan flag shield. Another very interesting place is the National Pantheon of Heroes, is a "must stop" for the tourists and foreign people, there lie the remains of the Heroes of my country. Then I step on the Cabildo and the Palace of the López. By the way, this European construction decorates the night with beautiful lighting. Meanwhile, get to work, the dress is waiting!
-------------------------------------------------------------------------------------------------------------------------------------------------------------
Vestiditos de ensueño si los hay, así como te muestro en esta oportunidad, un vestido liviano y fresco para lucir en los días cálidos, tanto bajo el sol como la luna.
Y para confeccionarlo necesitarás los siguientes materiales: la tela que prefiero es un jersey de algodón, tijera, pins, máquina de coser, una camiseta de ayuda y tiza.
Claro, no olvides sumarle a esto una pisca de energía y la magia del estilo!
También, les quiero contar que hoy mi país, Paraguay, cumple 200 años de Indepencia. Quiero que me acompañen a recorrer el centro de la capital, el paseo principal se llama Calle Palma o De La Palma, que simboliza la paz en el escudo de la bandera Paraguaya. Otro lugar interesante es el Panteón Nacional de los Héroes, que es una parada ideal para turistas y extranjeros, ahí reposan los restos mortales de los Héroes de la Historia Paraguaya. Luego paso por el Cabildo y el Palacio de López o Palacio de Gobierno. Por cierto, esta construcción de tinte Europeo decora la noche asuncena con un espectáculo de luces.
Mientras tanto, manos a la obra, el vestidito espera!
First Step


Picture #1: Place the fabric like you see in the picture
Colocar la tela como se ve en la imagen
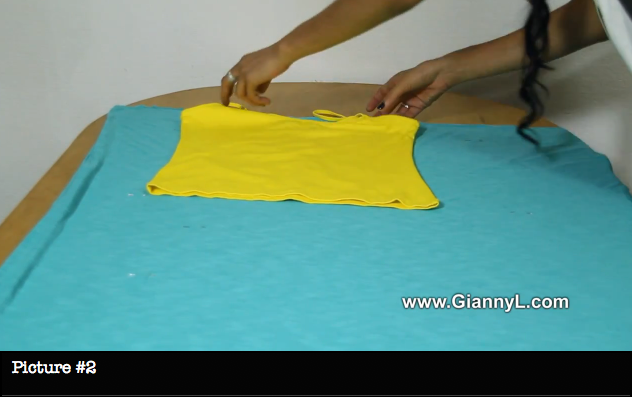
Picture #2: With the help of a Top (shirt), position on the upper side. This will help you draw the shape of the dress.
Con la ayuda de un Top, posiciona en la parte superior. Esto te ayudará a dibujar el molde del vestido.
Picture #3 and Picture #4: Draw the shape as you can see with the help of a chalk or pencil
Dibuja la forma como puedes ver en las imágenes con la ayuda de una tiza o lápiz.
Second Step


Picture #5: Once you're done drawing, pin the fabric to be saved.
Una vez que hayas dibujado, con los alfileres asegura la tela.
Picture #6 and Picture #7: Now start cutting the excedent fabric.
Ahora corta la tela excedente.
Picture #8: Sew the sides once you're done cutting.
Una vez que hayas terminado de cortar, debes coser ambos lados
Picture #9: For the top make a little hem and before sewing safe it with pins
Para la parte superior, haz un dobladillo y antes de coserlo aseguralos con los pins.
Third Step


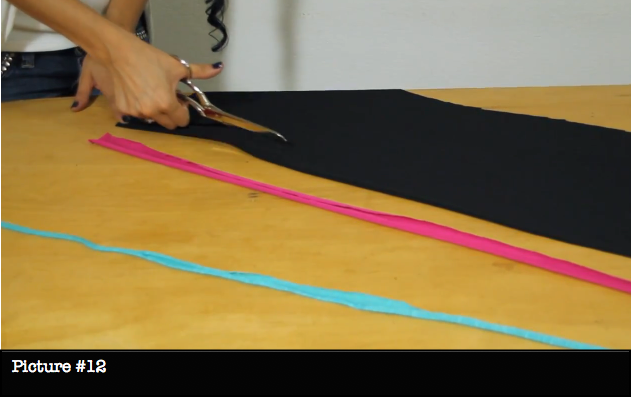
Picture #10, Picture #11 and Picture #12: Now let's make the straps! First cut one color of fabric the others
Ahora realiza los tirantes! Primero corta un color de tela luego las otras dos.
Picture #13: Tight a knot on one side then start making like a braid.
Haz un nudo en un lado luego empieza a realizar una trenza
Fourth Step


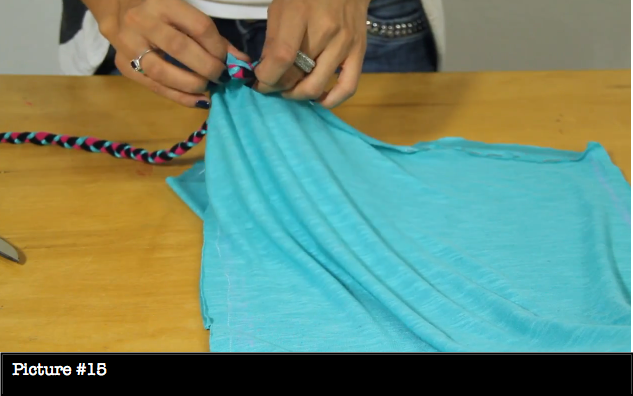
Picture #14 and Picture #15: Back to the Top of the Dress. Cut a little on this part of the fabric and put the straps
Volviendo al Top del vestido. Corta un poquito de la tela para colocar el tirante.
Picture #16 and Picture #17: Sew the top ensuring the strap. Then cut the straps to do the same on the back of the dress
Cose la parte superior asegurando el tirante. Luego corta el tirante para realizar el mismo paso para la parte de atrás del vestido.
Picture #18: Before you sew the strap on the back make sure to pin and then sew.
Antes de coser el tirante en la parte de atrás asegurate de pinchar con los alfileres para asegurar de coserlo bien.
And you are done! :)