Implementing Web Server on ESP32
by Common9899 in Circuits > Wireless
9067 Views, 7 Favorites, 0 Comments
Implementing Web Server on ESP32

The ESP32, a low-cost microcontroller with integrated Wi-Fi and Bluetooth capabilities, has become a popular choice for IoT applications due to its power and affordability. One intriguing application is the creation of a web server. This blog post will provide a step-by-step guide on how to implement a web server on the ESP32.

Understanding the Basics
What is a Web Server?
A web server is a software application that serves web pages to users. When a user requests a web page, the web server processes the request and sends the requested page back to the user’s browser. This forms the backbone of data communication on the World Wide Web.
What is ESP32?
The ESP32 is a series of low-cost, low-power systems on a chip microcontroller with integrated Wi-Fi and dual-mode Bluetooth. The ESP32 series employs a Tensilica Xtensa LX6 microprocessor and includes built-in antenna switches, an RF balun, a power amplifier, a low-noise receiver amplifier, filters, and power management modules. It is suitable for a wide variety of applications, from low-power sensor networks to more demanding tasks such as music streaming.
Get PCBs for Your Projects Manufactured
You must check out PCBWAY for ordering PCBs online for cheap!
You get 10 good-quality PCBs manufactured and shipped to your doorstep for cheap. You will also get a discount on shipping on your first order. Upload your Gerber files onto PCBWAY to get them manufactured with good quality and quick turnaround time. PCBWay now could provide a complete product solution, from design to enclosure production. Check out their online Gerber viewer function. With reward points, you can get free stuff from their gift shop. Also, check out this useful blog on PCBWay Plugin for KiCad from here. Using this plugin, you can directly order PCBs in just one click after completing your design in KiCad.
Setting Up the Environment
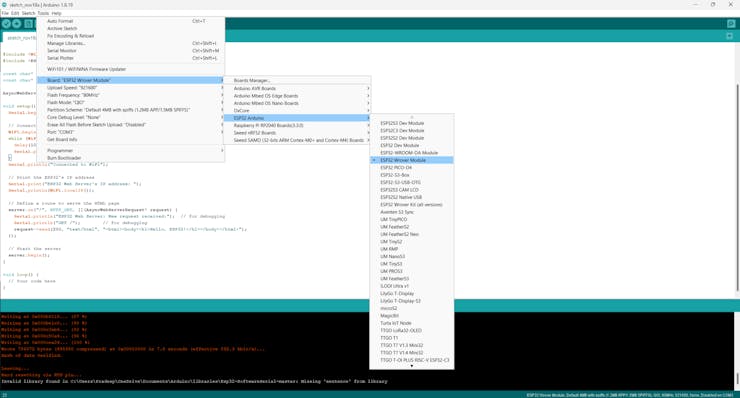
Before we delve into the implementation, we need to set up the ESP32 development environment. This involves installing the ESP32 board definitions in the Arduino IDE and connecting the ESP32 to your computer via a USB cable. The Arduino IDE provides a comfortable coding environment and makes it easy to upload programs to the board.
Including the Necessary Libraries
The first step in our implementation is to include the necessary libraries. We’ll need the WiFi.h library for connecting the ESP32 to a Wi-Fi network and the ESPAsyncWebServer.h library for handling HTTP requests. These libraries provide the necessary functions and methods to establish a Wi-Fi connection and to set up a web server.
#include <WiFi.h>
#include <ESPAsyncWebServer.h>
Defining the Wi-Fi Credentials
Next, we need to define our Wi-Fi credentials. Replace your_SSID and your_PASSWORD with your actual Wi-Fi SSID and password. These credentials will be used to connect the ESP32 to your local Wi-Fi network.
const char* ssid = "your_SSID";
const char* password = "your_PASSWORD";
Setting Up the Web Server
Now we can set up our web server. We’ll create an instance of the AsyncWebServer class and define a route. The server will listen on port 80, which is the default port for HTTP. The route is defined by the URL that the user types into their browser. In this case, the root URL (“/”) will return a simple text message.
// Define a route to serve the HTML page
  server.on("/", HTTP_GET, [](AsyncWebServerRequest* request) {
    Serial.println("ESP32 Web Server: New request received:");  // for debugging
    Serial.println("GET /");        // for debugging
    request->send(200, "text/html", "<html><body><h1>Hello, ESP32!</h1></body></html>");
  });
Connecting to Wi-Fi
Before we can start our web server, we need to connect the ESP32 to Wi-Fi. The WiFi.begin() function is used to connect to the Wi-Fi network. We then wait until the ESP32 is successfully connected before proceeding.
WiFi.begin(ssid, password);

while (WiFi.status() != WL_CONNECTED) {
    delay(1000);
    Serial.println("Connecting to WiFi...");
}

Serial.println(WiFi.localIP());
Starting the Web Server
Finally, we can start our web server. The server.begin() function is used to start the server. Once the server is started, it will listen for incoming HTTP requests and respond accordingly.
server.begin();
Deployment
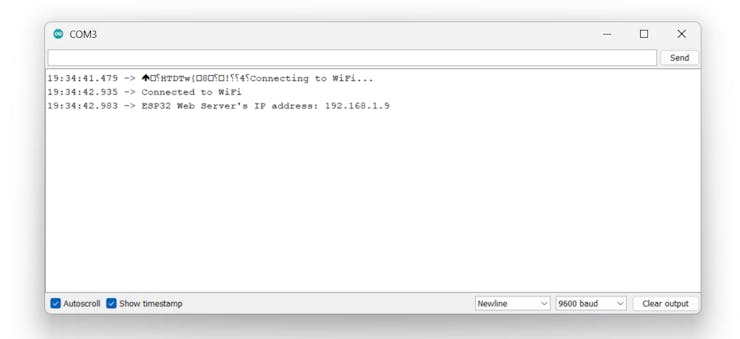
Just upload the code to the ESP32 board and look for the serial monitor results.
#include <WiFi.h>
#include <ESPAsyncWebServer.h>

const char* ssid = "ELDRADO"; // CHANGE IT
const char* password = "amazon123"; // CHANGE IT

AsyncWebServer server(80);

void setup() {
  Serial.begin(9600);

  // Connect to Wi-Fi
  WiFi.begin(ssid, password);
  while (WiFi.status() != WL_CONNECTED) {
    delay(1000);
    Serial.println("Connecting to WiFi...");
  }
  Serial.println("Connected to WiFi");

  // Print the ESP32's IP address
  Serial.print("ESP32 Web Server's IP address: ");
  Serial.println(WiFi.localIP());

  // Define a route to serve the HTML page
  server.on("/", HTTP_GET, [](AsyncWebServerRequest* request) {
    Serial.println("ESP32 Web Server: New request received:");  // for debugging
    Serial.println("GET /");        // for debugging
    request->send(200, "text/html", "<html><body><h1>Hello, ESP32!</h1></body></html>");
  });

  // Start the server
  server.begin();
}

void loop() {}

Here is the serial monitor result:

Next, navigate to the particular IP address in the web browser and look for the response.

Wrapping Up
Congratulations! You’ve just implemented a simple web server on the ESP32. You can now access this server from any device connected to the same Wi-Fi network by entering the ESP32’s IP address into a web browser. This is just the beginning - you can expand this server to control GPIO pins, read sensor data, and much more. The possibilities are endless.
