Journal Making

Make your own journal today!
Assemble the Supplies

- 2 Cardboard Pieces (7.5" x5") (Note: You can change the size, but just keep in mind that you will also have to adjust the other sizes accordingly)
- 2 Cardboard Strips (1-1.5"x5")
- 2 Front Papers
- 2 End Papers
- Journal Making Glue
- 16 or more or less pieces of paper
- Leather/Cottom cord to tie the journal together
- Binder Clip
- Drill (for the holes)
- Paintbrush (for the glue)
Apply Glue

Lightly coat the cardboard pieces (all 4 pieces) with the glue
(Thick coats will make the front pages lumpy)
Paste the Pieces

Paste the cardboard pieces so the glue sticks to the front papers. Leave some space between the small cardboard piece and the bigger one.
More Glue

Lightly coat the edges of the front paper and glue it down.
Finished Outside Papers

This is how your end product should look!
Glue the End Papers

Lightly coat the end papers in the glue and stick them to cover the cardboard cutouts

This is how it should look like
All Done!

Voila! You have made two successful covers.
Making the Journal

Place your papers between the two covers and align them the way you want them to look.
Drilling the Papers

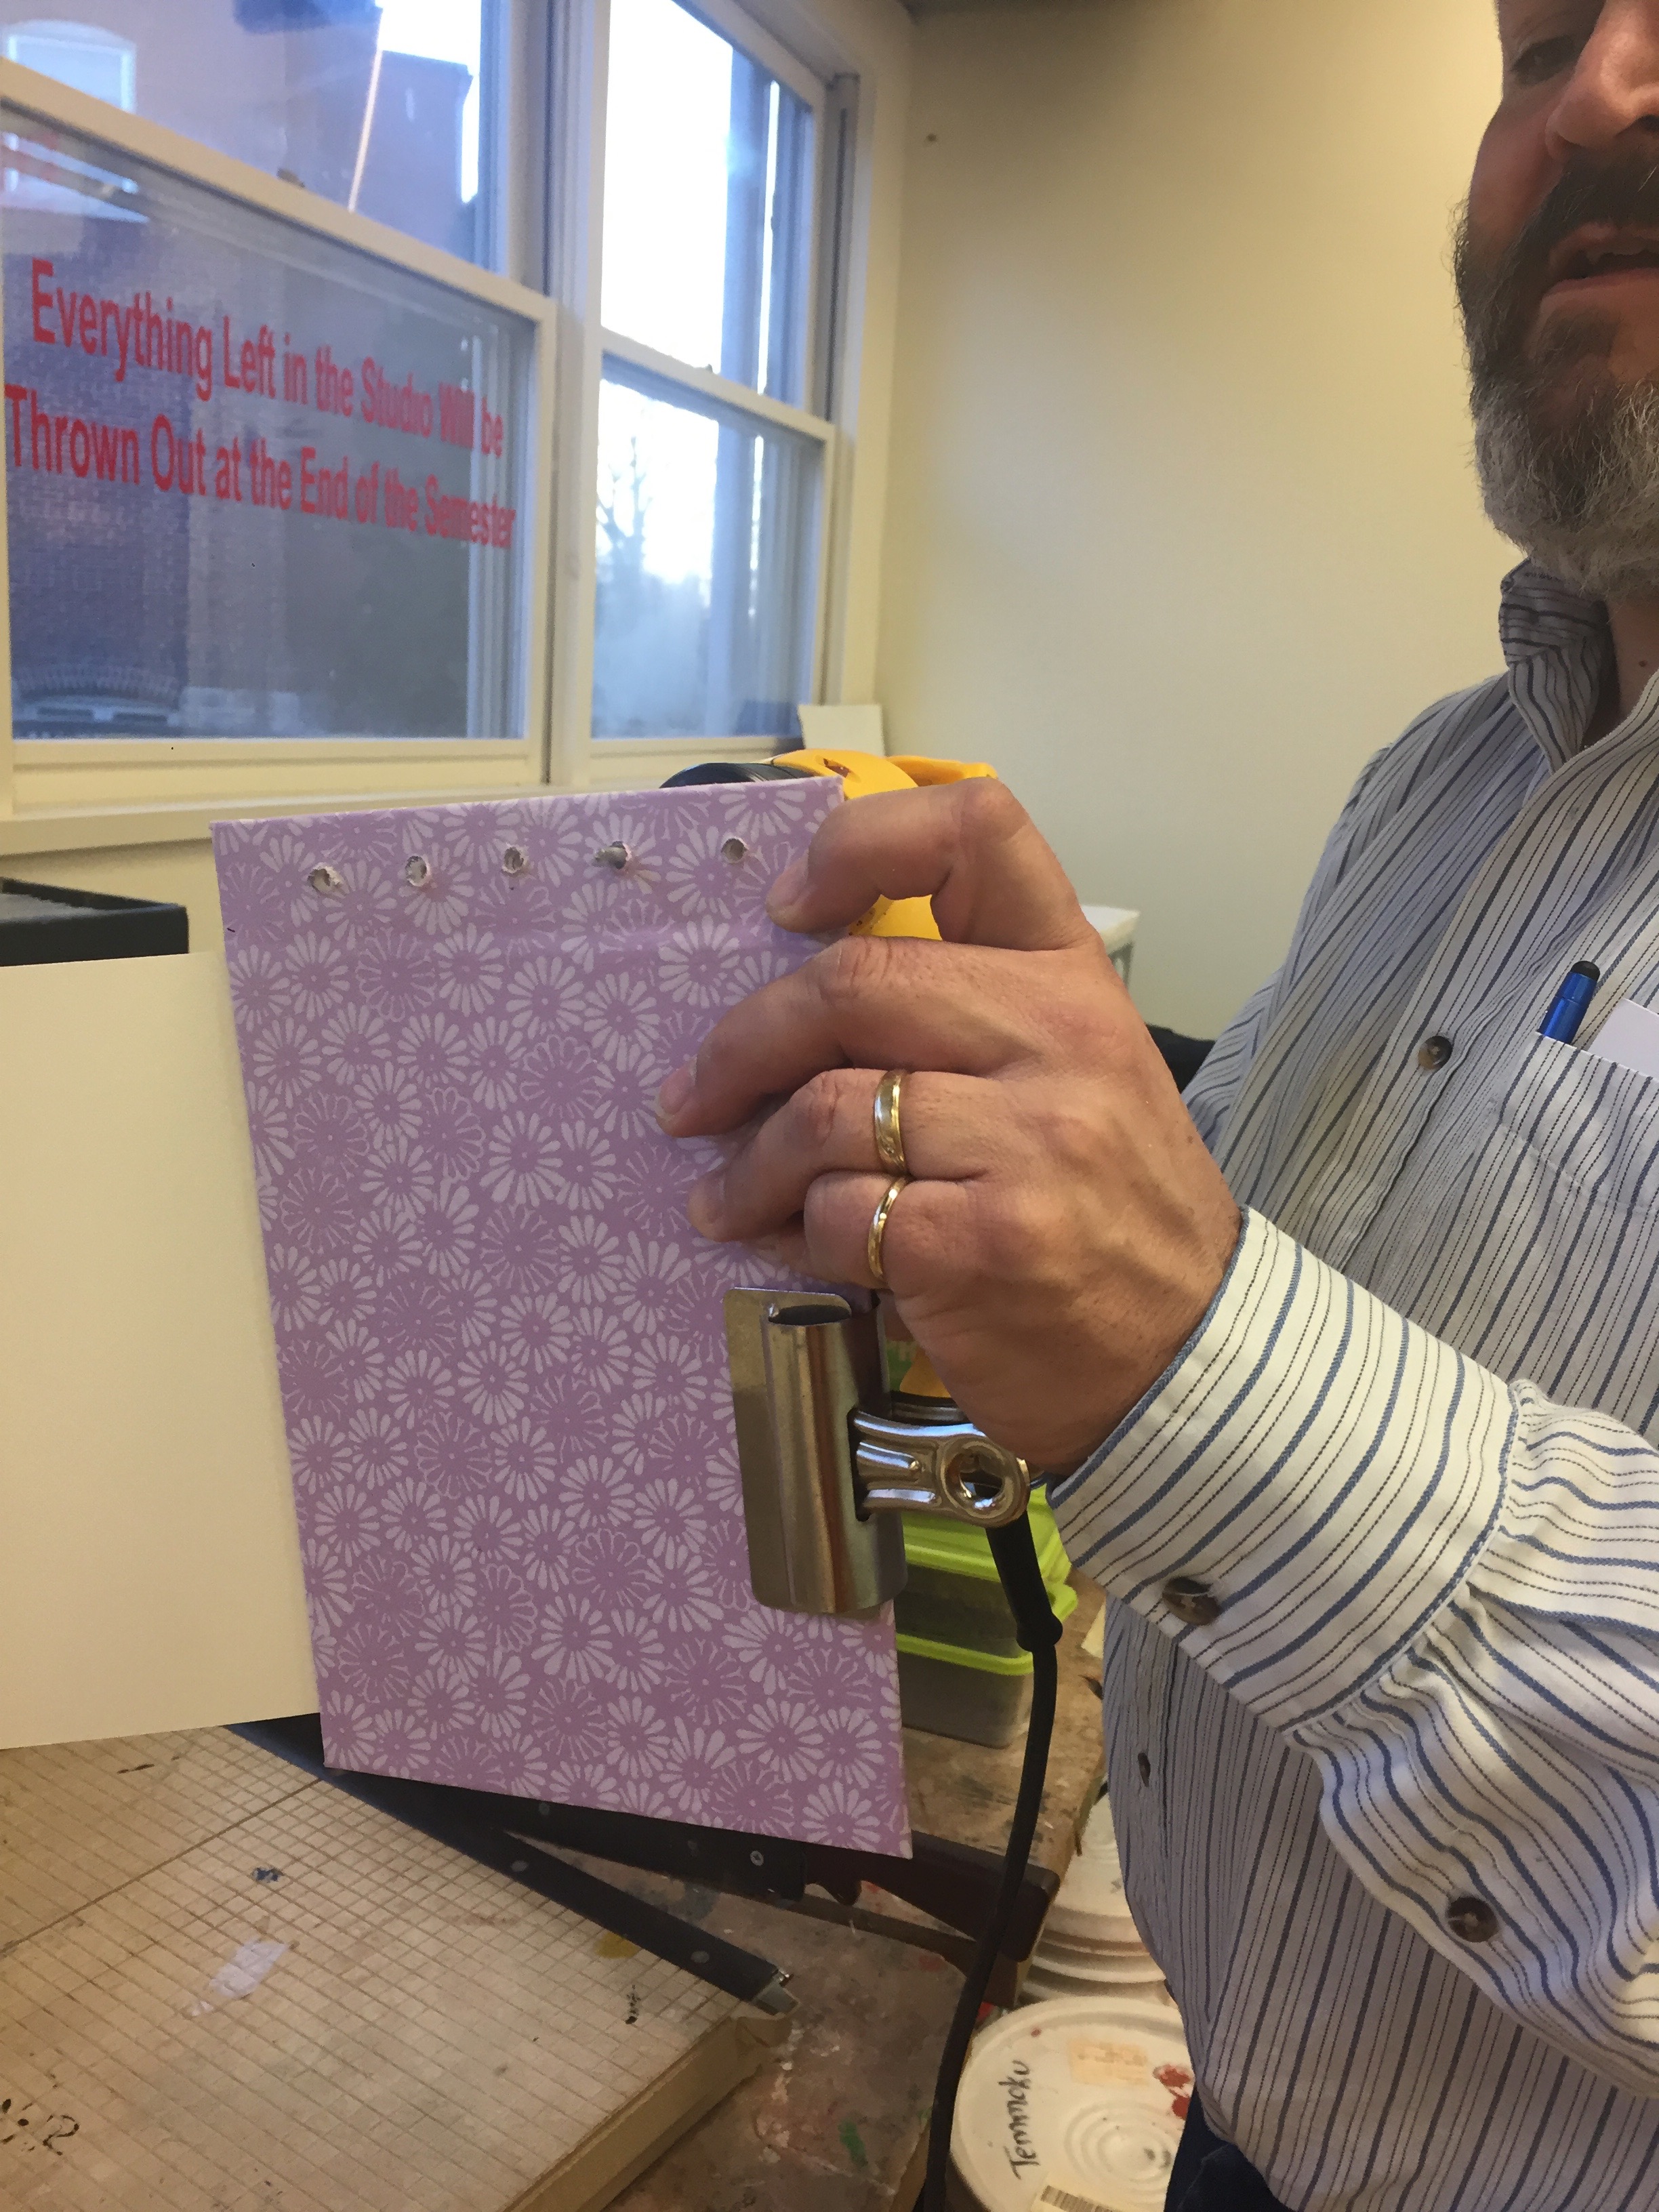
Clip the covers and paper with a binder to keep it in place for drilling.
Actual Drilling

BE CAREFUL WITH THIS STEP:
Place five dots where you would like to drill holes through the paper and drill holes through them. (Again, please be careful)
Finished Drilling

This is how your journal should look like after drilling the holes. Now, LEAVE THE BINDER CLIP and tie string through the holes.


There is no step! You are all finished. Congratulations! You have a journal that you can write menial things like grocery lists to your life goals. Make use of this new journal!