Learn How to Create a Never-Ending Card
1209 Views, 19 Favorites, 0 Comments
Learn How to Create a Never-Ending Card

Having troubles with creating an eye-catching letter or card? Well, I give you the never-ending card. Here's how to create one.
Supplies
•Embossed Short Paper (any firm paper)
•Marker
•Ballpen
•Ruler
•Scissors
•Glue (or paste)
•Highlight Pens
•Marker
•Ballpen
•Ruler
•Scissors
•Glue (or paste)
•Highlight Pens

Prepare all the needed materials.

Get the embossed paper and start by outlining with the use of the ruler and ballpen by dimensions of 10 cm x 5 cm. (*Note: The ratio of length to width is 2:1)

Cut the embossed paper with the use of scissors. You make at least 8 pieces of it.

Take a piece of the cutout. Fold it lengthwise by half and return it to its original form. Use a pen and ruler and fold each side towards the center. It should look like this.
Repeat Step 4 for the remaining 7 cutouts.
Repeat Step 4 for the remaining 7 cutouts.

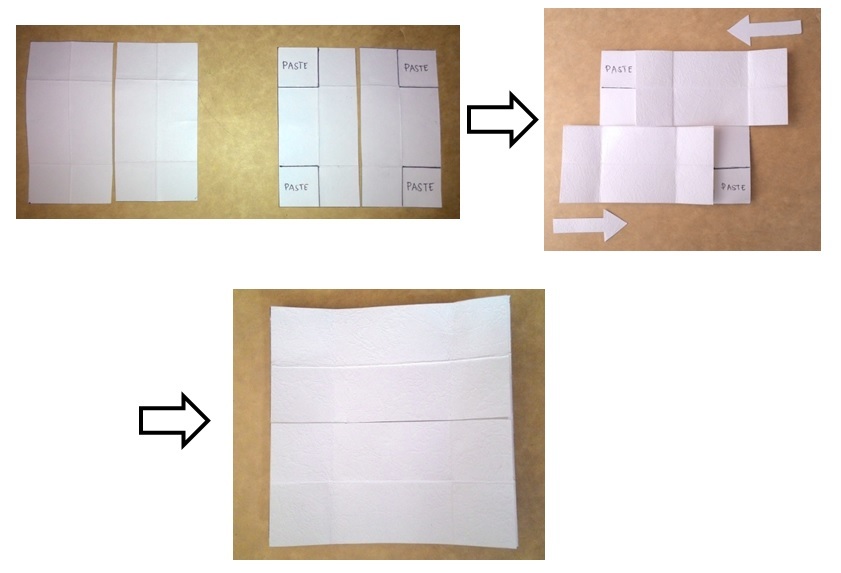
Take 2 pieces from the cutout. Lay the pieces parallel with each other. Put the glue on the four corners of the laid pieces. Take again 2 pieces of the cutout and stick them horizontally over the laid pieces. It should look like this.

Rotate the glued pieces of paper 90° to the left. Hold the opening of the paper and unfold it. It should look like this.

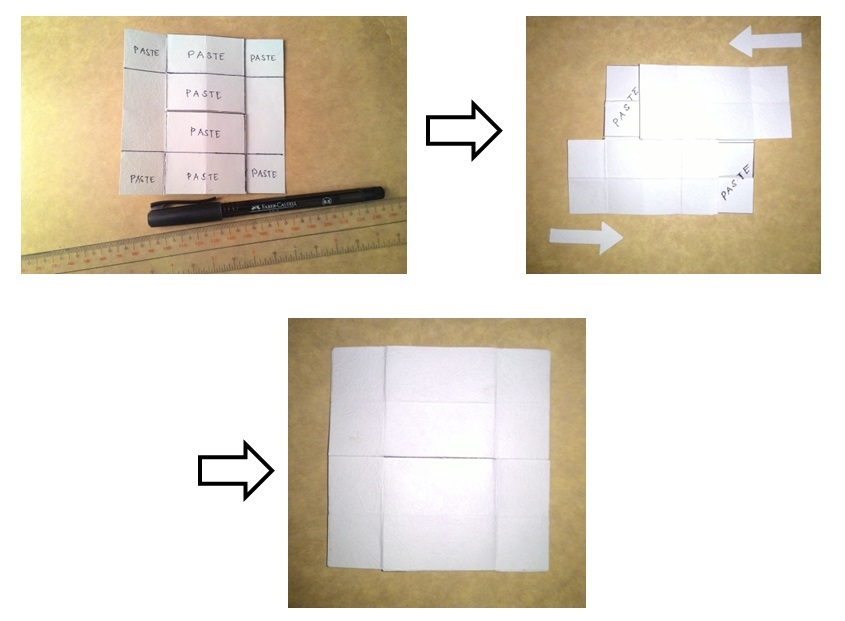
Put the glue on the unfolded part, it should resemble the letter “I". Take 2 pieces from the cutout. Put them over horizontally against the laid pieces. It should look like this.

Rotate the glued pieces 90° to the right. Unfold the paper then put the glue completely on all surfaces of the paper. Take 2 pieces again and pit them over horizontally on the laid pieces. It should look like these.

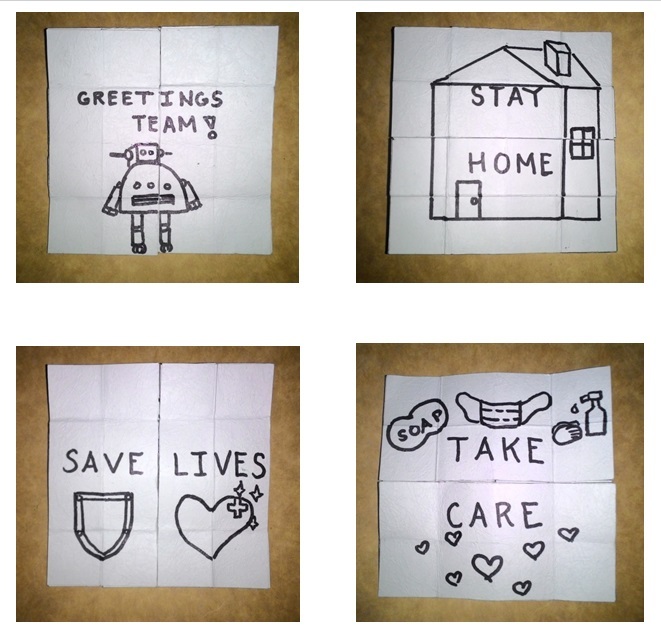
It is not yet completed. Take a marker and draw a message on each surface like these.

Color it with highlight pens. Now, it is 100% finished.