Mini-Bowling-Game


Hello, I am a current student at TASIS Dorado. This bowling game is not ordinary. Those who love bowling often can not play it unless they are at a bowling alley; this innovation solves the problem with its small, compact design. The design is made to be accessible, as it can be played anytime, anywhere. The tiny size lets its owner pack it without taking up too much space and play it without causing too much commotion. There are also rails on the sides, acting as bumpers to ensure the bowling ball does not fall off and get lost. Another feature of this game is the built-in storage. At the beginning of the lane, there are holes to store the pin and balls to ensure none of them fall out and get lost. There are also holes to put the pins in when playing, which allow the pins to be knocked over by the ball only and not some wind or the shake of a table. All these aspects contribute to how travel-friendly the game is, which was the ultimate goal: make a bowling game that anyone could play almost anywhere.
Another fun aspect of this piece is the theme. The bowling game is set like an 80s disco. The tile the ball rolls over is big enough to be noticeable but small enough that it doesn't affect its trajectory; these tiles represent a disco floor. There is also an 80s-like font on the side with the game's name. The colors are also supposed to represent the 80s: the tiles, words, and pins are very vibrant, and the bowling ball is reflective, as it is supposed to represent a disco ball. Overall, the bowling set represents a travel-friendly compact disco bowling game.
Supplies
For this game, I used the following:
- Fusion 360
Used to 3D model everything.
- Font Space (Online Website)
https://www.fontspace.com/the-augusta-2-font-f85467
Used to create the font on the side of the game to replicate the 80s style.
Sketching and Extruding the Main Piece


Before sketching the main piece, the measurements must be decided. Since this is mini bowling, the length was 6 inches, the height was about 2 inches on the left side, 1.85 on the right side, and the width was 3 inches. This makes it so that the bowling lane is at an angle, so the ball can roll more efficiently. You can create the base by selecting the plane between the green and red lines (Y and X) after pressing create sketch. Then type in the measurements (Left H= 2", Right H= 1.85", L=6") and connect the two points at the top. After doing this, finish the sketch and then extrude it 3 inches.
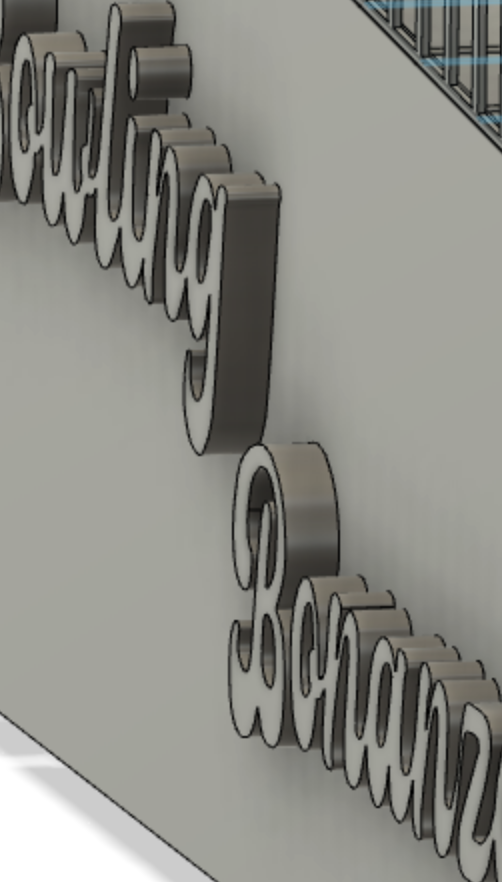
Bowling Bonanza Lettering


Now it's time to do the lettering. Add the image of the lettering onto the side of the extruded rectangular (add canvas and then press the side of the rectangle so that it will act as the plane.) Then vector the outline of the lettering ( I recommend the spline tool). Once that is done, press finish sketch, and extrude it 0.1 inches.
Adding Tile and Pin Holes


Next, it's time to add the tiles and tin holes. To do this, open a sketch on the top panel of the rectangle. Measure 0.5" up from the bottom and then draw a line across that area so there is now a rectangle with a width of .5" at the bottom. (Like the picture above) Then along the bottom of the line you just created, create a series of 0.5" marks in order to know how big to create the tiles. Then replicate this process across the side of the rectangle. Once you do this, offset all lines by 0.15" and -0.15" Now it's time to add the triangles. draw triangles according to the image above. Next, delete the lines between the offset lines. Finally, we will add the circles. Add circles to the areas according to the photo above. The radius of the circle shown is 0.1". The next step is to extrude. Extrude the tiles by 0.02" and the triangles by 0.03", and the pin holes by -0.01" Your final product should look like the one above.
Adding Storage

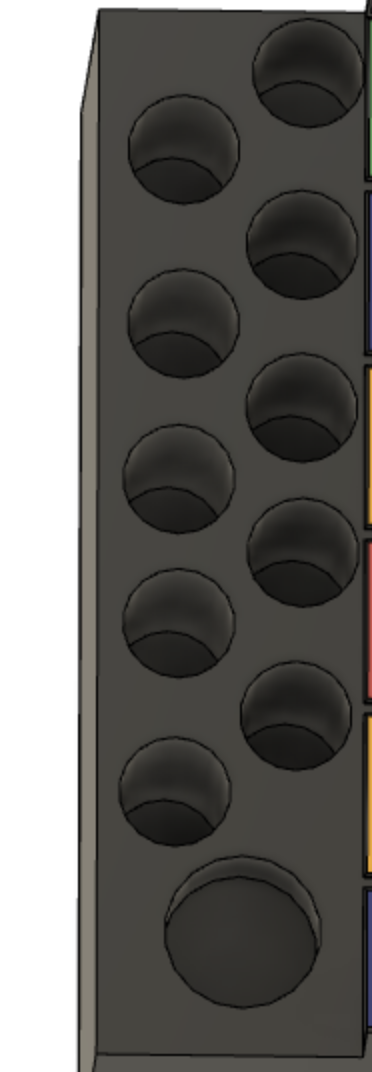
Now it's time to add storage. Create circles of 0.3" on the blank rectangle at the bottom of the game. Create 10 of them. Then arrange them in a way that takes up the least place. These are for the pins. Now add another circle with a .45" radius. After this, extrude the pin holes by -0.75" and the bowling ball holes by -0.25". The picture above is a reference.
Pins and Bowling Ball


Now it's time to create the pins and bowling ball. For the pins, open a sketch on the right face and sketch the pin design above (The pin should be 1/2 inch tall and 1/4 inch wide.) After that, exit the sketch and use the revolve tool with 360 degrees to create the pin. Copy and paste this pin till you have 10, which is the amount needed for the set. Next, make the bowling ball by following the steps for a sketch for the pins except the arc should be 3/8" tall and 0.1875" wide) Revolve this by 360 degrees and now you have your balls and pins.
Colors


Now it's time for the final step! Let's color our piece. Do think by double clicking/left clicking the part that you want to color and select appearance. Then look through the different options and color your piece however you want. If you'd like to color yours according to mine, uses the photos above as a reference. Used for this piece is a combination of blue, green, yellow, red, black, and silver.