Mr.Instructable Family by Digital Sculpting
by Hema11 in Workshop > 3D Design
1046 Views, 2 Favorites, 0 Comments
Mr.Instructable Family by Digital Sculpting


Digital sculpting, also known as sculpt modeling or 3D sculpting, is the use of software that offers tools to push, pull, smooth, grab, pinch, or otherwise manipulate a digital object as if it were made of a real-life substance .
The majority of digital sculpting tools on the market use mesh-based geometry, in which an object is represented by an interconnected surface mesh of polygons that can be pushed and pulled around. This is somewhat similar to the physical process of beating copper plates to sculpt a scene in relief.
Sculpting can often introduce details to meshes that would otherwise have been difficult or impossible to create using traditional 3D modeling techniques.
Video Demonstration

3D Design


3D means three-dimensional that is something that has width, height, and depth (length).
Our physical environment is three-dimensional and we move around in 3D every day.
Mostly the term 3D is used in 3D coordinates, 3D designing which deals with Parametric or non-parametric designing, Manufacturing technologies.
2D(0 thickness) and 1D( point object) are generally used to simplify the calculations in the real world.
Difference between 2D and 3D view:
2D View:
we can create in a blank paper with just a simple drawing or sketch. It will always on the same surface and it can only provide you with 1 view. If you want a different view, you need to draw another one.
3D view:
we create a 3D Model before you can have a view of it. In a 3D model, able to see a different sides of the model. E.g. 3D Cube, you will be able to see all 6 sides of the cube.
Designing Method and Its Process
Before going to design the product there are some protocols.
Design Process:
The design process usually involves the following steps:
- Identify the model(Product) requirements.
- Actualize the model based on the identified needs.
- Develop the model based on the concepts.
- Analyze the model.
- Prototype the model.
- Construct the model.
- Edit the model, if needed.
Design Method:
It is useful to plan a method of how to create the model before you design the model. After identifying our needs and separate the appropriate concepts.
Create the sketches and decide how to dimension and where to apply relations.
Sketches: Select the appropriate features, such as extrudes and fillets, determine the best features to apply, and decide in what order to apply those features.
Features: Assemblies Select the components to mate and the types of mates to apply and decide in what order to apply those features.
Assemblies: Select the components to mate and the types of mates to apply.
Starting With 3D Design : Body of the Instructable - Revolve


Go into the sketch -> draw a centerline to make an axis around which you want the sketch to be revolved.
Using this the revolve property manager to define the axis of revolution.
3D Design : Blunt the Instructable Body - Cut Extrude


To Cut a solid model by extruding a sketched profile in one or two directions.
If the cut affects multiple bodies in multibody parts, we can see select which bodies to keep in the bodies to keep the dialog box.
3D Design : Instructable Head - Cut Extrude


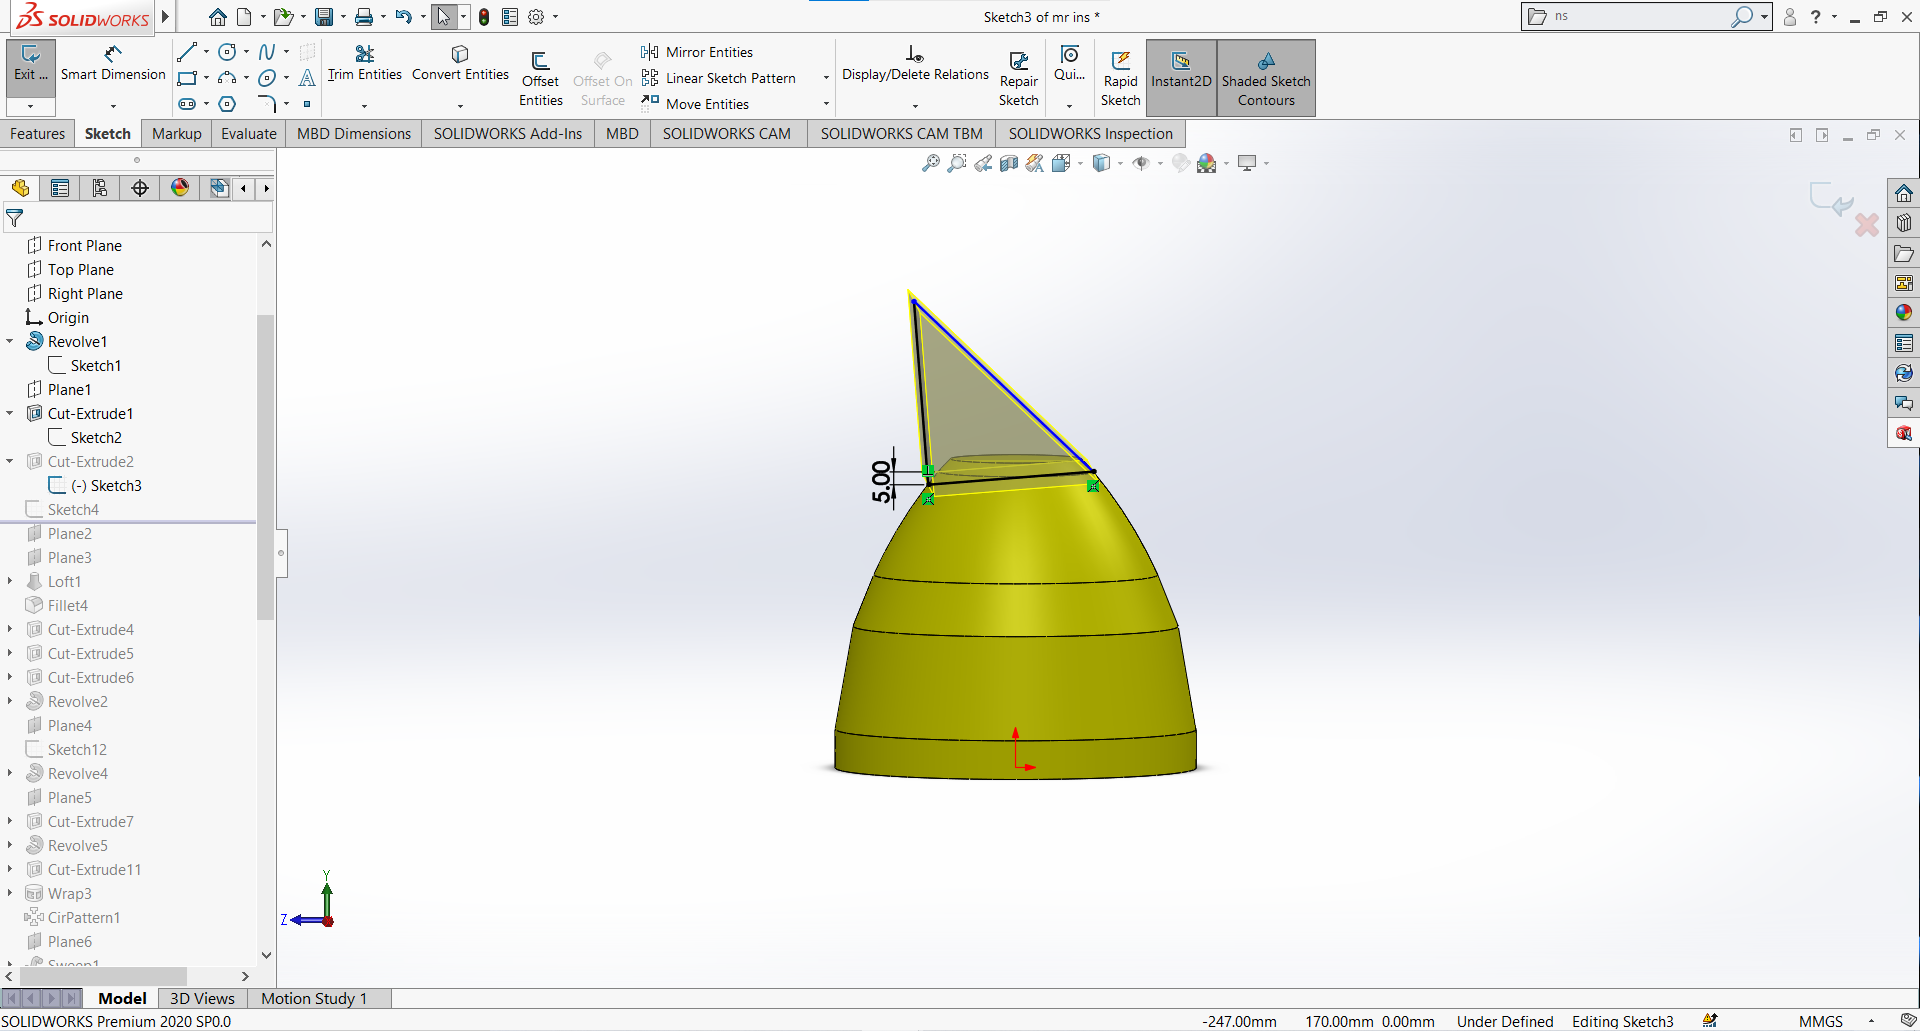
3D Design : Slightly Bend the Instructable - Loft


It is used to add materials between two or more profiles to create a solid feature. The first, Last, or first and last profiles can be points.
Loft creates a feature by making transitions between profiles. A loft can be a base, boss, cut, or surface. we create a loft using two or more profiles. For a solid loft, the first and last profiles must be model faces or faces created by split lines, planar profiles, or surfaces.
3D Design : Rounded the Edges - Fillet

It is used to create a rounded internal or external face along one or more edges on solid or surface features.
It can be of constant or variable size.
Use the fillet property manager to select the fillet type and then set options appropriate to the type.
3D Design :Cut Extrude


3D Design : Instructable Ear - Revolve


3D Design : Center Part of the Instructable Body - Cut Extrude


3D Design :Cut Extrude


3D Design : Wrap


Wraps a closed sketch contour onto the face. Two methods are available. Analytical wraps a sketch onto a planar or nonplanar face, while spline surface wraps a sketch on any face type but cannot wrap around a model.
3D Design : Circular Pattern

A circular pattern is a radial array of objects around a. Center point in a sketch. Axis in a part or assembly
3D Design : Sweep


Sweep a closed profile along an open or closed path to create a solid feature. we can use options in the property manager such as guide curves, profile orientation options, and twist to create a wide variety of shapes.
3D Design : Mirror

Mirror Features, faces, and bodies about a plane or a planar face. In assemblies, you can mirror assembly features.
To create the mirrored part, we first have to select the face or the plane we want to mirror the part about, or else you won't be able to activate the command. we will select a face and then go to the insert drop-down menu and click the mirror part.
3D Design : Boss Extrude

Select a sketch contour in one or two directions to create a solid feature. Use the Extrude property Manager top control where the extrude starts and the property Manager or the Instant 3D drag handle to define its direction and extent.
3D Design : Fillet

Create a rounded internal or external face along one or more edges on a solid or surface feature.
3D Design : Mirror

3D Design : Revolve


3D Design : Cut Extrude and Mirror


3D Design : Revolve and Cut Extrude


Final Design


Ultimaker Cura


Export each component as an STL file, and send them to the Ultimaker Cura 3D printing software.
I used the following settings in the Creality Ender 3D printer.
Printer Nozzle Size: 1mm
Supports: enabled
Retraction distance: 10 mm
Retraction retract speed: 60 mm/sec
Prime speed: 30 mm/sec
Z hop when retracted: enabled
Max Z speed: 120 mm/s
Z hop height: 1 mm Travel
speed: 200 mm/s
Layer height: 0.15 mm
Print temp initial layer: 200 Temperatures
Print Bed Temperature: 60 Temperatures
Main Printing Temperature: 180 Temperature (degrees) for the main print
TempOverhang: 30 degrees
Brim: enabled
support Pattern: Grid Support
Placement: Touching build Plate
Support Overhanging angle: 45
All the other settings: default
Material: PLA
Infill Density: 10
Initial Layer height: 0.2
Standup Setup


Ultimaker Cura

Export each component as an STL file, and send them to the Ultimaker Cura 3D printing software.
I used the following settings in the Creality Ender 3D printer. Printer Nozzle Size: 1mm
Supports: enabled
Retraction distance: 10 mm
Retraction retract speed: 60 mm/sec
Prime speed: 30 mm/sec
Z hop when retracted: enabled
Max Z speed: 120 mm/s
Z hop height: 1 mm
Travel speed: 200 mm/s
Layer height: 0.15 mm
Print temp initial layer: 200 Temperatures
Print Bed Temperature: 60 Temperatures
Main Printing Temperature: 180 Temperature (degrees) for the main print
TempOverhang: 30 degrees
Brim: enabled support
Pattern: Grid Support
Placement: Touching build Plate
Support Overhanging angle: 45
All the other settings: default
Material: PLA Infill
Density: 10 Initial Layer
height: 0.2
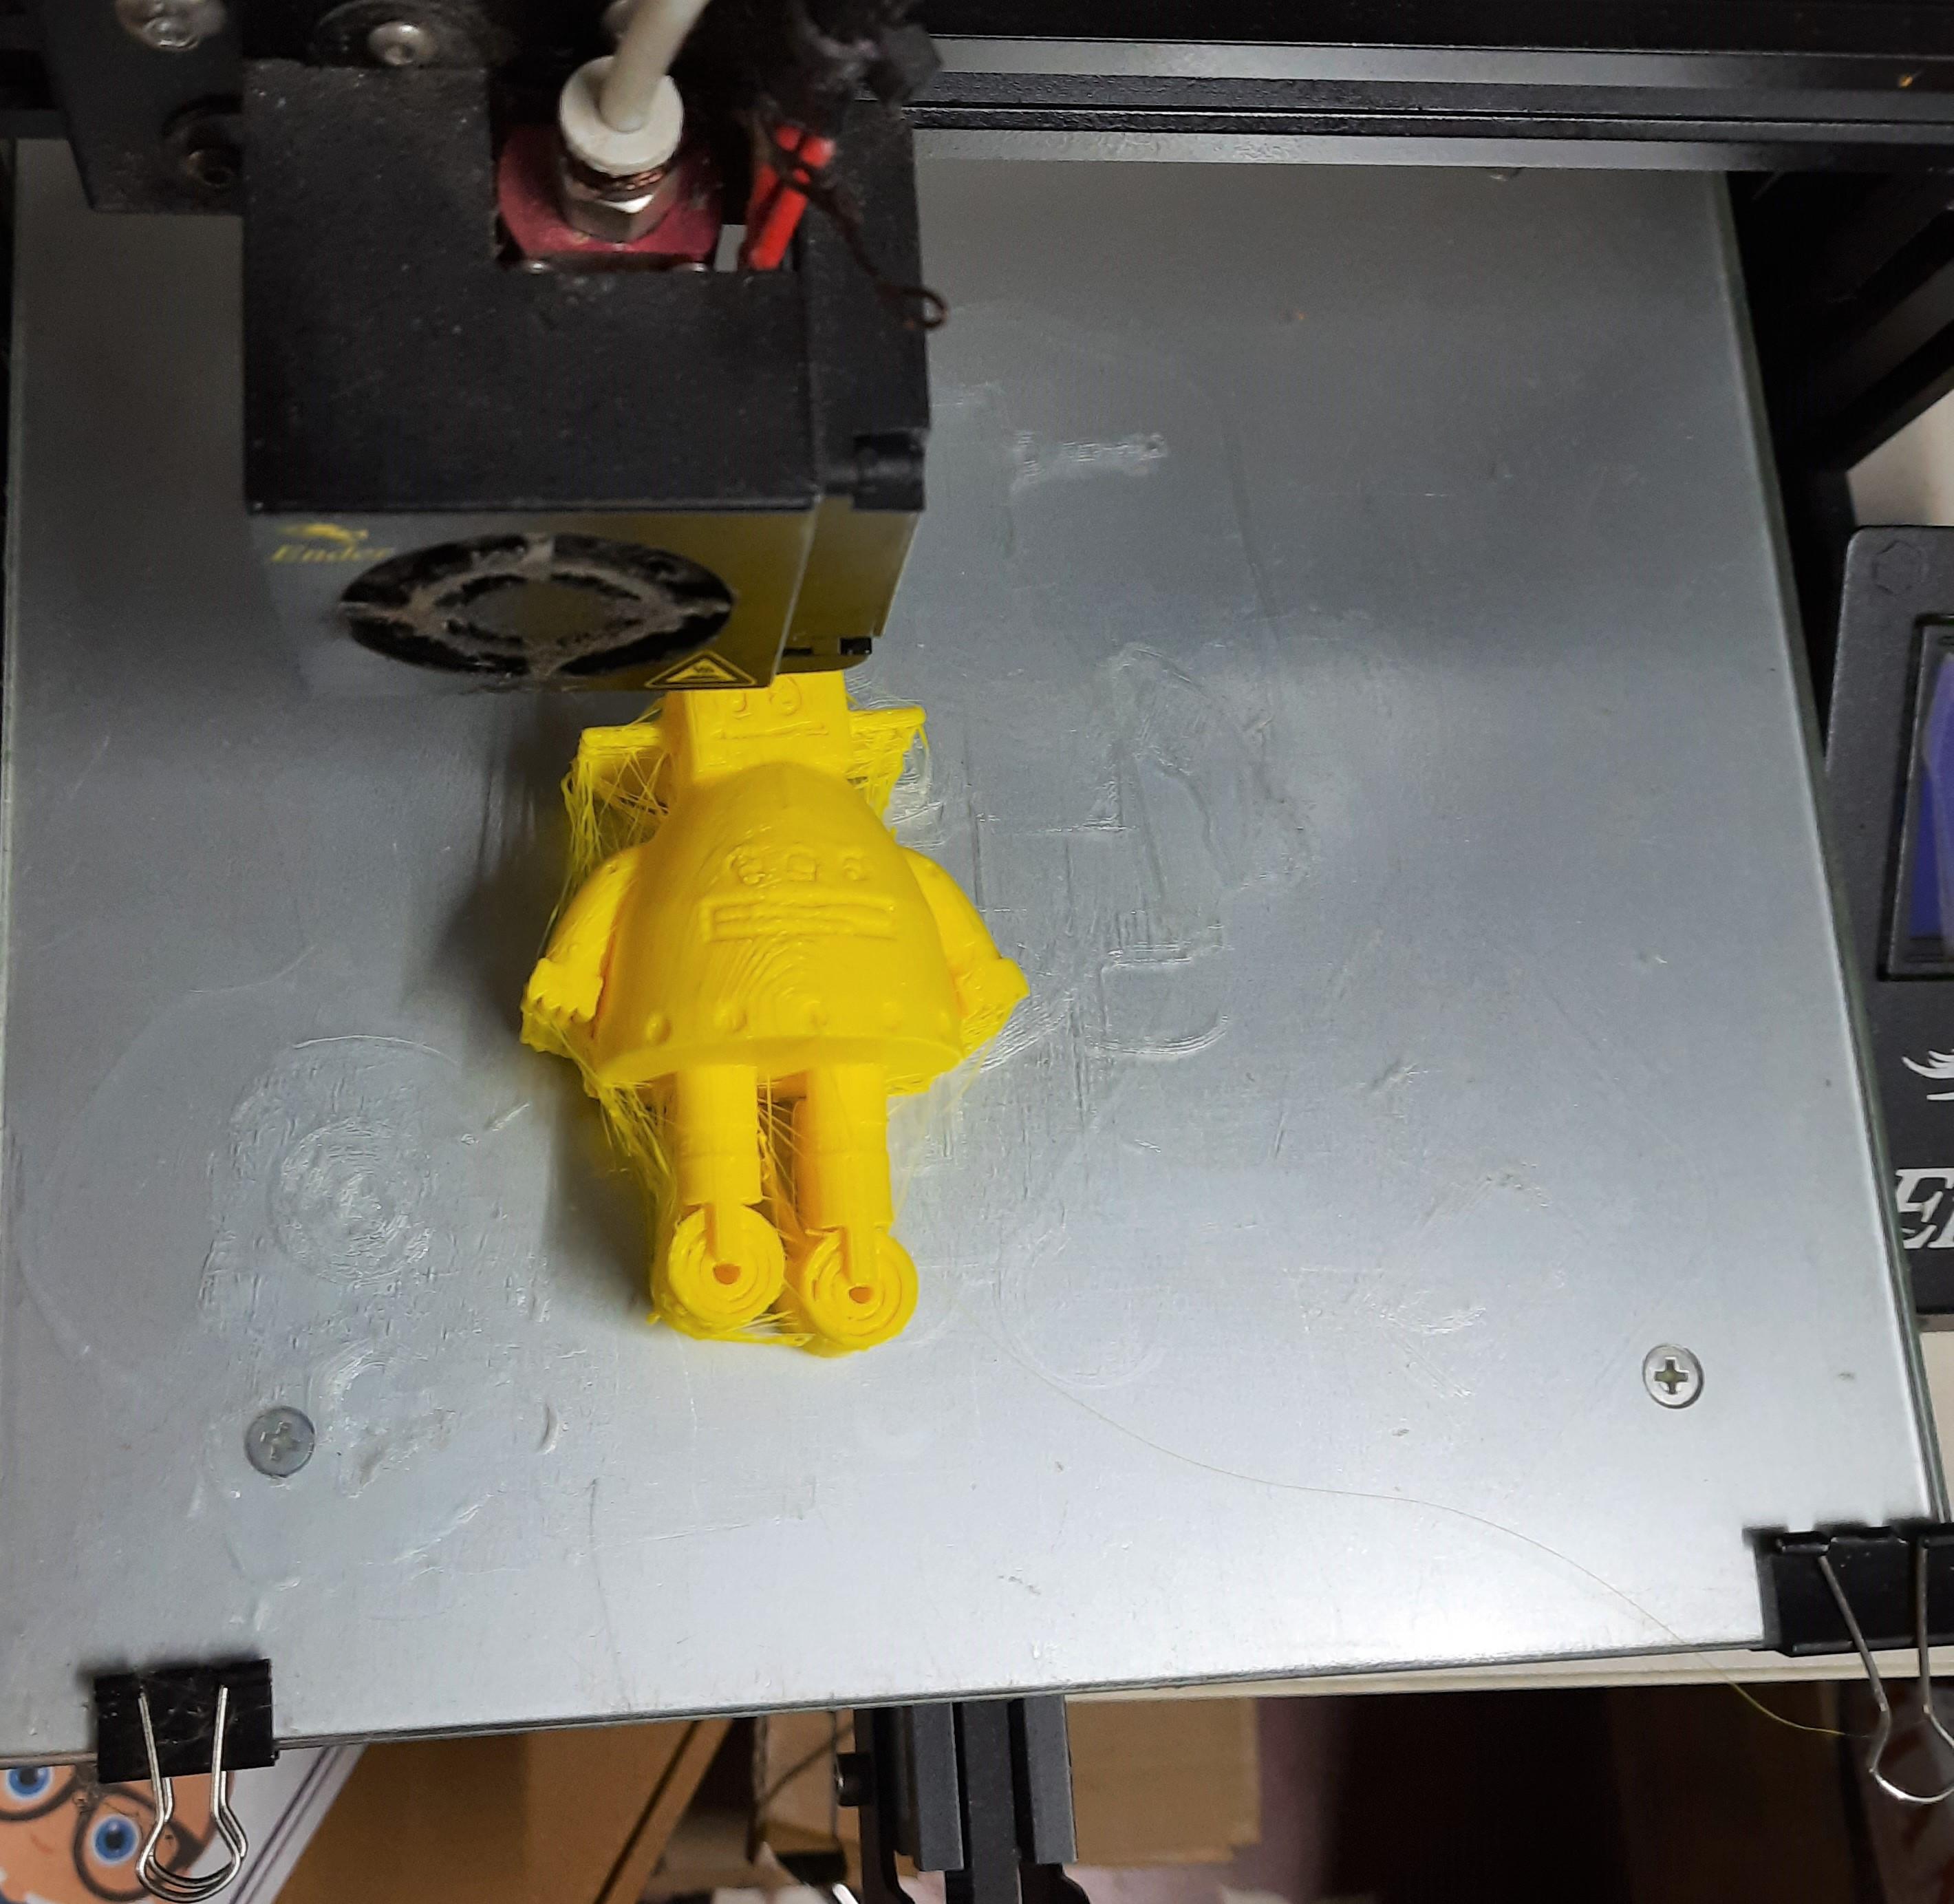
Start Printing


Insert the memory card into this 3D printer. Read the gcode files and select them. Start to print.
Thank You!!!!Have a Great Day
