Palm Tree Hanging Car Decoration
.jpeg)
Art is special because it is a reflection of you! Feeling overwhelmed with the responsibilities from life recently? Channel your stress or nervous energy into a fun craft that you can display in your car. If you don't have a car, no problem! This decoration can be hung anywhere. That's why this Instructable is worth making – it is completely customizable to your preferences and needs.
For the purposes of this project, I am creating a palm tree hanging car decoration, but the design can be customized to suit your own personal interests. Furthermore, I choose to create a square shape for the decoration, but the shape that you choose to make is completely up to you. You can use these instructions to create exactly what I have designed, or you can use them as a guide to customize a design that speaks to you. Happy crafting!
Supplies
.jpg)

Materials: (can be found at Michaels Stores, Inc.)
- A piece of 8.5 x 11" white computer paper
- A pair of scissors
- A pencil
- A ruler
- A piece of 8.5 x 11" light-colored tissue paper (of one’s choosing)
- A glue stick with clear glue
- A paper towel
- A pack of colored pencils (I am using the 36-pack of Prismacolor Premier colored pencils, but as long as you have a light green, a medium green, a dark green, a light brown and a dark brown colored pencil, you will be good)
- 3 bottles of FolkArt Glitterific acrylic paint glitter in the shades 5934 Evergreen, 5880 Green and 5927 Tropical (light green, dark green and blue)
- A paintbrush
- A hole puncher
- A roll of thin colored string
Measure the Dimensions for the Shape

With the 8.5 x 11" piece of white computer paper, take your pencil and draw a line that measures 4 inches along the width of the paper and 4 inches along the length, using the ruler to measure. If you would like to create a different shape for this step, you are welcome to do so. For example, if you wanted to create a circular shape, you could use the bottom of a small bowl for measurement. Additionally, if you would like to customize this step by using colored construction paper, you may do so.
Cut Out the Shape


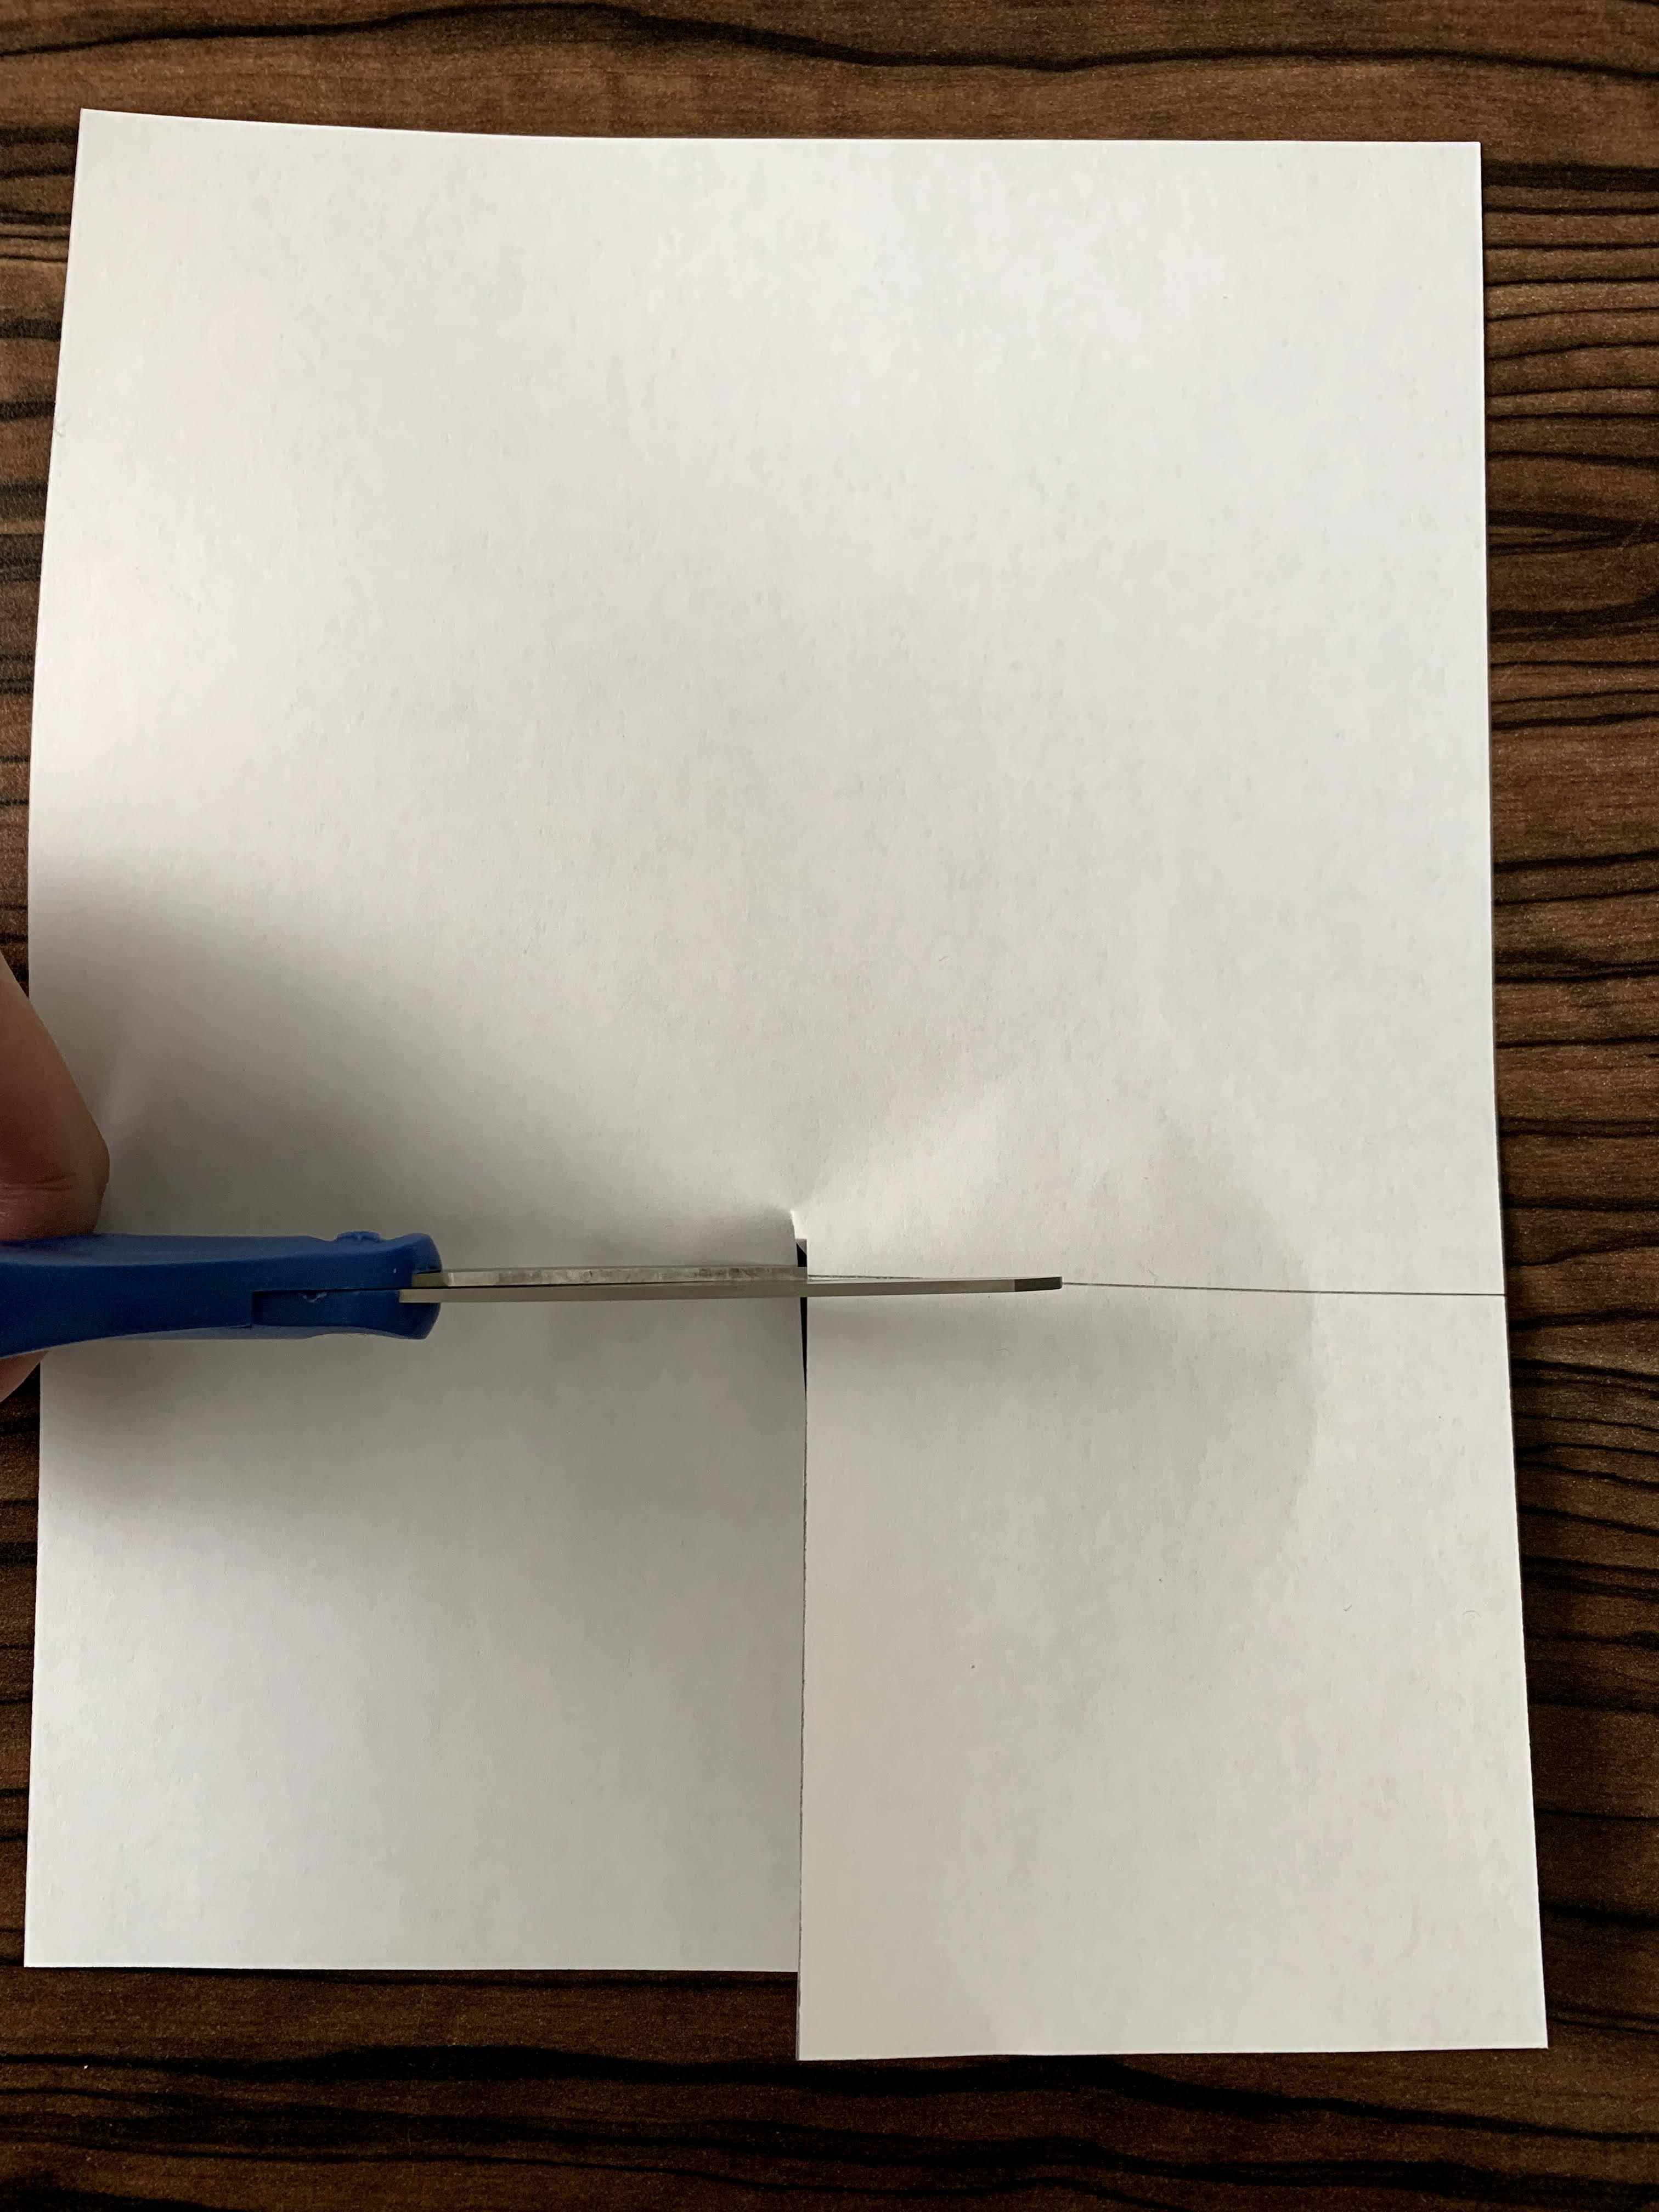
Using the ruler as a guide, follow the pencil lines to cut out a 4 x 4" square.
Place the Tissue Paper Over the Computer Paper

Take a sheet of light-colored tissue paper (color is up to you) and put the 4 x 4" square of computer paper underneath it so that the tissue paper is covering the square. I would recommend choosing a light shade of tissue paper to ensure that the drawing will be visible. The tissue paper adds dimension to the design by creating a more textured surface. If you chose to use colored construction paper in step 1, you are welcome to skip steps 3 – 8.
Cut Out the Tissue Paper Shape

Cut out a 4 x 4" square of the tissue paper, following the edges of the 4 x 4" square of computer paper. Again, this applies to any shape.
Cut Out the Tissue Paper Shape Again

Repeat steps 3 and 4 so that you have two 4 x 4" squares of tissue paper.
Apply Glue

Apply glue to 1 side of the 4 x 4" square of computer paper.
Align the Squares

Align the 4 x 4" square of tissue paper with the 4 x 4" square of computer paper so that the tissue paper is covering the 4 x 4" square of computer paper.
Align the Squares Again
Repeat steps 6 and 7 on the other side of the 4 x 4" square of computer paper.
Let's Draw the Palm Tree!
.jpg)
Take out 5 colored pencils: A light green shade, a medium green shade, a dark green shade, a light brown shade and a dark brown shade. Make sure they are sharpened before use.
Draw the Branches

.png)


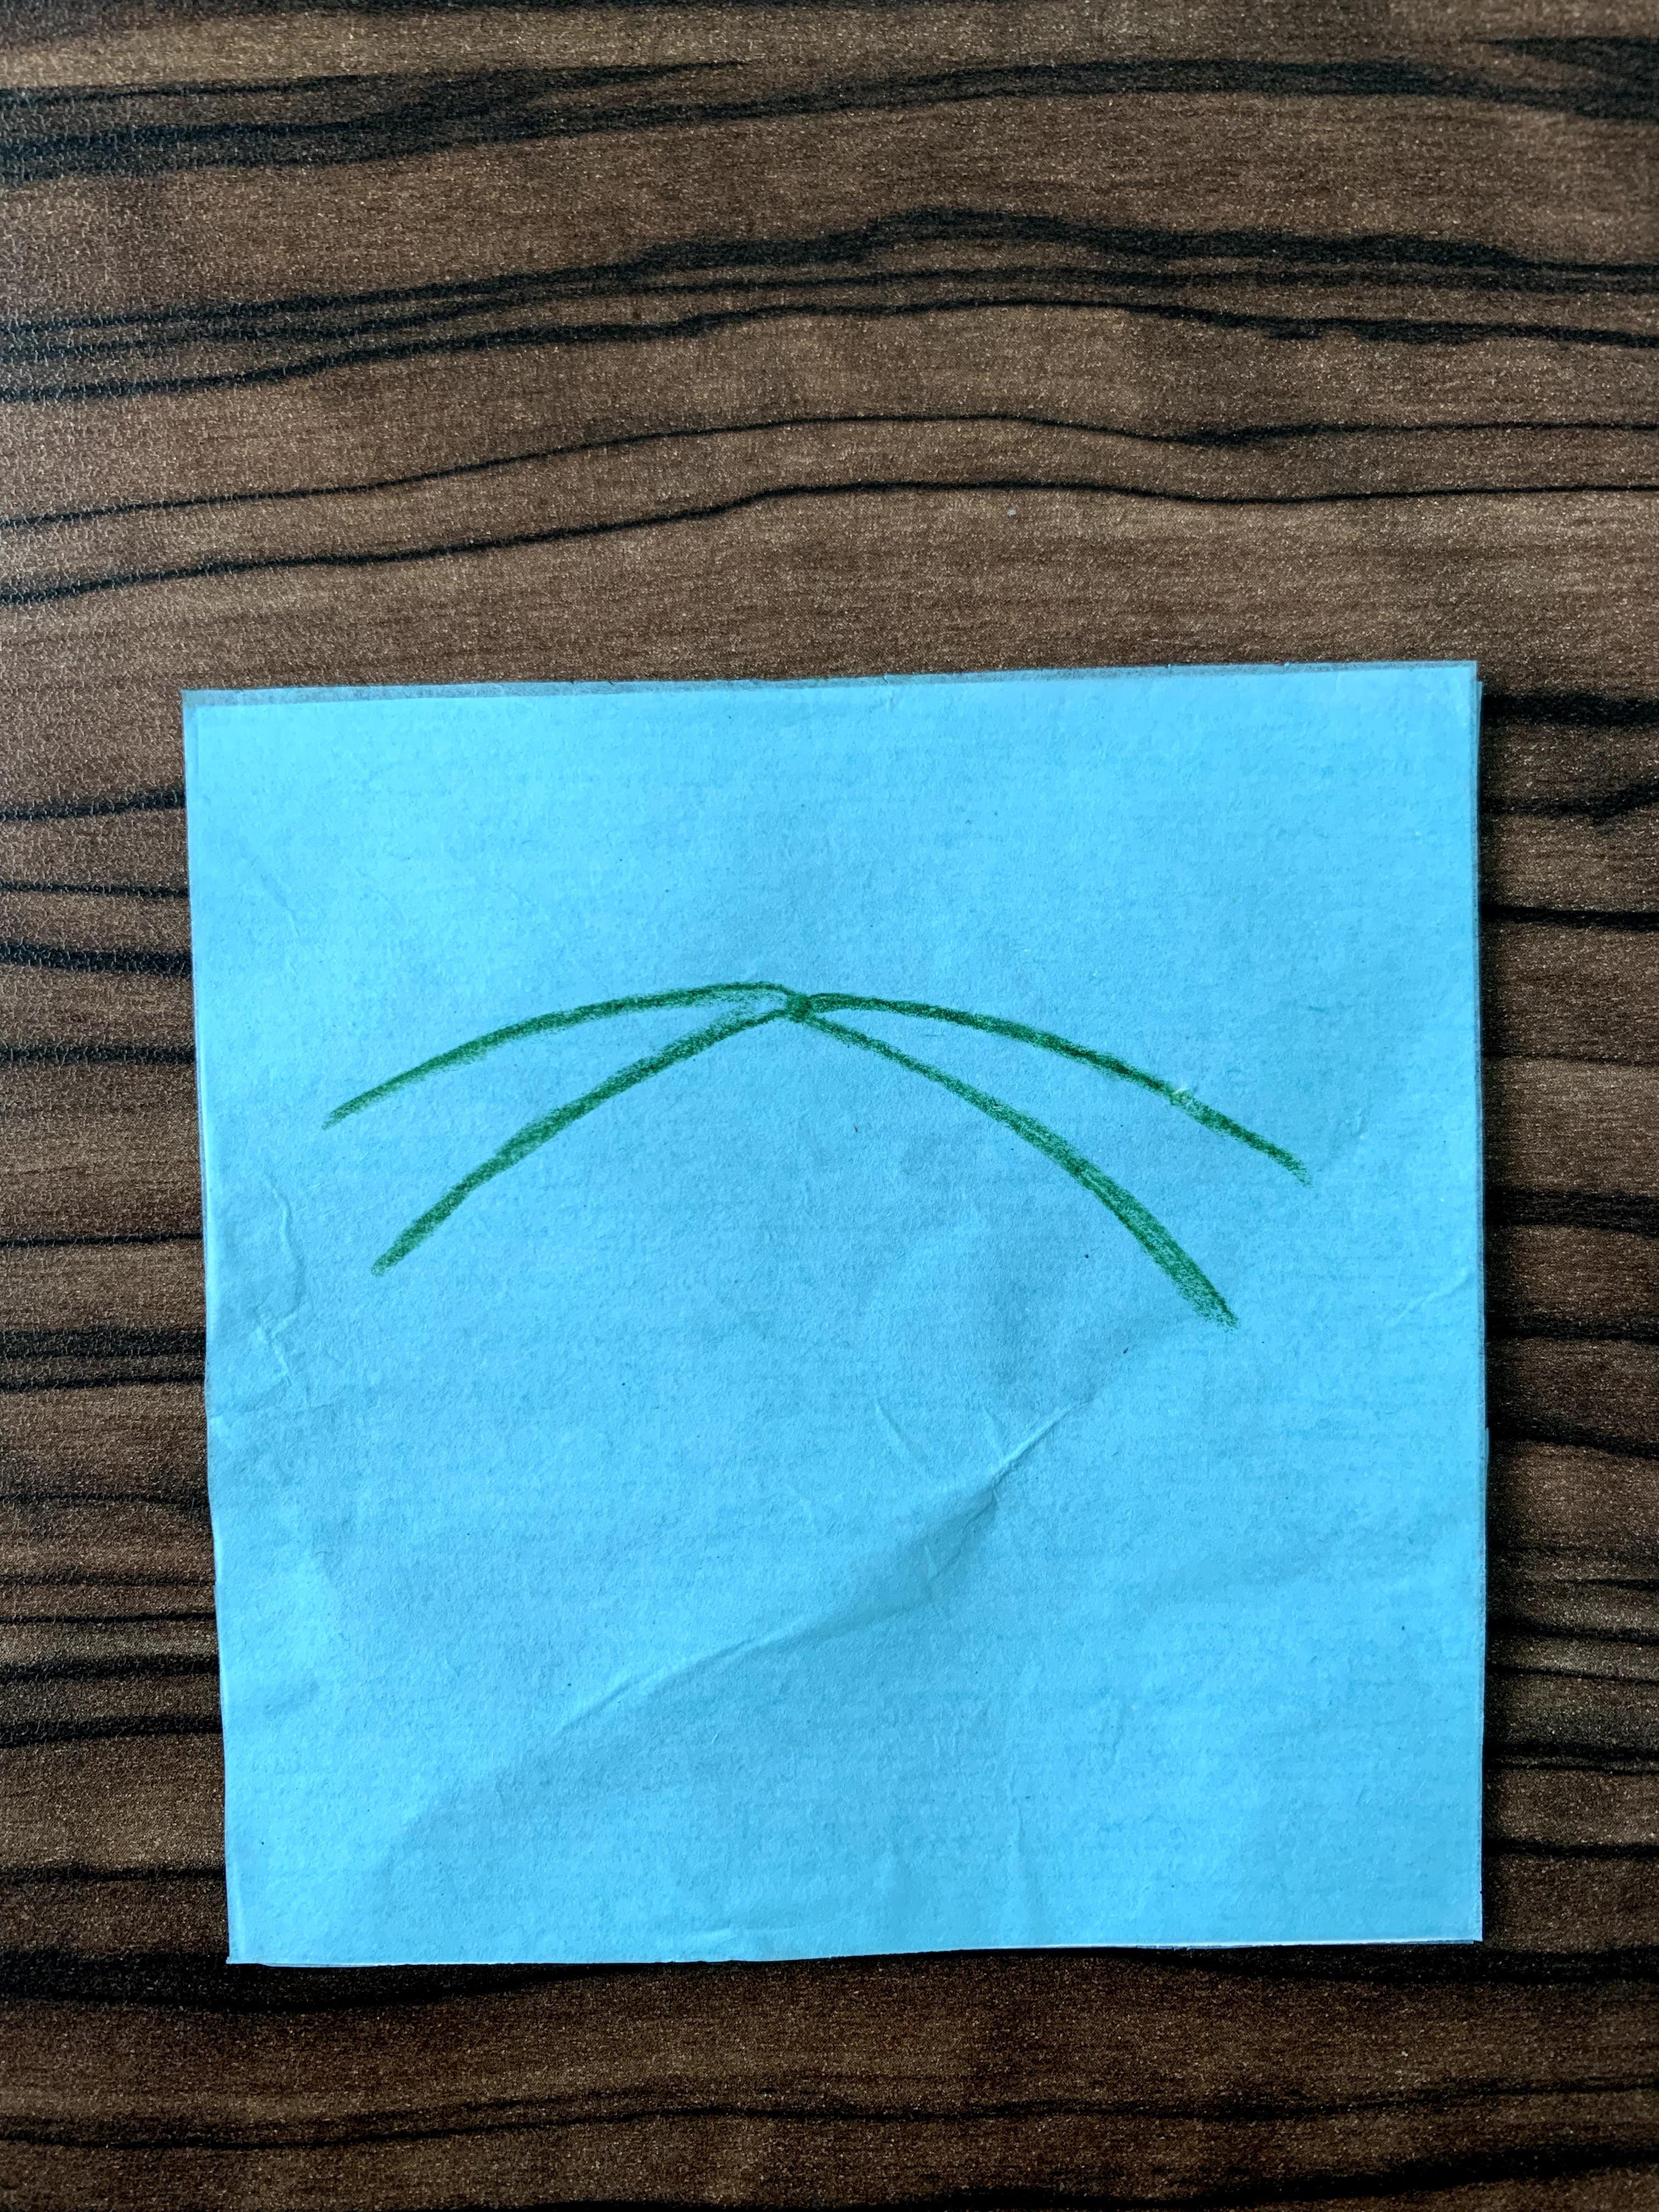
1" from the top of the square and 2" across, use the dark green colored pencil to draw a small, filled in circle. From this centered circle, draw a curved line that extends from the center circle to within 1 centimeter off the edge of the paper. Draw 3 more of these curved lines and measure ½" between each line for spacing purposes. If you are choosing to draw a different design, you can use steps 10 – 19 as a reference for spacing and layering color.
Draw the Leaves
.jpg)


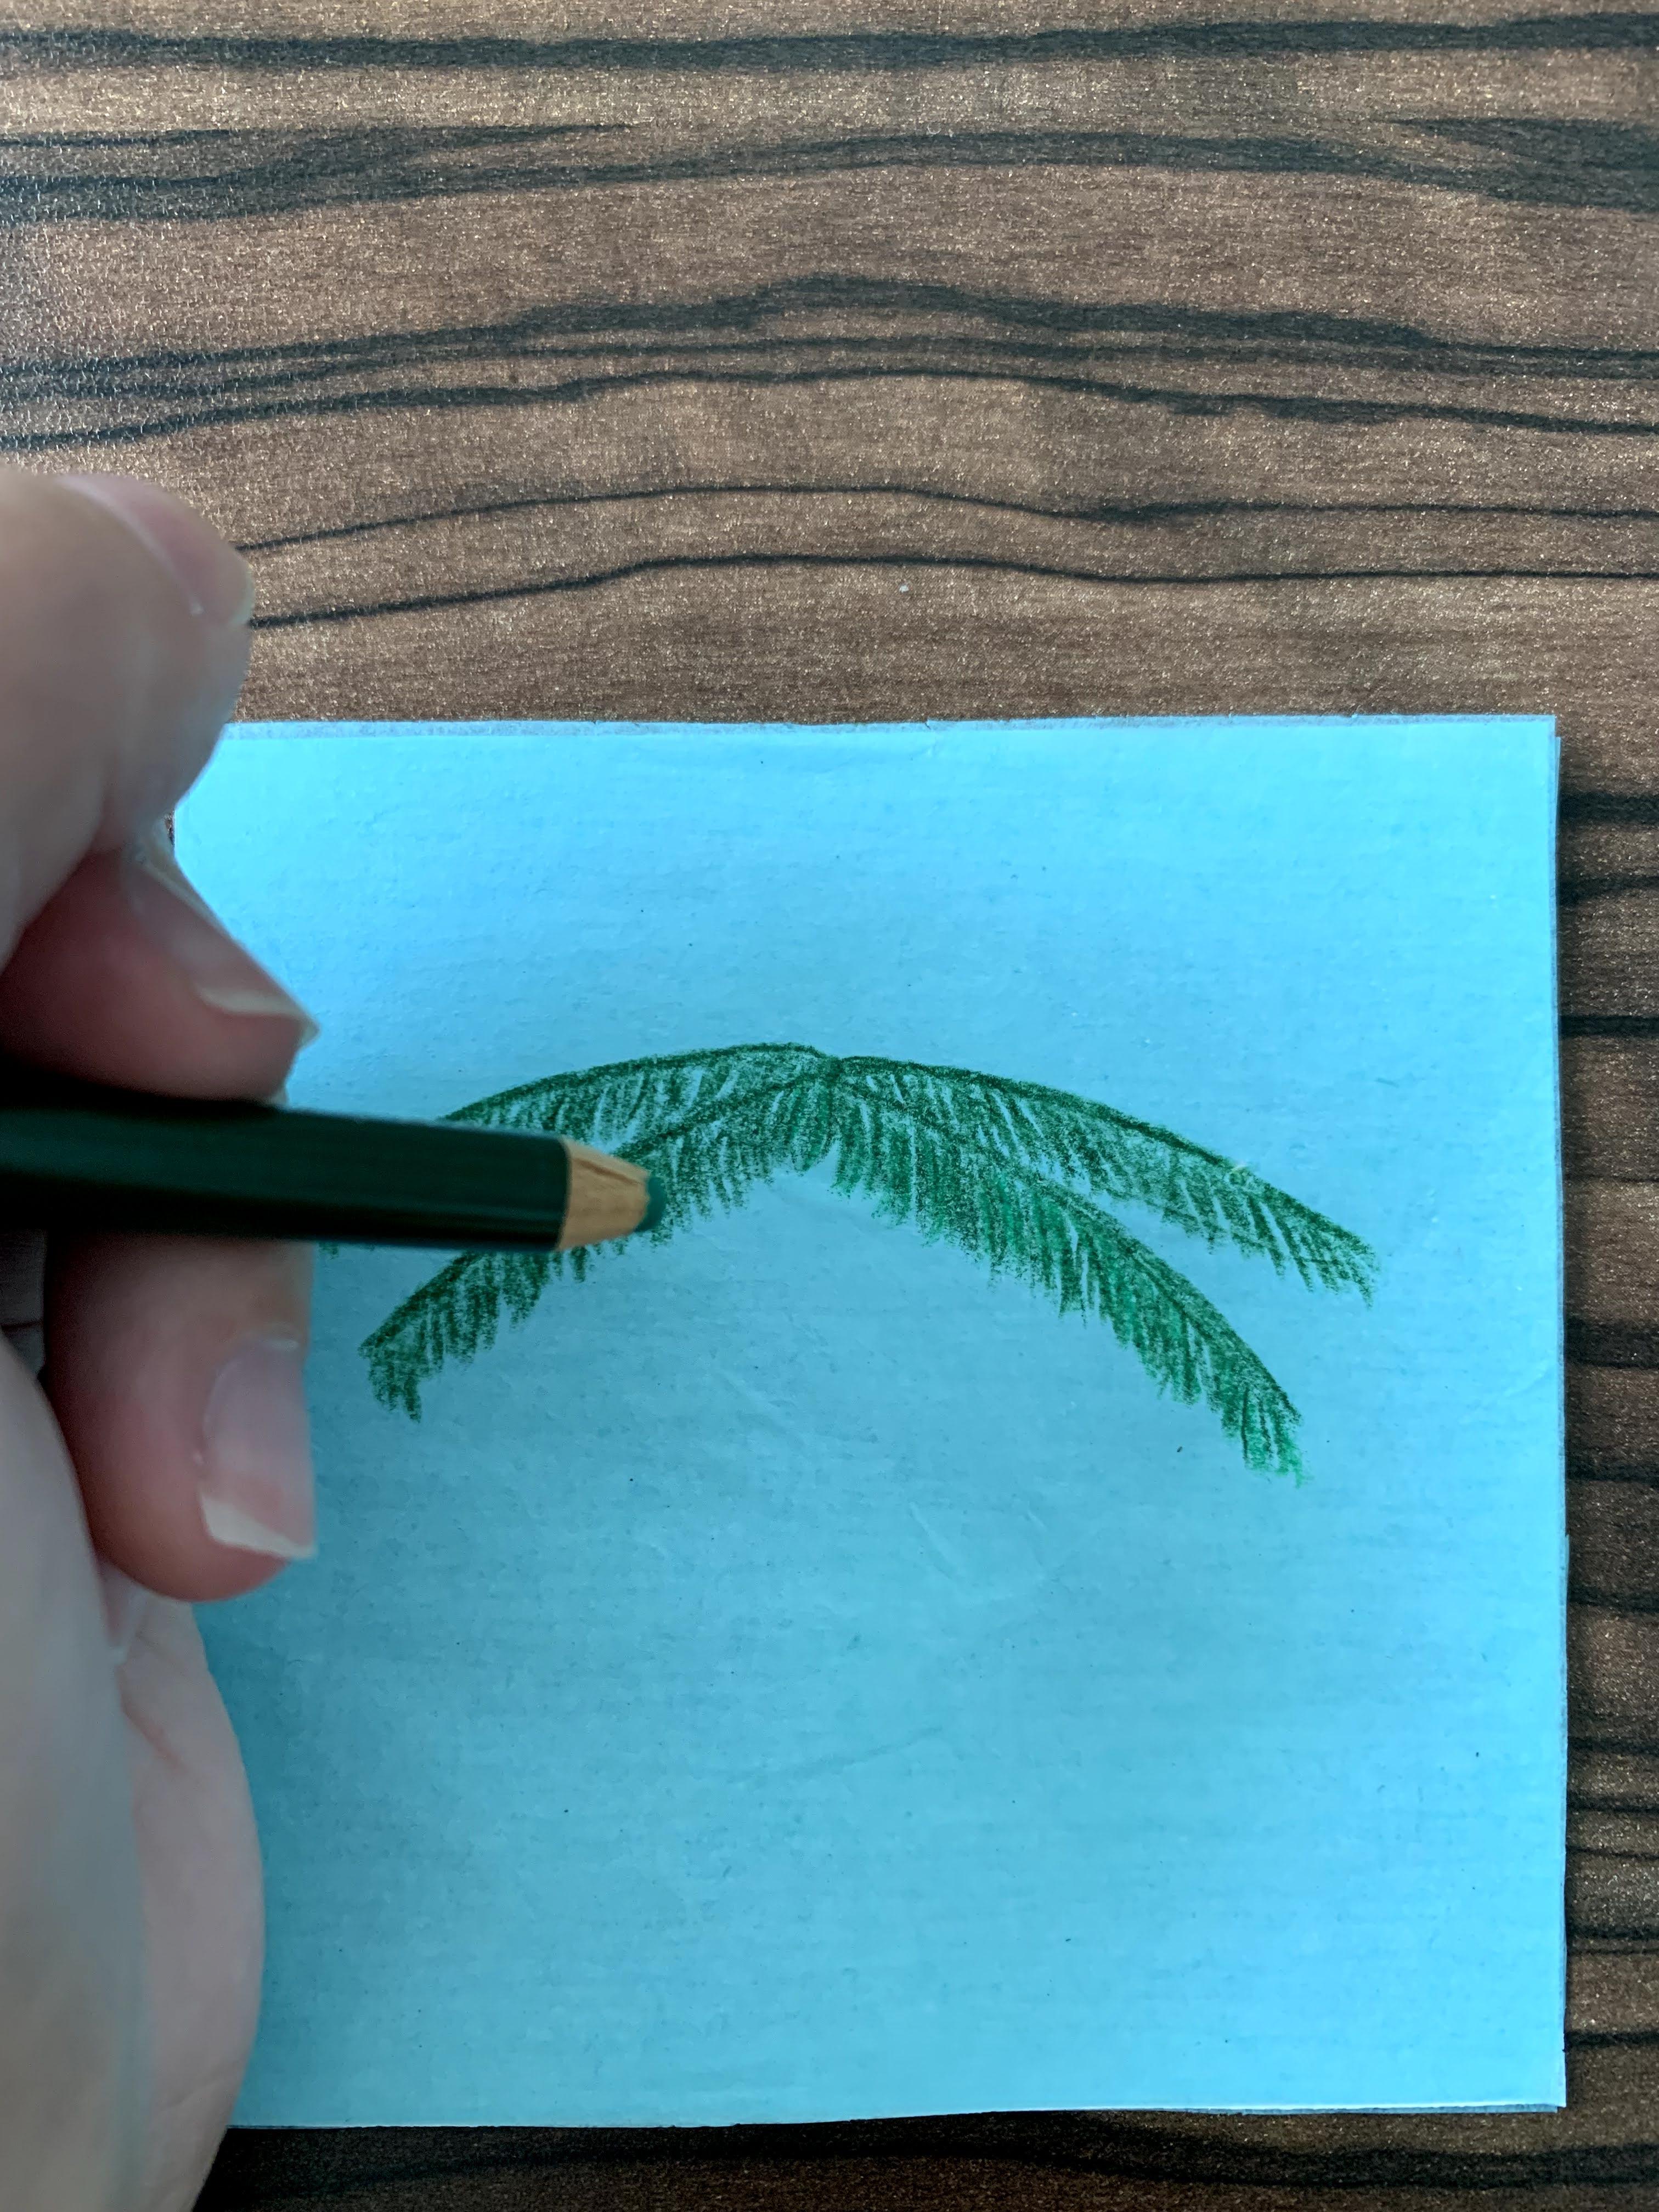
With the dark green colored pencil, draw small, downward-facing lines that are close together and extend off of the curved lines.
Continue Drawing Leaves


Use the medium green colored pencil to perform the same process as step 11.
Keep on Drawing Leaves

Use the light green colored pencil to perform the same process as steps 11 and 12.
Begin Drawing the Stem

With the dark brown colored pencil, draw 2 short lines just below the green, downward-facing lines so that they are the same length apart as the sides of the circle you drew.
Draw the Stem


Using the dark brown colored pencil, extend the small lines directly down the 4 x 4" square. When you are 1 centimeter away from the bottom of the 4 x 4" square, shift the straight line into a slightly curved line until you hit the bottom of the 4 x 4" square.
Shade in the Stem

With the dark brown colored pencil, color in the space between these lines to create the stem of the tree.
Shade in the Stem More

With the light brown colored pencil, color over the dark brown colored pencil.
Shade in the Circle

With the dark green colored pencil, blend in the small circle by coloring over it lightly.
Apply Green Glitter


Dip the small paintbrush into the dark green bottle of glitter and paint it over the green lines you drew. The glitter adds texture to the design because when the final product is hanging in your car, the sunlight will catch it and enhance the shimmer. If you chose to create a different design, you can use any color(s) of this glitter to fit your design interests.
Apply More Green Glitter

Rip the paper towel in ½ and wipe off the paintbrush. Repeat step 19 using the light green glitter.
Add Glitter to the Background


Wipe off the paintbrush and dip it into the blue bottle of glitter. Cover the tissue paper so that the surface area surrounding the palm tree has blue glitter.
Add Glitter to the Other Side

Wait 3 minutes for it to dry. Place the clean ½ of the paper towel onto the surface you are working on. Flip over the square onto the back side and onto the paper towel and repeat the same process until the back is also covered with blue glitter.
Punch a Hole

.jpg)

Wait 3 minutes for the back of the square to dry, then flip it over to the front. Take your hole puncher and punch a hole ¼" from the top of the 4 x 4" square.
Add the Colored String
.jpg)
.jpg)

.jpeg)
.jpeg)
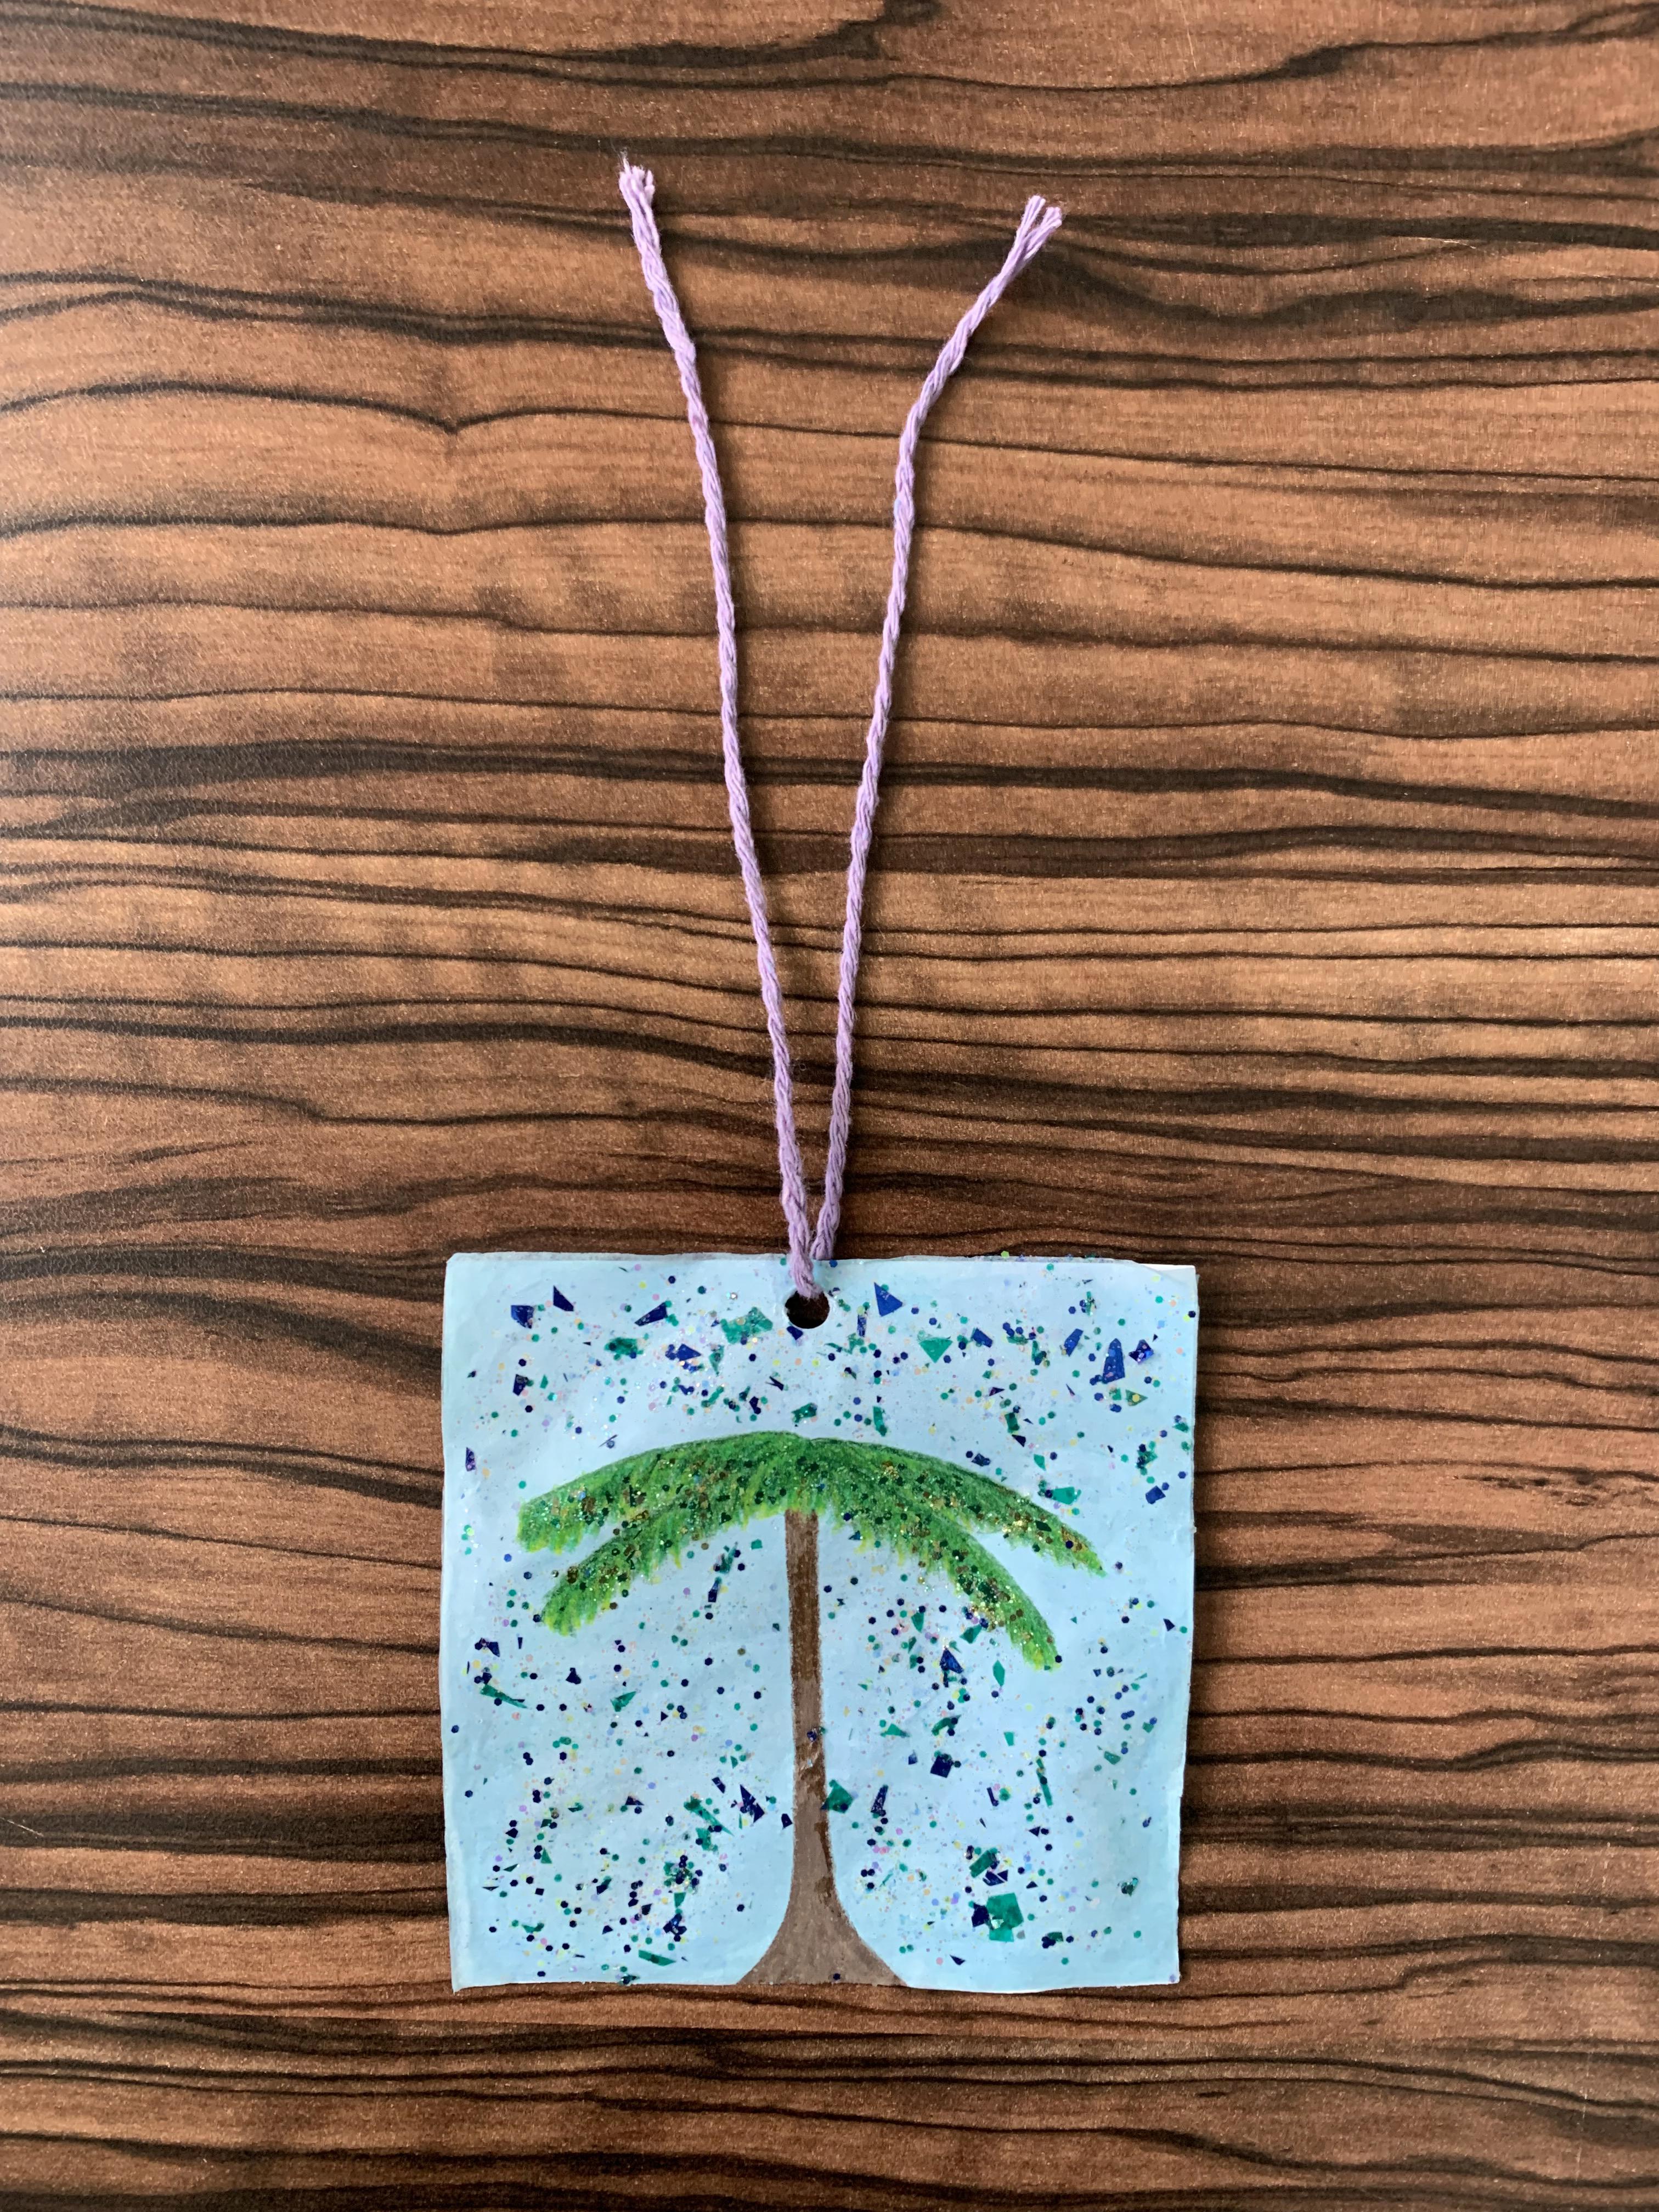
Take your colored string and measure 12" with your ruler. Cut the string at the 12" mark and loop it through the hole. Make sure that the string is even on both sides and tie a knot where the hole punch is. Then, tie a knot where the ends of the string meet at the top.
Time to Take a Drive!
.jpeg)
You have yourself a hanging car decoration! This can be displayed behind your rear-view mirror and makes for a fun piece of artwork that can liven up your drive. Enjoy!
Disclaimer
While this craft has been designed with the safest intentions in mind, I do not assume any responsibility or liability for any errors that the user may find in the images or the text, nor for any potential effects that the user may encounter from the materials, such as paper cuts, allergies, or reactions.