PaperCraft : #The_Selfie_Edition
by Stuart Carlisle in Craft > Paper
1649 Views, 3 Favorites, 0 Comments
PaperCraft : #The_Selfie_Edition

WARNING! : PLEASE SEEK LEGAL COUNSEL FROM YOUR LAWYER BEFORE ATTEMPTING THIS PROJECT - YOU MIGHT GET PEOPLE TRYING TO SUE YOU FOR APPROACHING PAPERCRAFT PERFECTION! ALSO MAKE SURE THAT YOU HAVE YOUR TUXEDO DRY CLEANED AND READY FOR USE BECAUSE BY UNDERTAKING THIS PROJECT YOU COULD BECOME A NOMINEE FOR THE NOBEL PRIZE IN PAPERCRAFT ENGINEERING! THE STUART CARLISLE HUMANE ASSOCIATION MONITORED THE ANIMAL ACTION IN THIS PROJECT - NO ANIMALS WERE HARMED
So you can't clone a guinea pig, you can't ride shotgun on Santa's red sleigh as he streaks across the sky and you're probably not likely to ever become the President Of the Planet......but don't despair, you can achieve an experience that is in the same ultimate class - you can build yourself a Papercraft statue that's taking a #Selfie!
The model being made here is a winged female holding a cellphone in a 'taking a selfie' pose and is based on Team Ninja's critically acclaimed "Nyotengu" from the 'DOA series'.
Although i used the Blackberry Bold 9000, you can practically use any phone model of your liking, provided you adjust the hand holding the phone accordingly. This model has the following dimensions when printed on A4 paper:
HEIGHT - 1014mm
WIDTH - 718mm
DEPTH - 1552mm
There are five levels of complexity/detail in making this model
1. The Hair
The hair is fashioned after the hairstyles that "Oirans" or Japanese Courtesans used to wear. this is a seriously unique hairstyle and the hair bristles with slews of dangling ornaments, strings of beads, ribbons and cords tied into fancy knots.The hair is intricately done, with perfect straight cut style bangs and perfectly cut hime side locks. The rest of the side locks are left uncut and long, and tied to the sides with sophisticated topknot style bands on the tops. The rest of the hair is worn in perfectly straight cut pigtails and features geisha and oiran style hair decorations.
2. The Face
The face is the most detailed section with lots of small pieces that need to be pieced together and requires more or less the finesse of an open heart surgeon to put together.
3. The Bust
There are is a lot of detail and parts to put together here. The emphasis should be on bringing out the voluptuous curvature and making it look as natural as possible.
4. The Fingers
These are steel reinforced due to the fact that they have to support holding a heavy phone - in this case the Blackberry Bold 9000. The fingers might actually turnout to be more detailed than the face.
5. The Wings
The wings are also steel and cardboard reinforced and are the body part that consumes the most amounts of material. Almost 50% of the 248pages required to make this model go towards making the wings.
If you just want to build the model without following the steps below, I've attached a link to the PDF:
This project remains committed to the environment and seeks to have a low carbon footprint. Please think twice before printing this document. This project used sustainability strategies to reduce its carbon emissions and environmental impact.
(Please don't share the PDF without the link to where it came from, thank you!)
If this is your first paper craft project and you would like to have a little bit of practice before building this model you can try building these models first :
1. Wall-mountable Paper Unicorn
https://www.instructables.com/id/Faceted-Papercraft-Unicorn-Edition/
2. Curvaceous Paper craft Statue
https://www.instructables.com/id/Faceted-Papercraft-Curvaceous-Edition-Bonus/
This project's .PDF is meant to be printed on A4, but you can print it on A3 and the model will be about 75% larger.
The PDF for this project contains close to 250 pages - as such it will probably take a considerable amount of time to assemble, your patience and endurance will be tested. Working at a rate of roughly 4 hours a day, it took me almost 190 days to fully assemble. That's counting the time spent creating the metal endoskeleton and embedding it inconspicuously into the model. Its only my third papercraft project so a seasoned papercrafter might take a lot less time than I did. Anyway, Without further ado - lets get to it!
Downloads
Simulating Human Anatomy in Papercrafts


Given that the model has to support heavy add-ons like a 136g Blackberry smartphone, wings with a combined wingspan of about 2400mm (about 8 feet) and the elaborate and exquisite Oiran hairstyle, it is important there be an internal support structure. As such, lessons from Biology are taken, and an attempt at simulating human anatomical support structures is undertaken in the following manner :
1. Mild Steel wire - for simulating BONES
2. Fleece Cloth - for simulating MUSCLE
3. Tissue Paper - for simulating FAT
4. Crumpled Newspapers - for simulating SOFT TISSUE
5. White paper/Vellum board - for simulating SKIN
6. Thin fine copper wire - for simulating TENDONS
7. Cardboard - for simulating CARTILLAGE
Basically I was gluing the pieces together in such a way that the printed lines and the edge numbers were within the model and not visible on the outside. I was working from the ground up - starting with the legs and then working my way up to the head. This makes it easier to stand the model while working on it. I used a non toxic water based glue for joining the pieces together. Where necessary I reinforced some areas with tape from inside the model such that it was not visible from the outside. Many sources would recommend that you start from intricate to coarse - but I recommend you start from coarse to intricate as in so doing you will get the hang of the gluing process so that when you move to the finer details you will be better able to handle the intricacy. Having the PDF open will be a big help as you can use the search facility to find the location of the corresponding piece or edge that you need to cut out and glue.
LEGS AND TORSO


Since the model is designed in such a way that the model is in a kneeling position, there is a lot of pressure on the toes. to strengthen the toes a plastic inserts are put inside the toes. Also at the ankle bend and especially at the knee joint there are steel inserts and also fleece cloth inserted into the model so that there is structural integrity. The legs support the whole weight of the model so extra strong joints are needed and this is achieved by intertwining the steel to make it stronger. The torso by virtue of the model having a large waist to hip ratio, is very vulnerable to breaking in two. As such a lot of supporting cloth and cardboard is required to ensure a strong and sturdy waist. At this stage you will notice the model is a bit hollow and if you touch it indelicately 'dents' will be left in the model. To combat this , while at the same time putting some old newspapers to good use, I stuffed the model with crumbled up newspapers. Cloth could be used instead of newspapers I suppose - in which case its a great use for old tshirts, old socks e.t.c. There are however, other methods to give a papercraft model of this magnitude structural integrity. These include the use of fibreglass resin, liquid glass, wood glue e.t.c Assuming that you have managed to assemble the legs and glue both the left and right legs together next step will be to find a way to mount the legs on a platform.
BUST


The bust is comprised of very small interlinking pieces, as such there will be a lot of handling of the bust when you're making it. In order to prevent the white material from getting dirty, clean hands are required when making this stage of the model. At this stage a McGill reverse tweezer could come in handy if not essential. On making the apex of the bust, a pen could be used to form the tip. So as to maintain the characteristic shape of the bust, cloth and newspapers can be inserted such that the shape remains well defined and perky.
Arms & the Selfie Hand


For the selfie hand, the first thing is to get some steel and fashion it into a kind of a skeletal hand that fits right around the smart phone that you want to use for the project. Mark the position of the fingers on the phone so as to give you guidance. Also put some fleece around the steel fingers so as to protect the phone from getting scratched by the steel endoskeleton. The hand holding the phone, especially the elbow joint and the shoulder joint are to be made as strong as possible as most of the downward force will be experienced in these areas. You can use a protractor to get the angle of the arm bends and shoulder bend to be up to par. The other hand thats not holding the phone should be made to rest on the apex of the left bust
The SLS AMG Style Gullwings
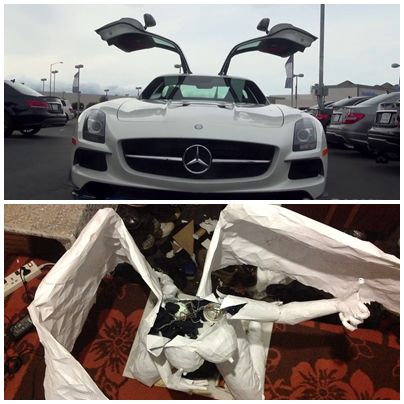


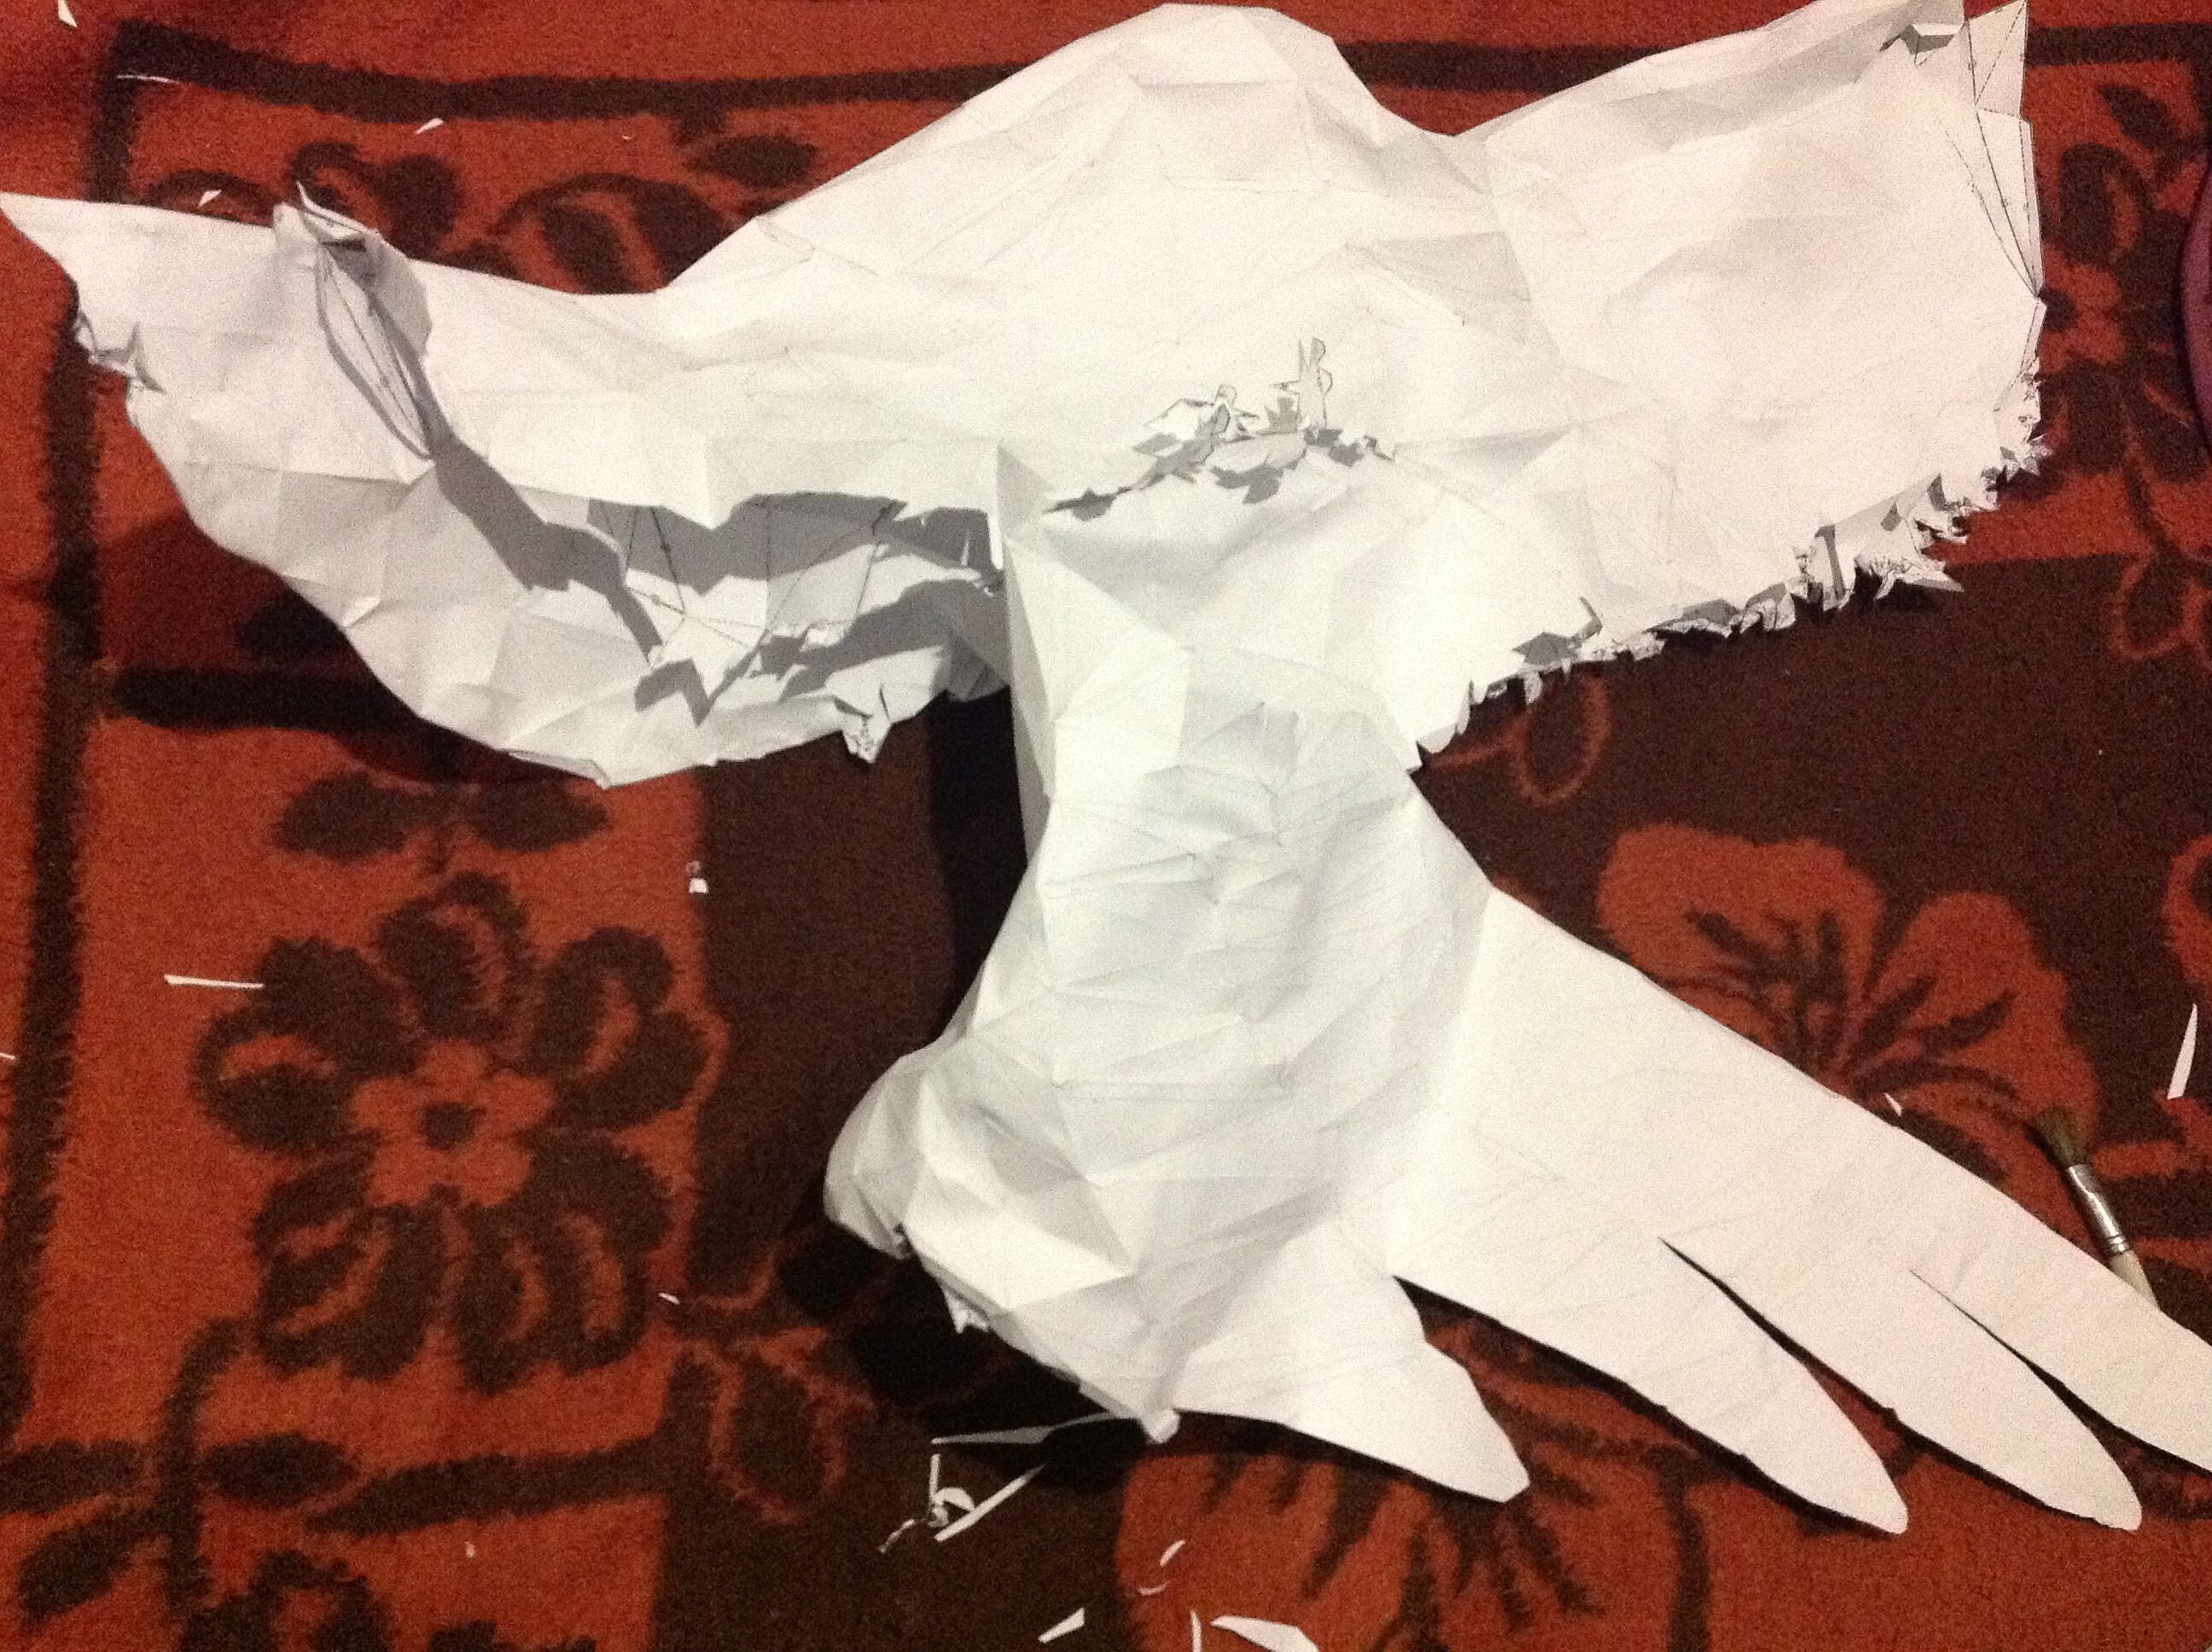


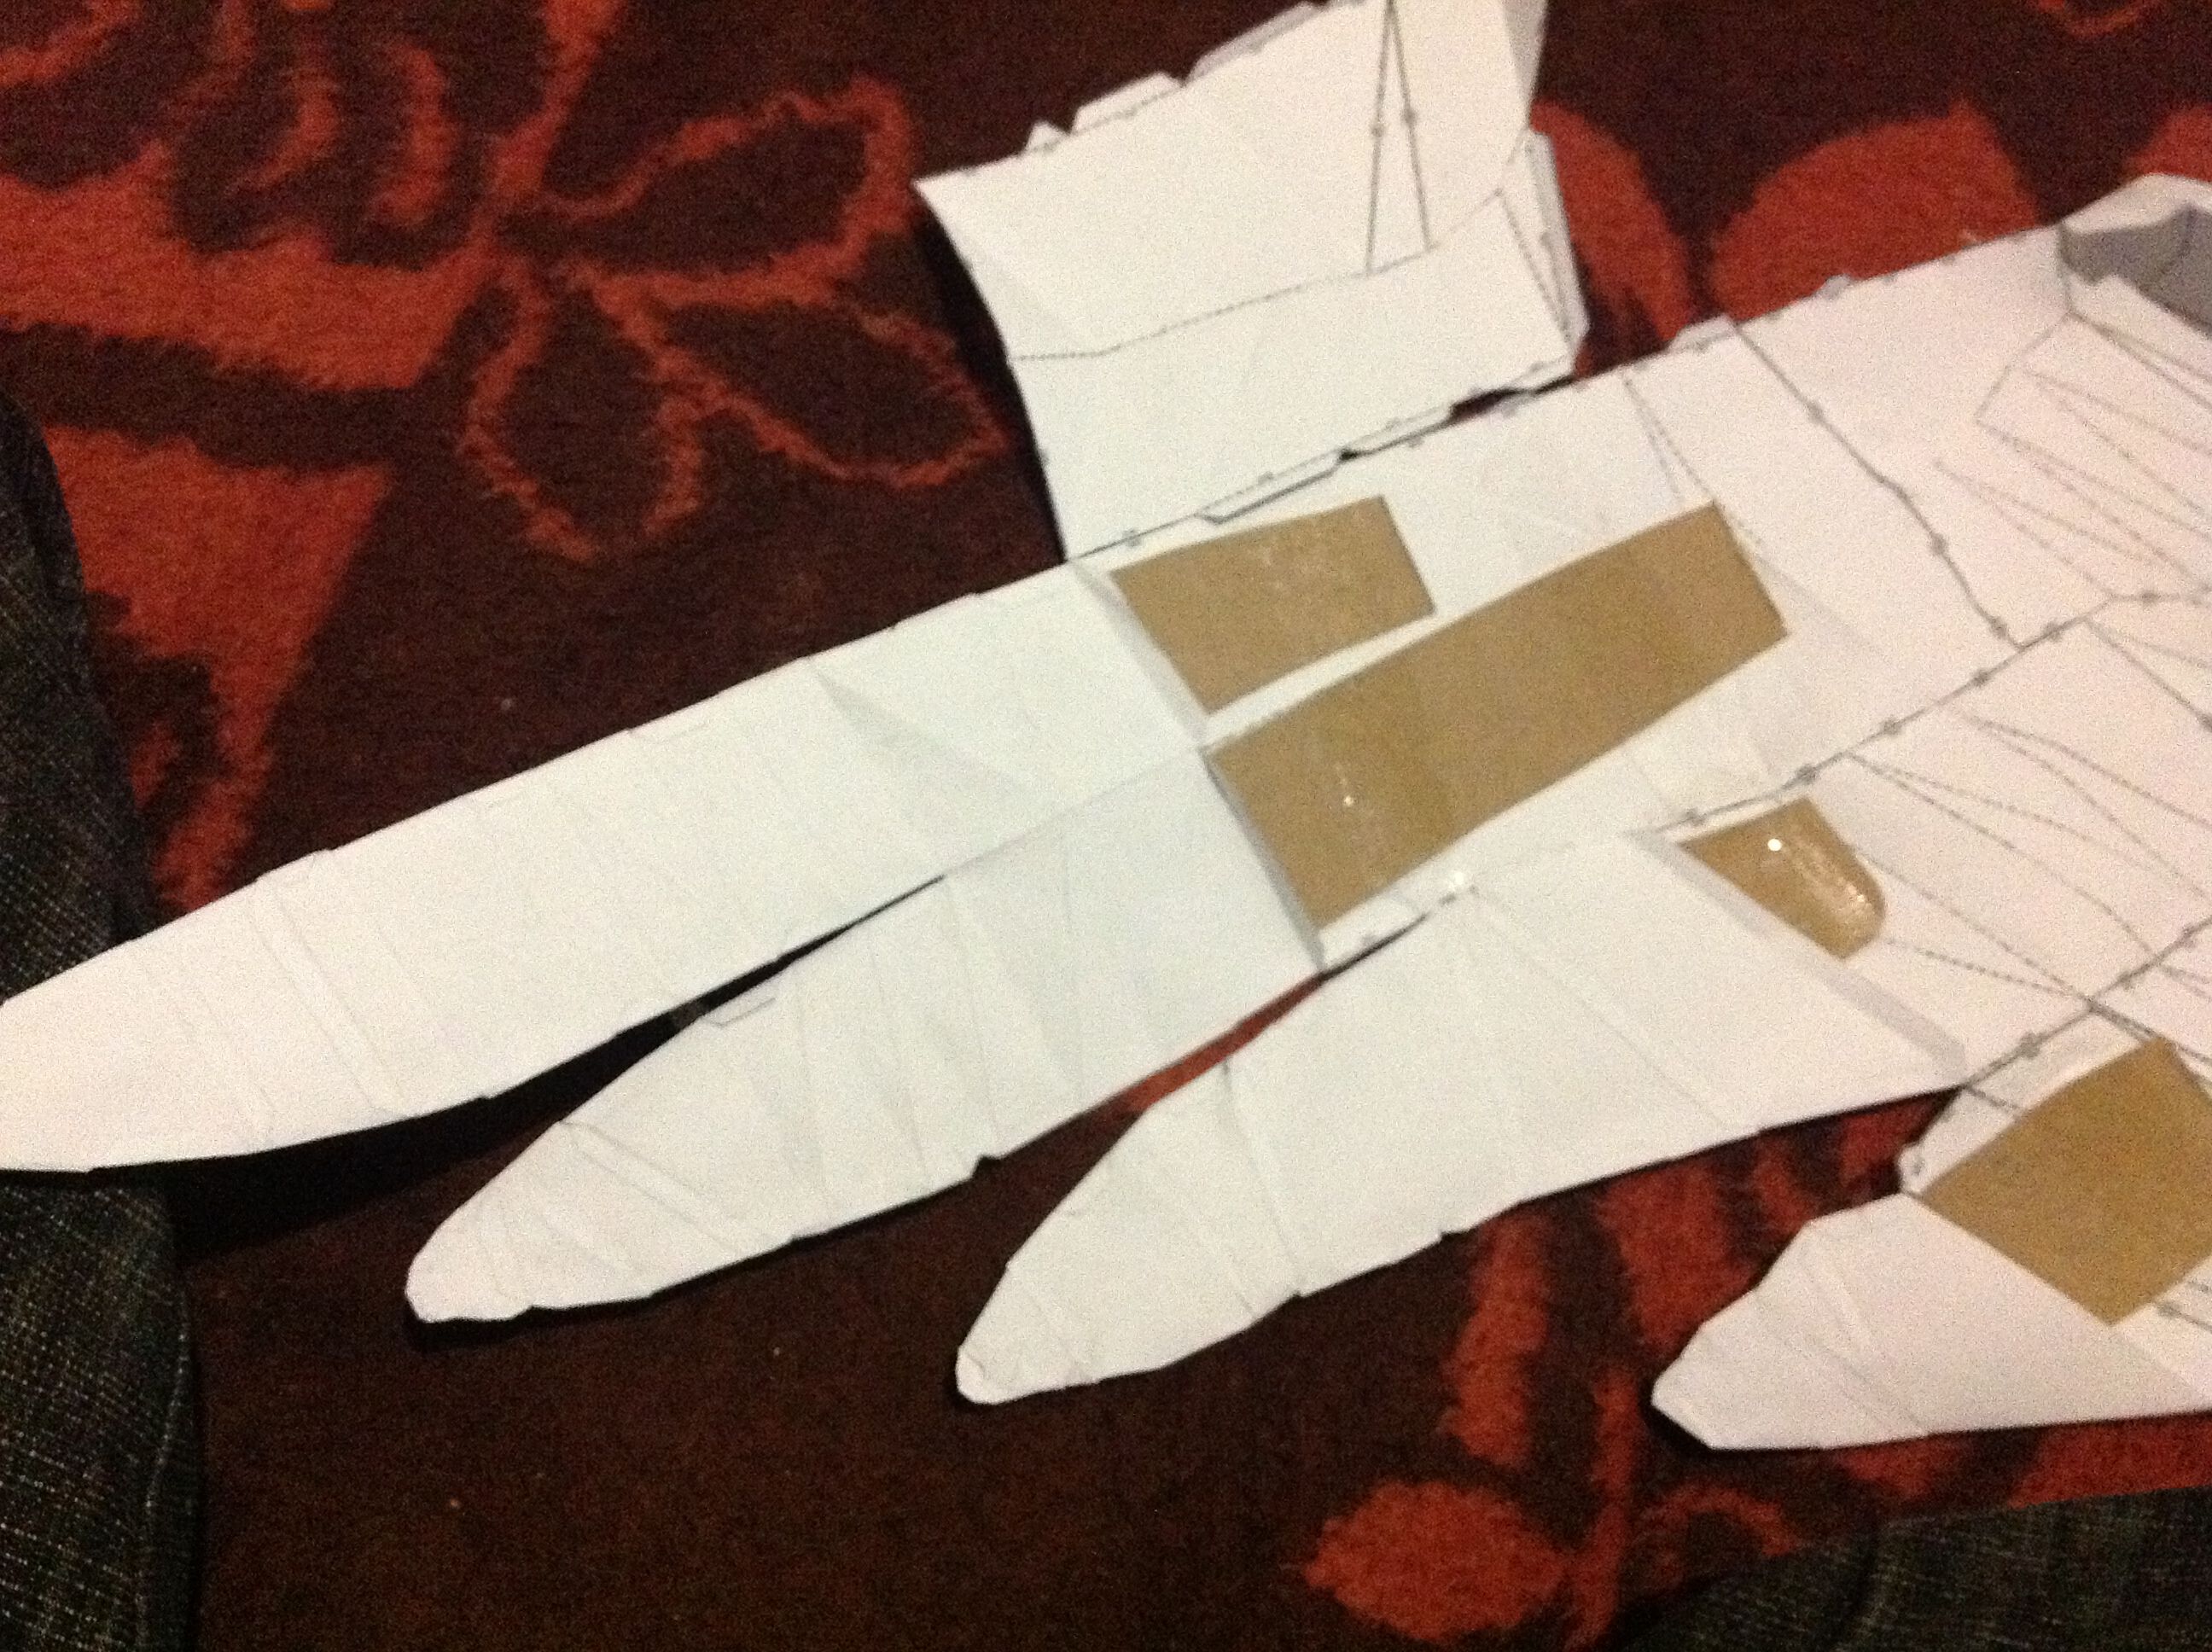


The wings are styled after the iconic Mercedes Benz 300SL gullwing from the 50's and the SLS AMG BLACK SERIES. The wings have one that bends at an angle towards the body, and the other wing is out stretched. The wings are also steel and cardboard reinforced and are the body part that consumes the most amounts of material. Almost 50% of the 248pages required to make this model go towards making the wings. The best strategy is to start making the root of the wing, where the wing joins the body and continue making the wing until you get to the tip of the wing. A steel wire is then embedded into the wing to add additional structural support to the wing. The tip of the wings are reinforced with cardboard. The wings are then joined together and posed before they are attached to the main body.
Facial Features


The most challenging part to this instructable is assembling the face. It has a lot of small pieces to cut out and glue together. Personally i was overwhelmed by the amount of detail in the eyes, lips and ears that I ended up improvising those areas without using the PDF guideline. Use of the McGill reverse tweezer is recommended here. the nose requires special attention so that is becomes finely drawn and good looking.
Hairstyle + 'Oiran' / 'Geisha' Decorations


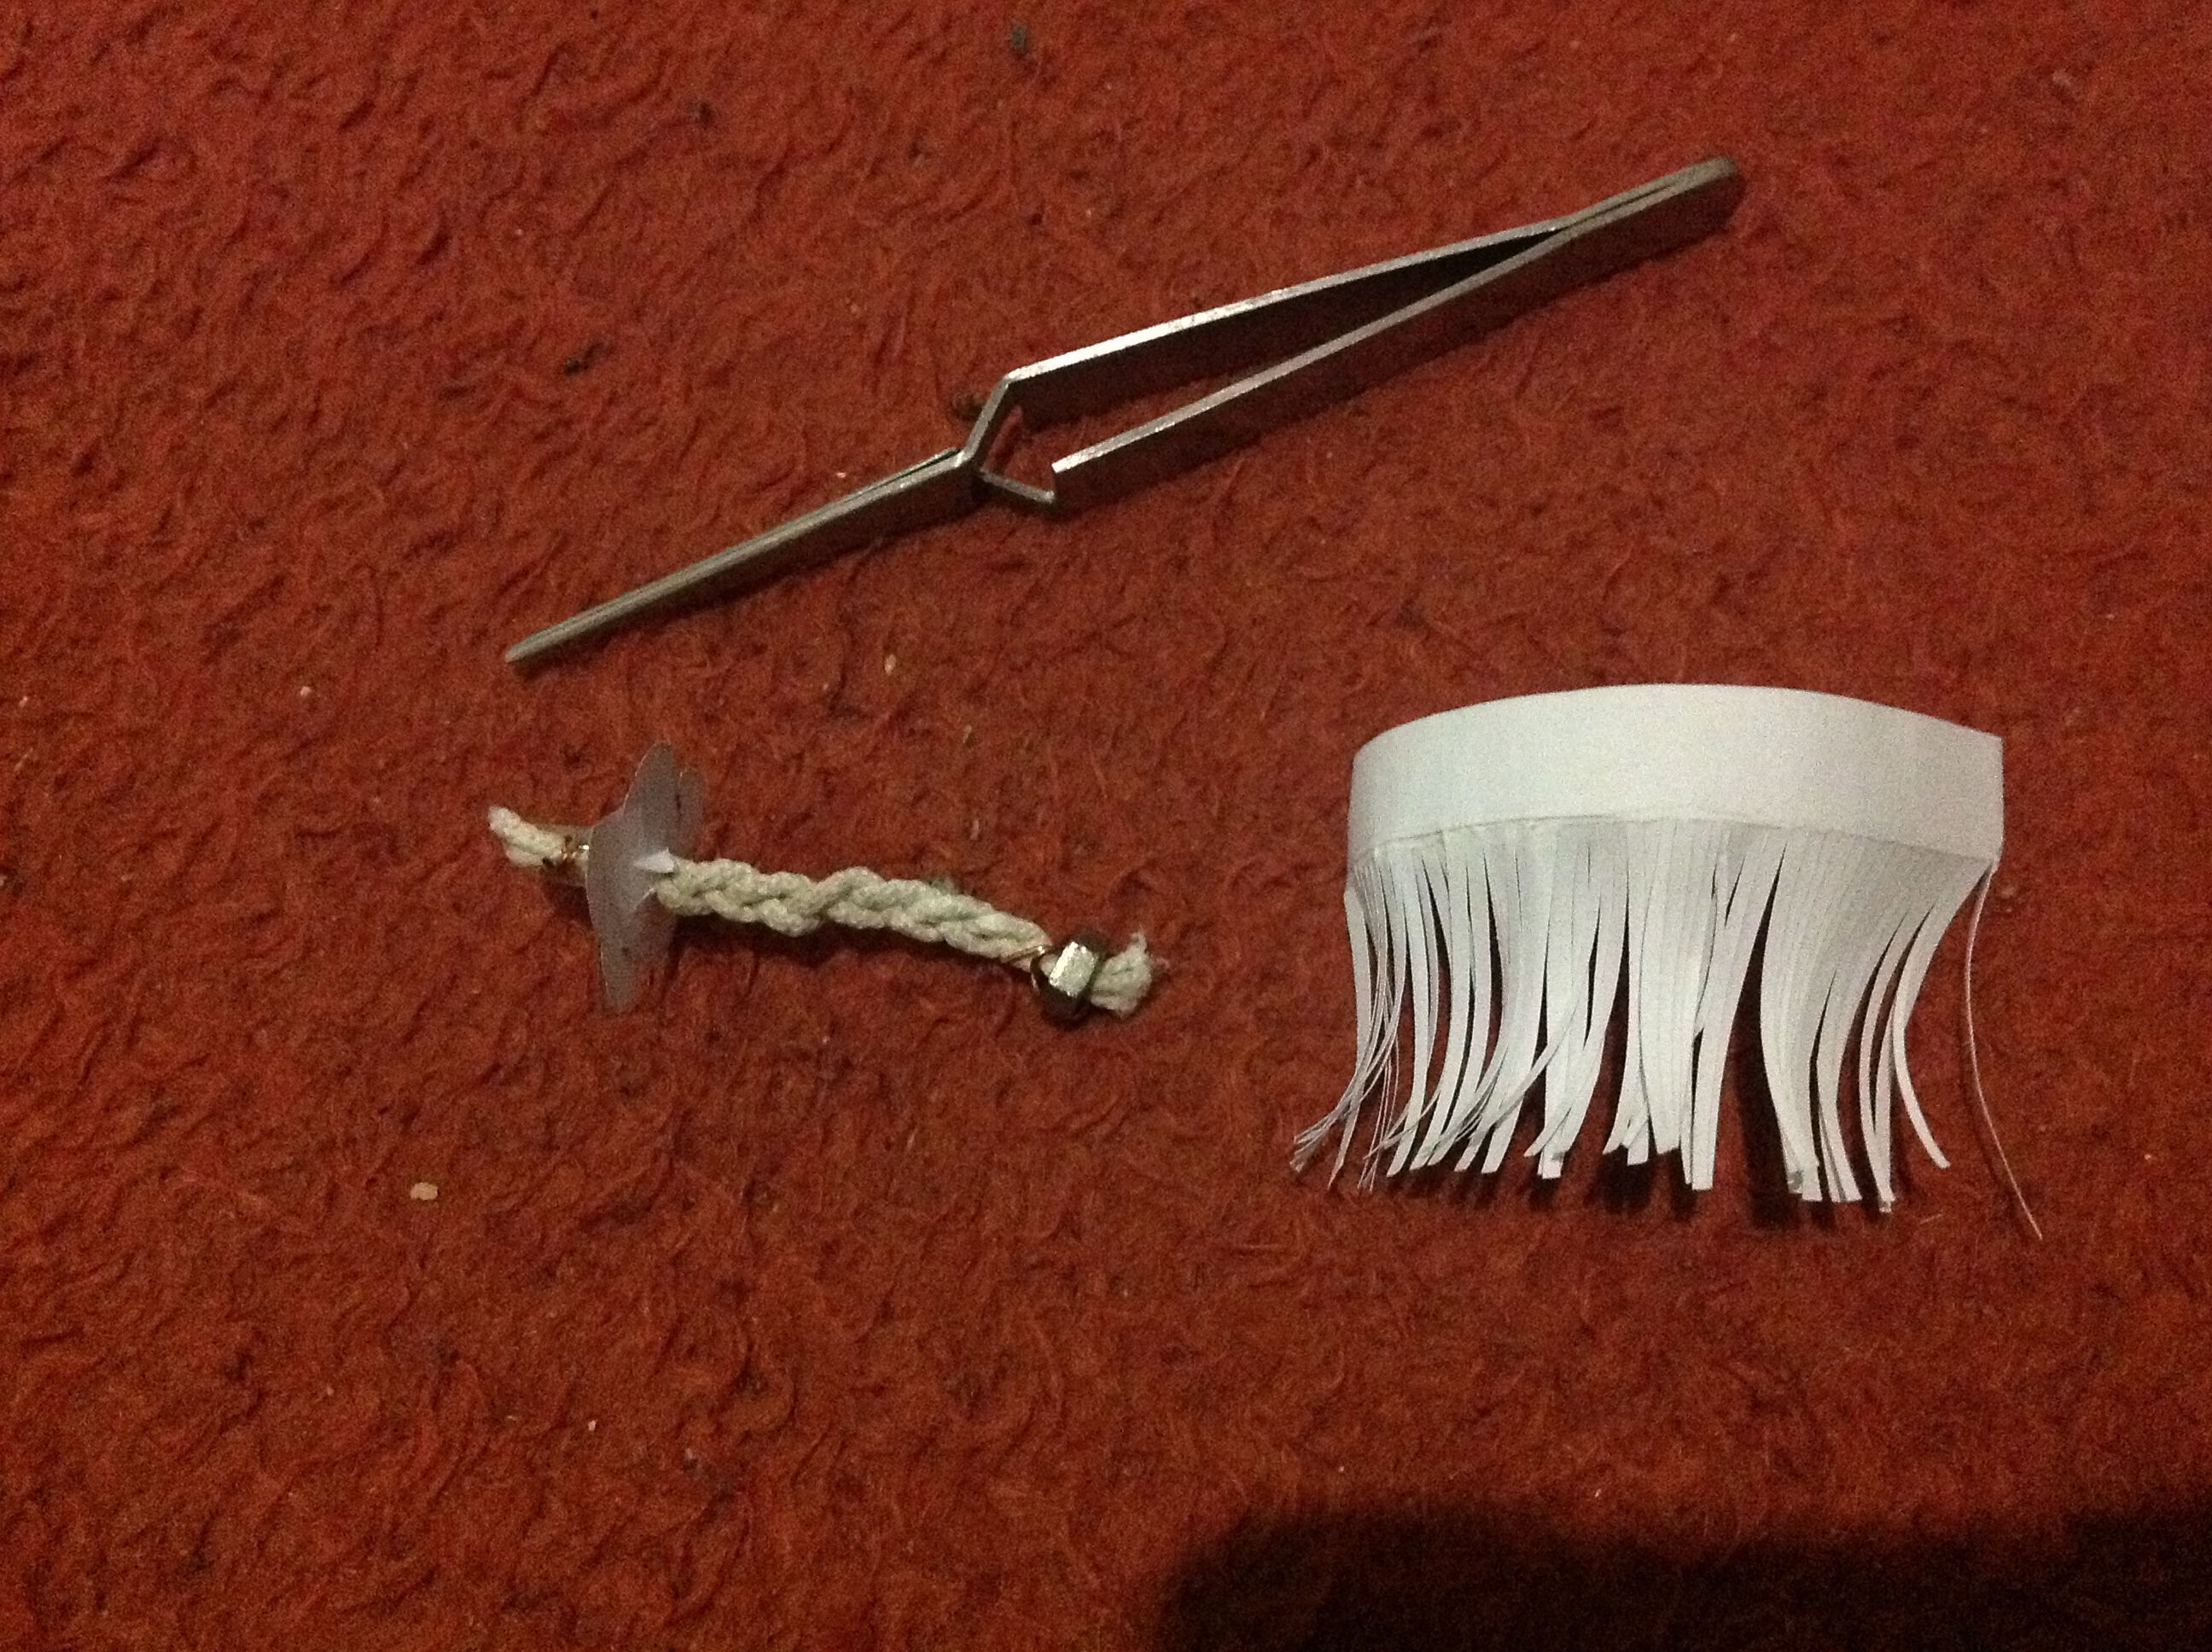


The hair is fashioned after the hairstyles that "Oirans" or Japanese Courtesans used to wear. This is a seriously unique hairstyle and the hair bristles with slews of dangling ornaments, strings of beads, ribbons and cords tied into fancy knots.The hair is intricately done, with perfect straight cut style bangs and perfectly cut hime side locks. the rest of the side locks are left uncut and long, and tied to the sides with sophisticated topknot style bands on the tops. The rest of the hair is worn in perfectly straight cut pigtails and features geisha and oiran style hair decorations. For the circular hair ornaments, i used this guide
www.howaboutorange.blogspot.nl/2011/11/how-to-make-3d-paper-ball-ornaments.html?m=1
I had to put some little weights inside the ornaments to make they hang properly.
Exeunt Omnes


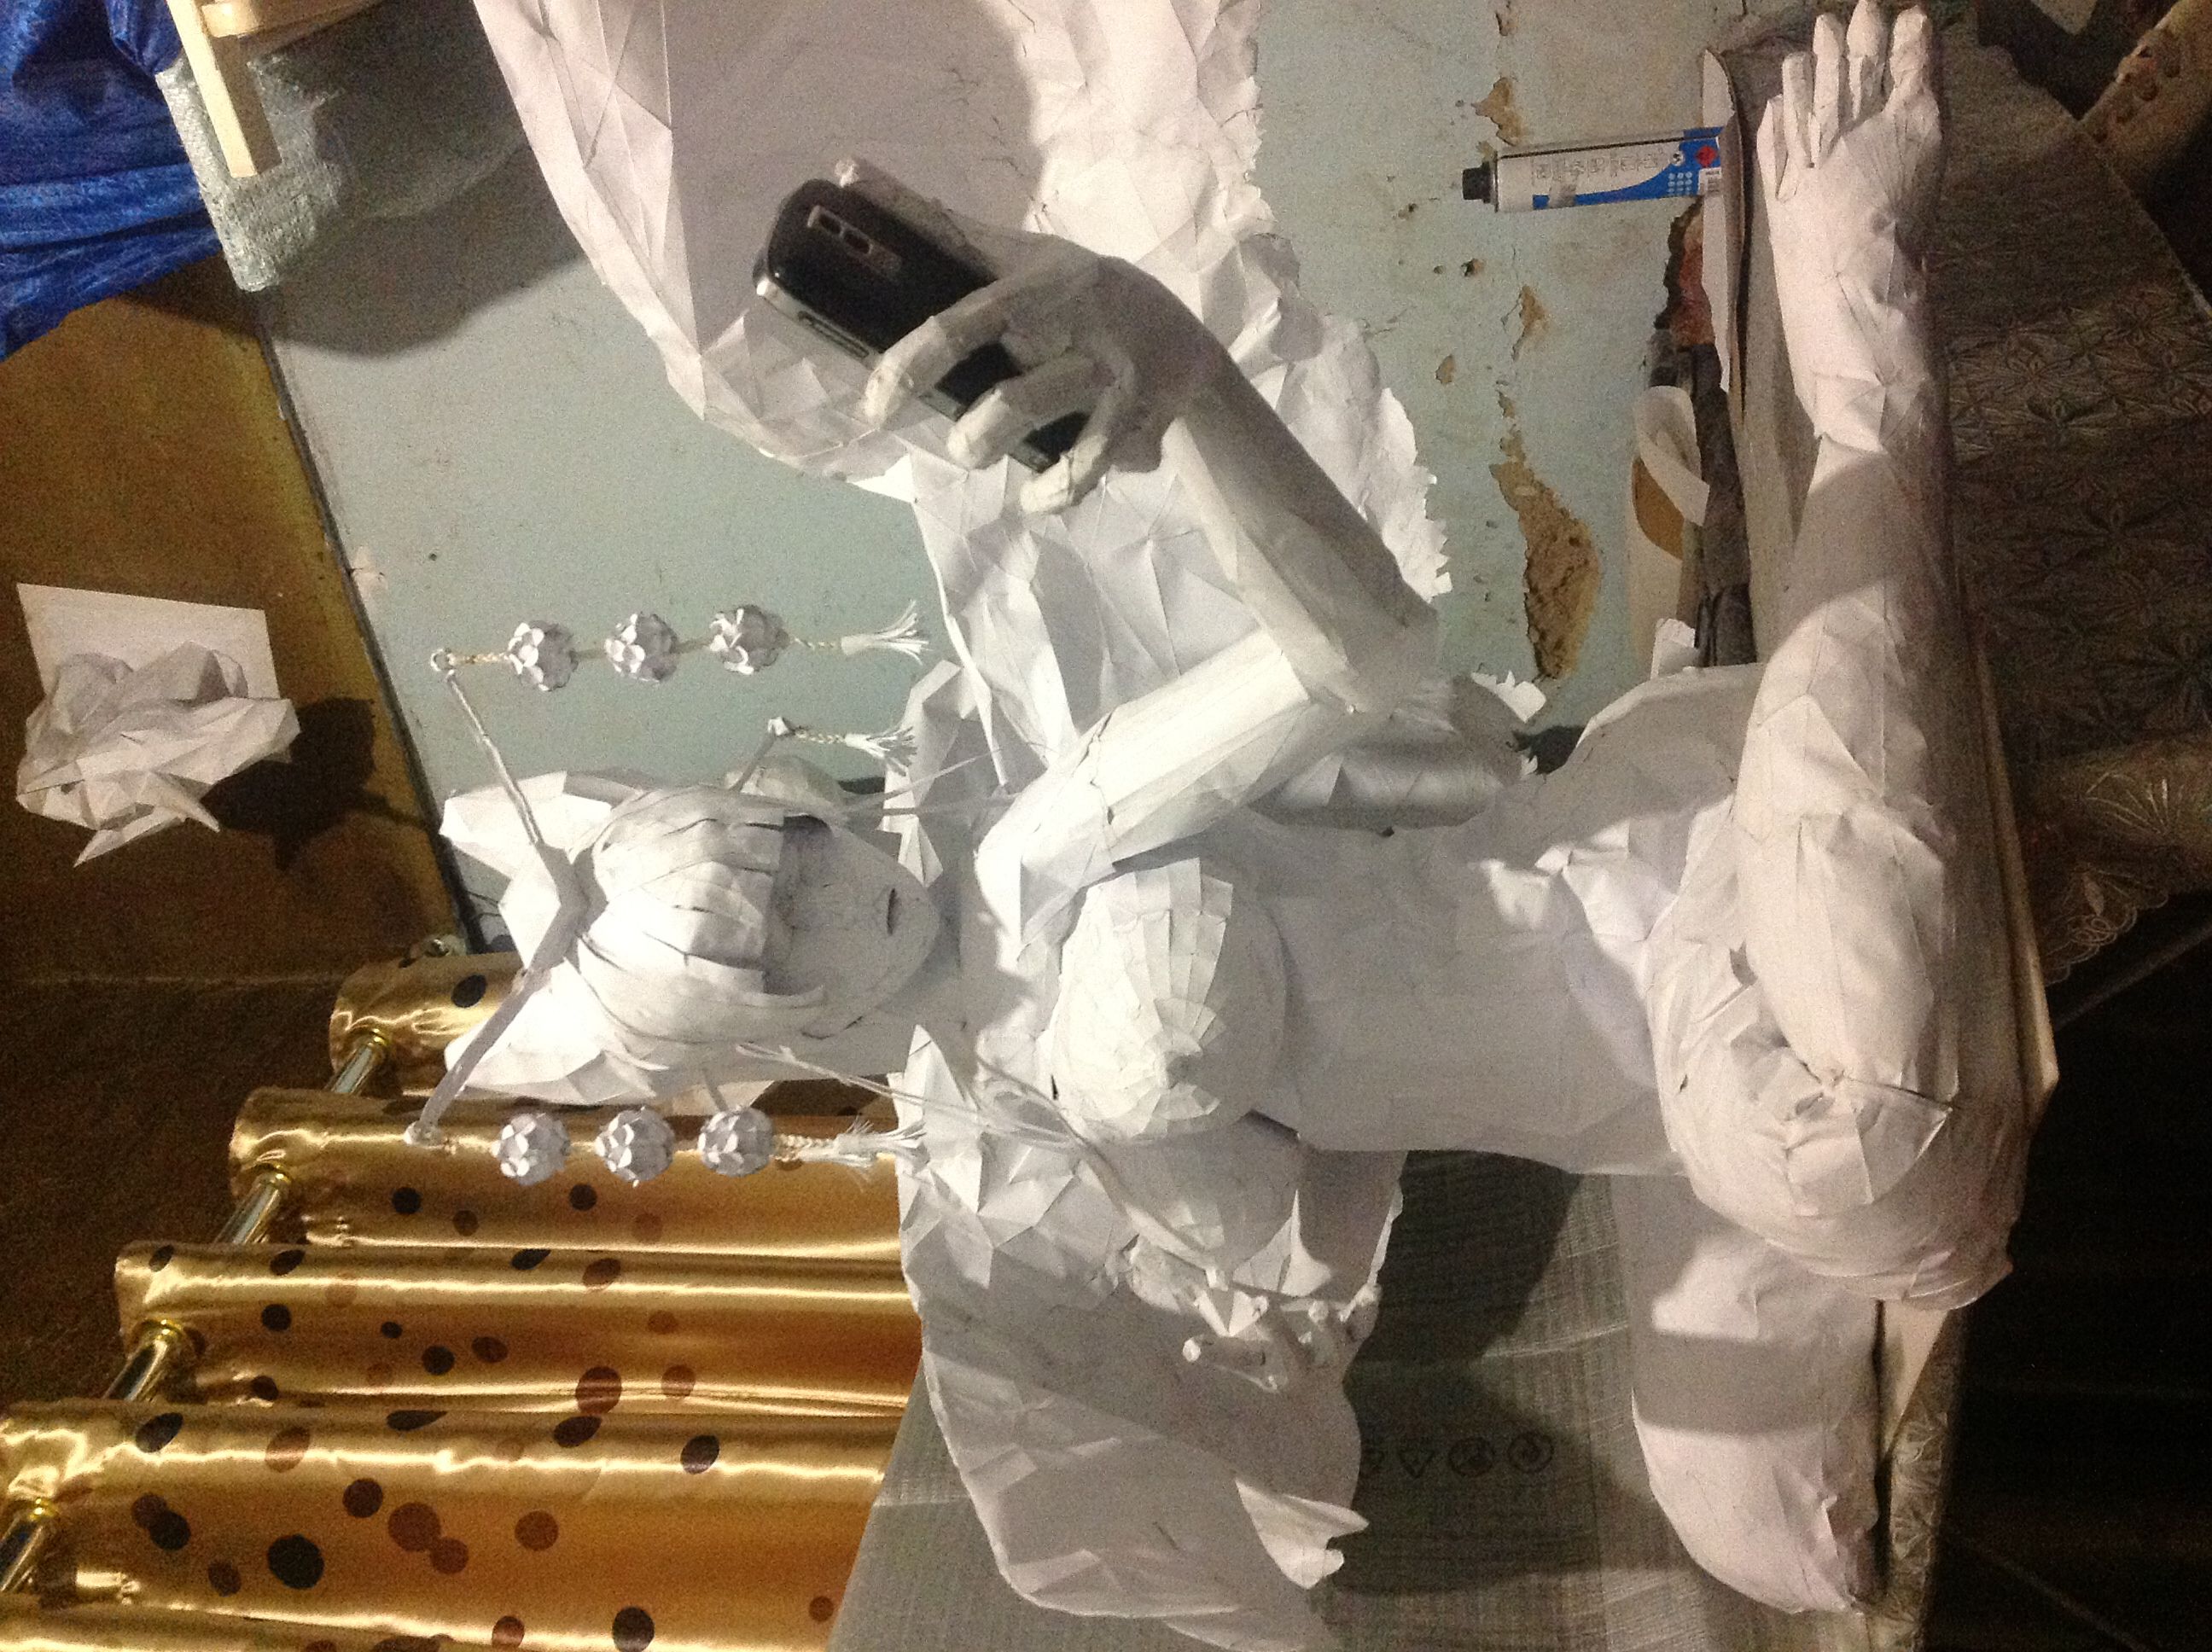


By now its all a matter of building up and joining the pieces together and internally reiforcing some areas with tape where neccessary. As the model gets higher you will need to be fixing areas that need fixing and adjusting your supporting structures accordingly.Keep on going. Piece by piece. Edge by edge. Don't worry if you lose track of what youre doing - in the end it will magically fit together. This is where the PDF comes in handy, search for the edge number you require and your PDF reader will show you the page and the position of the edge you need in no time. After loads more cutting, gluing and improvising - all will be done. All thats left is to find a nice place to show off your model. congradulations - You've made it!
RESEARCH & DEVELOPMENT AND THE FUTURE

1. In the interests of adding further to the project - painting in facial structures such as the eyes, eyelids,
eyebrows, lipstick and adding some mascara would be a good aesthetic advancement.
2. Adding non visible support structures for making the model stand upright.Looking into the possibility of adding a metal endoskeleton within the model also would be great and would also open up possibilities like having movable joints and being able to change the models pose.
3. Adding things like fibreglass resin, liquid glass or other similar chemical paraphenalia to strengthen the model. Adding a spray-on chemical like clear acrylic, laquer or a similar product to produce a glossy, highly polished, lustrous surface without yellowing the paper.
4. Researching on making "Photorealistic Models" or "sculpture-realistic models" rather - with high polygon counts. Whats the highest number of polygons/pieces (e.g. of a human face) that can be manipulated and built by hand using traditional pepakura methods? A hundred thousand? A million?