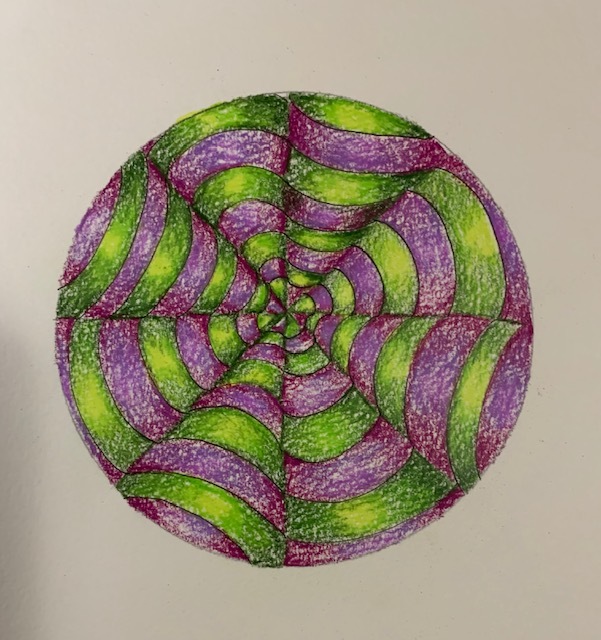
RIPPLED PAPER DRAWING

This Instructable explains how to draw a cool pattern that uses just a few supplies that you probably have on hand.
Supplies

PAPER
template to draw a circle, anything will do as long as it is round.
assorted colored pencils
sharpie or thin marker, I like the sakura micron
a pencil
Begin With the Circle


Using the pencil draw a circle whatever size you like, I suggest you start with a nothing larger than a 5" template.
Divide the circle in half then again and again until you have 8 equal sections.
Switch to the marker and draw a tiny dome shape in each section, then an inverted dome shape in every other section.
Finish Your Pattern


Use the marker to follow the shape to the outer edge of the circle. Try to use no more than 6 lines, next connect them in the next section and create the line in the same direction of the first dome.
Work your way all around the sections of the circle.
Colored Pencils

Begin the coloring patterns by choosing three colored pencils in the same family. I chose a dark, medium and light GREEN.
Coloring


Using the darkest color start at the outer edges of the first sections of your circle, next blend in the middle tone and finally the lighted tone.
Continue


Continue this process as shown in each section of the circle.
NEXT


Choose 3 more colored pencils, again, same family, dark, medium and light.
Continue the same technique in each section until your circle is complete.
The paper I used was watercolor in my moleskin sketchbook. The surface of the paper created the small white fleck throughout my drawing. If you don't want the flecks in your artwork, use a smoother less textured paper, perhaps Bristol.
Variations


You can make variations of your designs by changing the directions of the line.
One More Design


