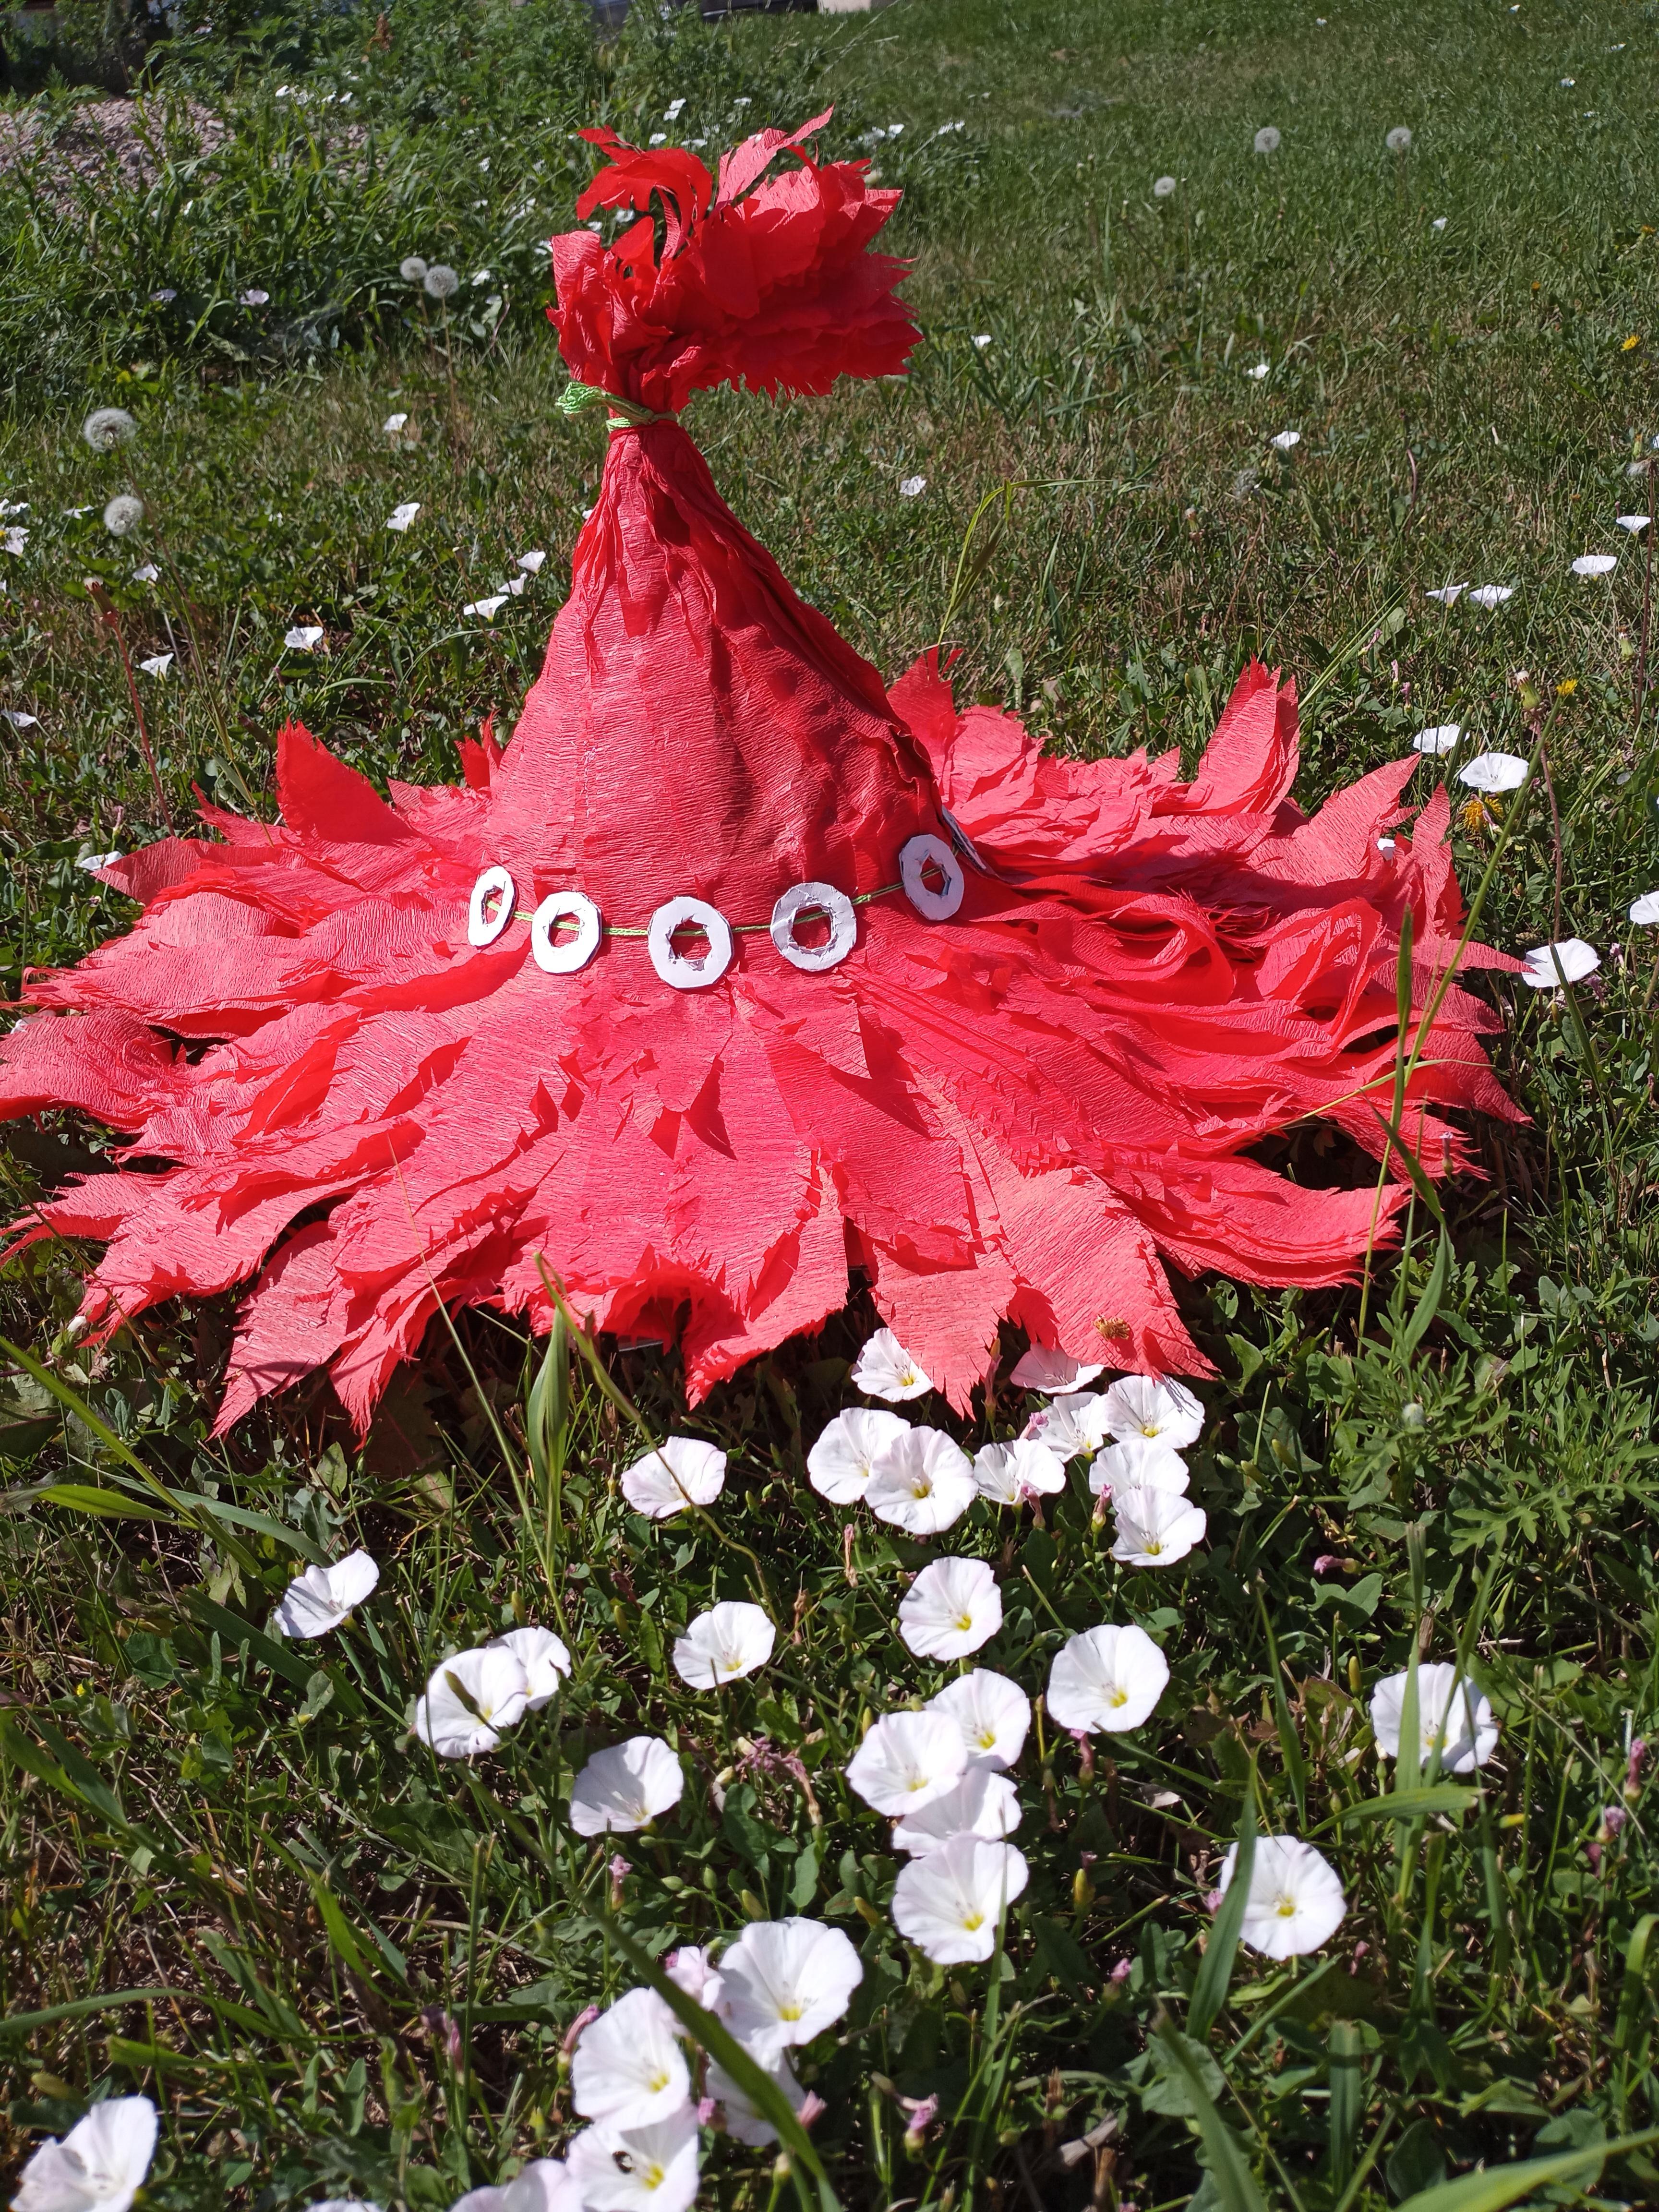
Skull Kid's Hat (The Legend of Zelda)
by macwillow1905 in Craft > Costumes & Cosplay
1099 Views, 9 Favorites, 0 Comments
Skull Kid's Hat (The Legend of Zelda)


In this Instructable I show how to make Skull Kid's hat from Majora's Mask.
Supplies


Materials:
- Red paper party streamers
- Foam sheets
- Cardboard (both thin and ribbed)
- Mod Podge (or other craft glue)
- Paints
- Green string/yarn
Tools:
- Hot glue gun
- Scissors
- Patience
Basic Hat Frame


The first thing is to measure your head for a size that will fit. You can do this by either measuring your own head with a soft tape measure, or measuring a hat that fits to your liking. Either way, when you have the measurement, cut a strip of foam sheet to that length, and about 1-2 inches thick. This will be the hat band. Glue the ends together, making an enclosed circle.
Next, cut another strip and glue it over the circle, as shown in the pictures above. Finally, another strip, making an X shape over the top of the circle. When this is done, try on the frame to make sure it fits properly.
Frame Structure and Shape


To build the frame, you will need to use thin cardboard. This is the kind of stuff like cereal boxes, the backs of notebooks, etc. Cut a long thin strip, with a pointed end. Make many of these, all the same size, and enough to it around the entire frame. Begin to hot glue these on, one every inch or so around the frame. Glue them with 1-2 inches sticking out at the bottom. You will then bend these outward to create a brim-like structure. When all the strips are glued on, tie all the pointed ends together in the center with a piece of string.
Next, glue little strips of cardboard between each end, as shown in the pictures above. Do this all the way around the brim.
The Brim


Now, using thicker, ribbed cardboard (like the cardboard box kind) cut much longer strips. find which part of the hat you want to be the front, and start there. Glue one strip in between each of the thin strips we did before. At the end of each thick strip, bend it downwards to get the brim shape. The ribbed cardboard really holds shape well.
I also went back and cut the strips, gradually making them shorter from back to front. this will make it long in the back, but short enough in the front to see.
Next, using the thin cardboard again, do the same thing as before; gluing little strips across each length of cardboard. But this time, glue them not at the very end, but just above where you bent them downwards.
Paper Mâché...Ish


This step is not really required, but It made the rest of the project much easier. For this part, I mixed up some Mod Podge and red paint, and kind of paper mâchéd some strips of the red party streamers onto the top of the hat. When it was dry, it made gluing all the feathers/leaves on much easier.
Feathers


Okay. So I don't actually know what Skull Kid's hat is made of? I'm pretty sure it's like straw or something but we're gonna say feathers in this Instructable.
Anyway, start by cutting 3-5 strips of the red party streamers and stack them up. Cut them into a point on one end, and then using scissors, fray up the end with a bunch of little cuts. Then, hot glue the other end to the base of the hat where the brim starts, as shown in the pictures. Do this all the way around the brim of the hat.
Next, do another layer around the entire hat brim, except this time make them slightly shorter, so you can really see the layers. Finally, a third layer, except this time make them really long and glue the ends all the way up the hat, as shown in the pictures. When the whole hat is covered in bright red feathers, it's perfect.
Cut some short strips and tie them together on one end. Then do the feathery fraying on the other end, and stick this piece into the tip top of the hat. Then tie several layers of green string around this part.
Finishing Details


Tie several layers of green string around the base of the hat, just above the brim.
Next, cut out 10-12 circles from cardboard, cut a hole in the center, and paint them white.
Finally, glue the circles about 1/2-1 inch apart on the green string.
Done!


VOILA!! It is finally done!! DON'T go anywhere near that weird mask and I hope you enjoyed the Instructable!