Snowflake Trophy

I've decided to make this because it seemed cool.
Supplies

https://www.onshape.com/en/
Sketch 1

Create a sketch of the snowflake. The numbers are in inches. The vertical line in the middle will be your mirror line.
Design

Create your design on ONE side of the vertical line. You will mirror that design to the other side.
Circular Pattern

Use the circular pattern tool. Set it to 6X and copy the pattern around the circle
Extrude the Snowflake

Finish sketch and extrude the design to 0.125 inches. Make sure that the extrude is symmetric. Designs will vary.
Sketch the Base

Create a sketch. Make a rectangle below the snowflake that's 0.6 inches high and 1.1 inches wide. Mirror the rectangle to the other side to make it symmetrical.
Extrude the Base


Extrude the base by 1 inch, and make sure its symmetric.
Lettering (1)


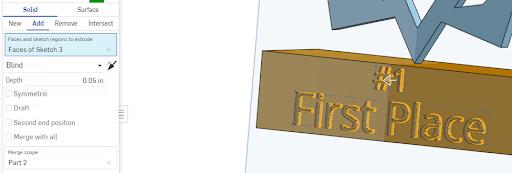
On one side of the base, place a sketch write a text that says "#1 First Place".
On the other side of the base, place another sketch and write any text that you would like. For my case, I wrote "Instructables Contest 2022".
Size of texts will vary.
Extrude the Letters

Extrude the letters on both sides by 0.05 inches.
Sketch the Supporting Base

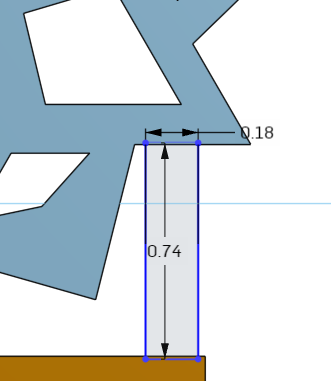
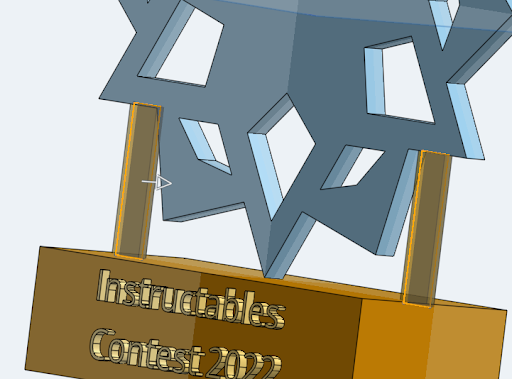
On the underside of the snowflake, create a rectangle with a width of 0.18 inches and a height of 0.74 inches, making sure that it reaches the base AND the snowflake. Do the exact same on the other side of the snowflake.
Extrude the Base

Extrude both of the bases by 0.05 inches, and make sure it's symmetrical.
Finalize
That's it! Now just choose any color you'd like. The customization is completely up to you.