Using a No-Code Setup to Visualize and Listen to Your Muscle Signals (EMG)
by Upside Down Labs in Circuits > Sensors
675 Views, 4 Favorites, 0 Comments
Using a No-Code Setup to Visualize and Listen to Your Muscle Signals (EMG)
 Store photos.jpg)
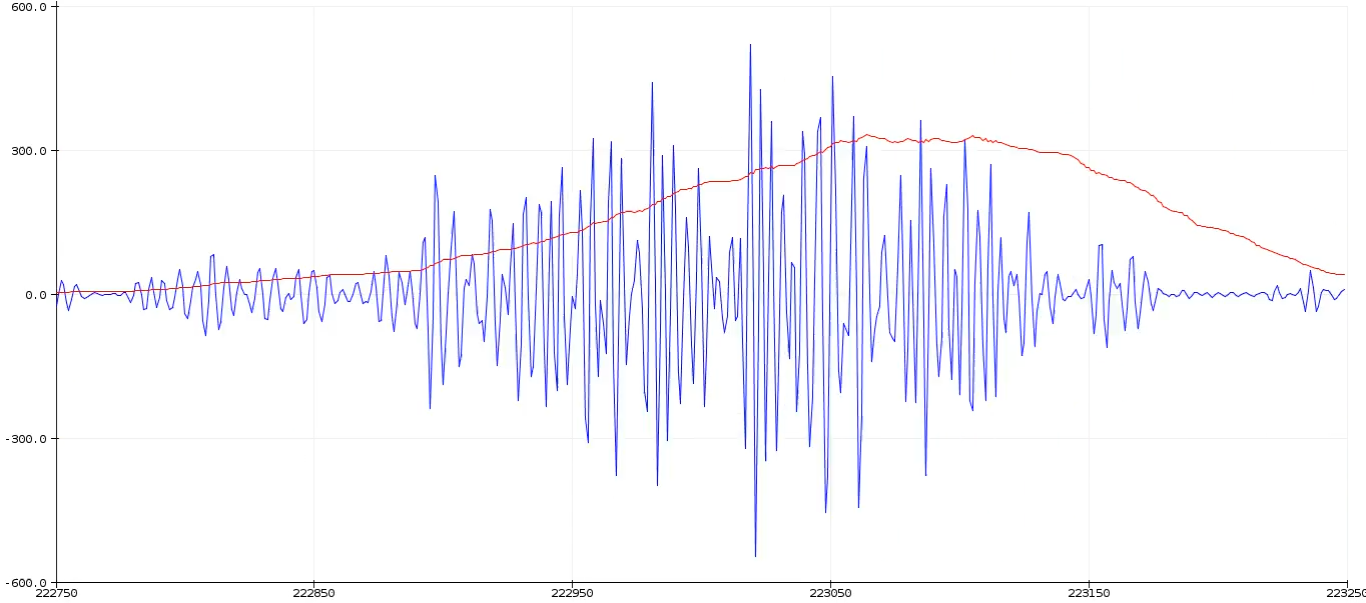
In this tutorial, we are going to create a simple EMG system at your home so that you can record the muscle signals, visulize them on your laptop or mobile phone and even listen to the neurons firing in your muscles on headphones or speakers.
But before moving forward, let's understand a brief about Electromyography.
What is Electromyography (EMG)?
Electromyography is a technique that measures muscle response or electrical activity in response to a nerve’s stimulation of the muscle. We can use this electrical activity to detect neuromuscular abnormalities or create solutions for some crazy real-world problems like making artificial limbs for amputees.

About BioAmp v1.5 (2023 Edition):
It is a small size portable biopotential amplifier with a no code setup to record and listen to your muscle signals (EMG) non invasively. The best part is that it doesn’t require any microcontroller (like Arduino) to sample the signal. You just plug a 9V battery into the board, electrodes to the body, and an audio jack to a mobile/laptop, and you are ready to record signals from muscles (EMG) using audacity, Backyard Brain’s spike recorder or any other audio recording software.
Supplies
1 x BioAmp v1.5 (2023 Edition) Kit (Upside Down Labs Store | Tindie Store)
- The Kit includes:
- BioAmp v1.5 PCB x 1
- All the passive components required in the PCB
- BioAmp AUX Cable x 1
- BioAmp Cable v3 x 1
- 9V Snap Cable x 1
- Muscle BioAmp Band (EMG Band) x 1
- Boxy Gel Electrodes x 15
1 x 9V Battery
1 x Wired earphones/headphones
1 x Speaker with 3.5mm jack
1 x Laptop or Mobile Phone or Tablet with a 3.5mm jack
SKIN PREPARATION KIT & ELECTRODE GEL:
1 x NuPrep skin preparation gel (Upside Down Labs Store | Tindie Store)
1 x Wet wipe
1 x Electrode Gel (only if using Muscle BioAmp Band) (Upside Down Labs Store | Tindie Store)
SOFTWARE:
Any one of the following:
- Backyard Brains' Spike Recorder
- Audacity
- or any other audio recording app/software
Assembly
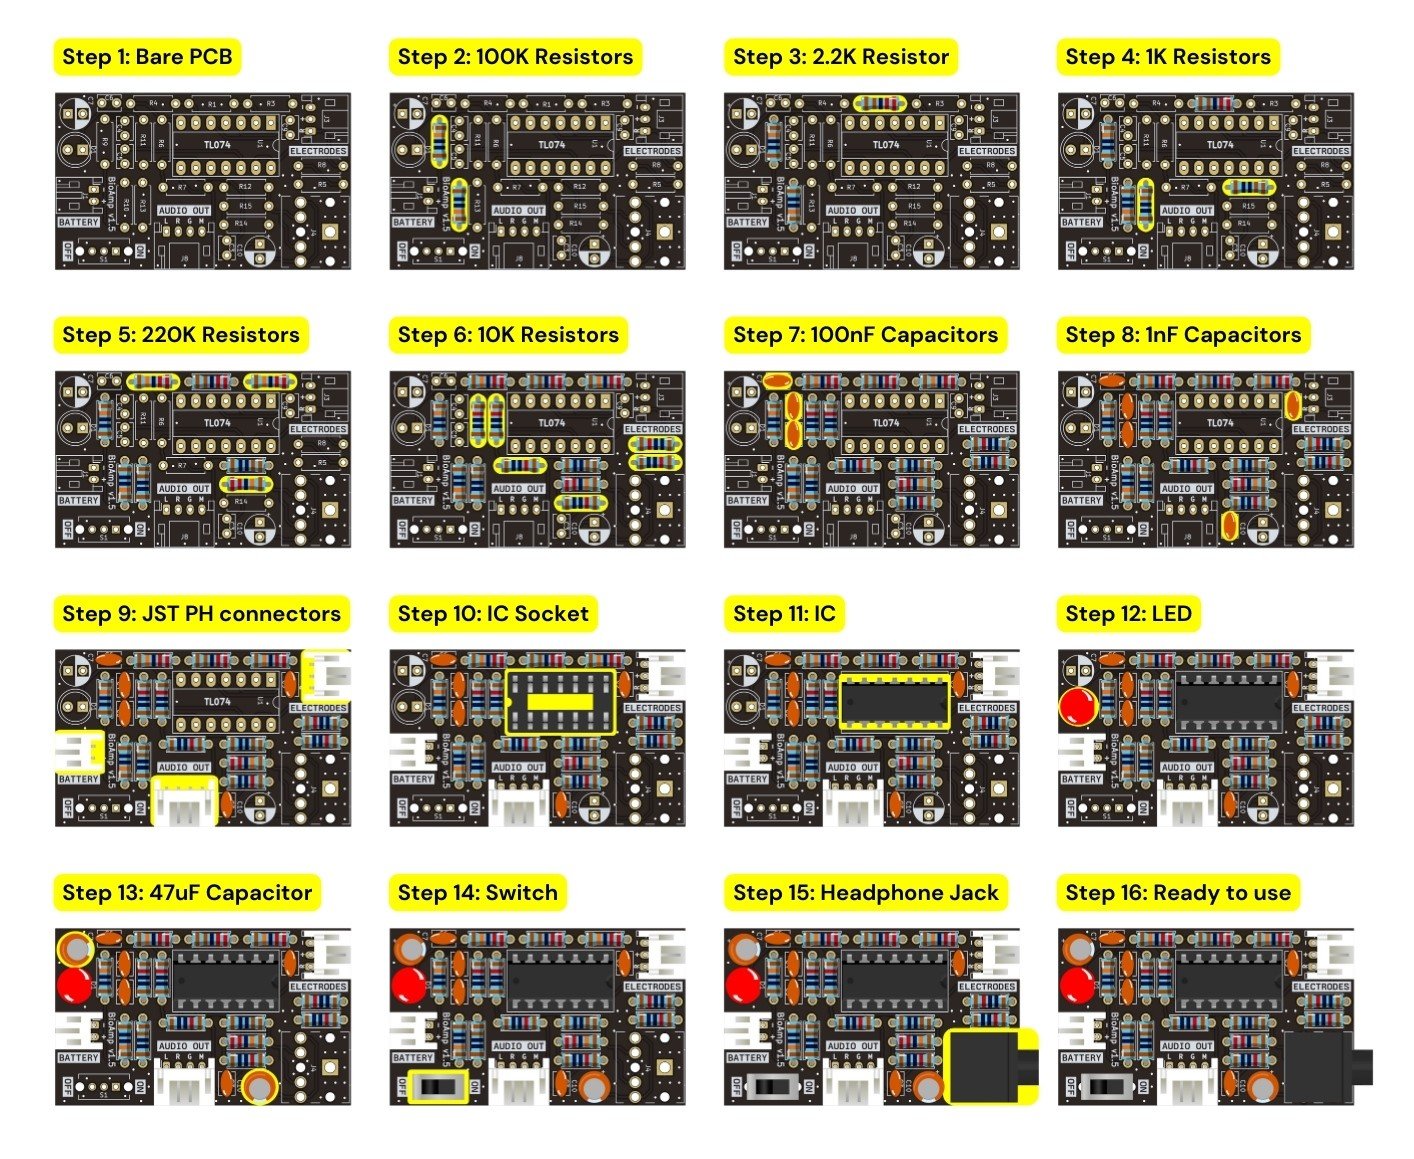
First of all, you have to assemble all the passive components on the BioAmp v1.5 PCB.
For a step-by-step guide for the assembly, you can follow the image given below:

Connecting Electrode Cable

Connect the BioAmp Cable to BioAmp v1.5 as shown in the connection diagram.
Note: Don't place the electrodes on the skin at this moment.
Skin Preparation

Apply Nuprep Skin Preparation Gel on the skin surface where electrodes would be placed to remove dead skin cells and clean the skin from dirt. After rubbing the skin surface thoroughly, clean it with a wet wipe.
About Nuprep Gel:
Nuprep skin preparation gel is a mildly abrasive, highly conductive gel that should be applied before placing the electrodes on the skin to improve measurements. When applied gently, it strips away the top layer of skin and moistens the underlying skin layer which reduces the skin impedance with minimal skin irritation and discomfort.
Electrode Placements

We have 2 options to measure the EMG signals, either using the gel electrodes or using dry electrode based EMG band. You can try both of them one by one.
Measuring EMG using Gel electrodes:
- Connect the BioAmp Cable to gel electrodes,
- Peel the plastic backing from electrodes
- Place the IN+ and IN- cables on the arm near the ulnar nerve & REF (reference) at the back of your hand.
Measuring EMG using Muscle BioAmp Band, a dry electrode based EMG band:
- Connect the BioAmp Cable to Muscle BioAmp Band in a way such that IN+ and IN- are placed on the arm near the ulnar nerve & REF (reference) on the far side of the band.
- Now put a small drop of electrode gel between the skin and metallic part of BioAmp Cable to get the best results.
Connecting 9V Battery

You can directly connect any 9V battery to BioAmp v1.5 using a 9V snap cable. Now activate the board by flipping the power switch, and you'll notice an LED light up, showing that the board is ready to use.
Listen to Your Muscle Signals


You can either listen to the muscle signals (EMG) on a speaker or wired earphones/headphones. Let's try both of them.
Listening EMG on a wired earphones/headphones:
- Plug your wired earphones or headphones on the 3.5mm jack of BioAmp v1.5
- Plug it in your ears
- Flex and listen to your muscles
Listening EMG on a speaker using BioAmp AUX Cable:
- Plug the BioAmp AUX cable on BioAmp v1.5
- Connect the BioAmp AUX cable on the speaker
- Switch on the speaker and turn the volume to maximum
- Flex and listen to your muscles.
Visualizing EMG on Mobile

You can easily visualize EMG signals on your mobile phone/tablet using the steps given below:
- Plug the BioAmp AUX cable on BioAmp v1.5
- Connect the BioAmp AUX cable to your mobile phone/tablet that have 3.5mm jack support.
Now there are various options to visualize the EMG signals:
Using Phone Recorder
- Open any audio recorder app on your mobile tablet.
- Flex your muscle to be able to record the muscle signals.
- If you want to extract that data then it will be saved by default as a .wav file but you can convert it in any other format according to your project requirements.
Using Backyard Brains' Spike Recorder
- Download the Spike Recorder App from playstore using this link
- Open the app, click the setting icon on the top right corner and set the low band pass filter to 72Hz and high band pass filter to 720Hz.
- Apply the 50Hz or 60Hz notch filter depending on the country you are living in. For example if you are in India then the AC current oscillates at a frequency of 50Hz but it oscillates at 60Hz frequency in USA. This AC current acts as a noise in the signals so we have to remove it by applying this notch filter.
- Again click on the setting icon to close it and you are ready.
- Flex your muscles to be able to visualize the muscle signals (EMG)
- You can record the EMG data as a .wav file by pressing the record button on the top right corner of the app and then convert it in any other format as per your project requirements.
Visualizing EMG on Laptop

In case you want to visualize EMG signals on your laptop then it can also be done using the simple steps given below:
- Plug the BioAmp AUX Cable on BioAmp v1.5
- Connect the BioAmp AUX cable to the 3.5mm jack of your laptop
Now there are various options to visualize the EMG signals:
Using Backyard Brains' Spike Recorder:
- Download the Spike Recorder using this link
- Install it in your laptop
- Open the software, click the setting icon on the top right corner and set the low band pass filter to 72Hz and high band pass filter to 720Hz.
- Apply the 50Hz or 60Hz notch filter depending on the country you are living in. For example if you are in India then the AC current oscillates at a frequency of 50Hz but it oscillates at 60Hz frequency in USA. This AC current acts as a noise in the signals so we have to remove it by applying this notch filter.
- Again click on the setting icon to close it and you are ready.
- Flex your muscles to be able to visualize the muscle signals (EMG)
- You can record the EMG data as a .wav file by pressing the record button on the top right corner of the app and then convert it in any other format as per your project requirements.
Using Audacity:
- Download audacity using this link
- Install it in your laptop
- Open the software and set the recording device to microphone.
- Flex your muscles to be able to visualize the muscle signals (EMG)
- By default the EMG data would be recorded as a .wav file but you can convert it in any other format as per your project requirements.
The project is finally complete. Hope you had a lot of fun!!
Feel free to ask any questions in the comment box below. You can also mail us at support@upsidedownlabs.tech for any kind of support while making this project.