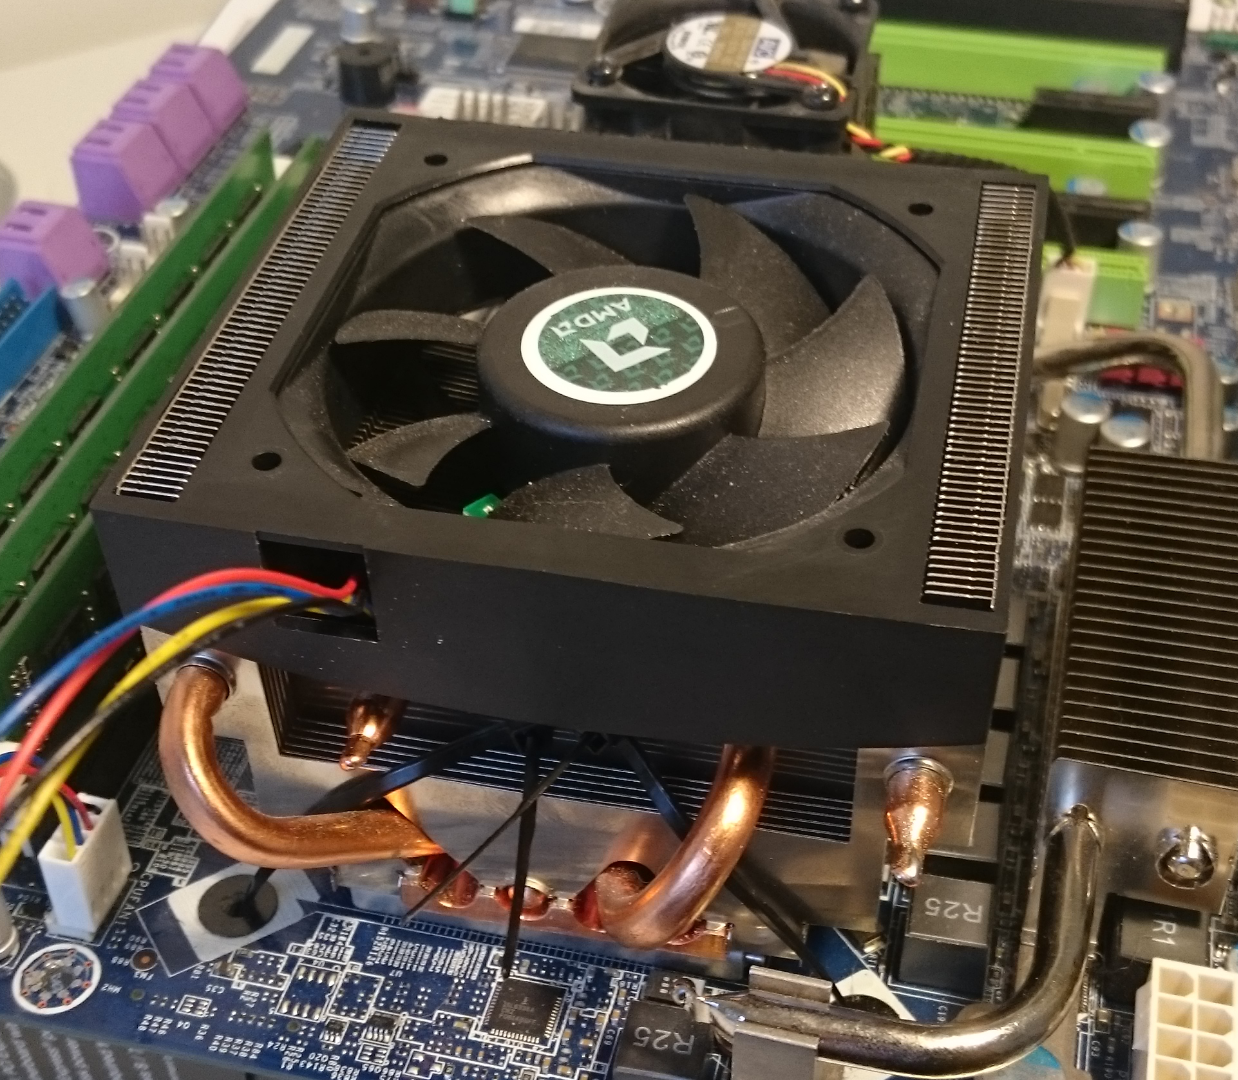
Ziptie-Mounted Heatsink and Fans
by JackieLope in Circuits > Computers
14248 Views, 49 Favorites, 0 Comments
Ziptie-Mounted Heatsink and Fans


I will show you how to mount two different heatsinks: one that I pulled out of an old Dell PowerEdge server and the default AMD heatsink that comes with most processors. As a bonus, I will show you how to mount case fans to heatsink fins!
Why?
My favorite thing to do with old computers is to salvage and use the old parts. Unfortunately, you always end up with odds and ends that don't match. This is a simple, easy way to reuse heatsinks and case fans - with decent cooling results!
What will I need?
- Heatsink
- Motherboard+ CPU
- Thermal paste
- Isopropyl alcohol (as high % as you can get!)
- Cotton pads
- A bag of small zipties (I found mine at the local dollar store)
- A pair of scissors
- Optional: A small knife, like a mini pocket knife
Word of Caution
In this Instructable I will not be going into detail about things such as electronics safety, how to apply thermal paste, etc. I assume that anybody using this guide is already familiar with the basics! Thank you!
PLEASE FOLLOW ALONG WITH MY PICTURES!
Mounting a Heatsink WITH a 'gap'


Preparing and Cleaning your Hardware
First, lightly wet a cotton pad with isopropyl alcohol and wipe off any thermal paste gunk that might remain on your CPU or heatsink. Don't be afraid to use up a bunch of cotton pads to really get it clean. If your motherboard is still inside of a case, remove it before beginning the mounting process.
The Dirty Work
I recommend you go through these steps without thermal paste the first time you attempt it. If you mess up at any point, you can take a small knife and push it under the ziptie lock to free the ziptie so that you may retry.
- Put two zipties through one side of mounting holes and add a ziptie on each to extend them (see picture)
- Align your heatsink on top of the processor
- Slip each line of zipties through the heatsink's gap and into the mounting hole that is diagonally across. (I recommend making a cross with the zipties to make the firmest grip) If the zipties aren't long enough to make it through the hole, just use an extra.
- Lock the ends that are poking through the bottoms of the holes using another ziptie's head. Push each ziptie head as far as possible so the line is as tight as possible and the heatsink is being pressed as much as it can
Once you're done, you can clip any long ziptie leads with a pair of scissors to keep it nice and clean.
Mounting a Heatsink WITHOUT a 'gap'


Preparing and Cleaning your Hardware
First, lightly wet a cotton pad with isopropyl alcohol and wipe off any thermal paste gunk that might remain on your CPU or heatsink. Don't be afraid to use up a bunch of cotton pads to really get it clean. If your motherboard is still inside of a case, remove it before beginning the mounting process.
For the AMD heatsink, take off the bracket holding the fan in place by using a small knife or other prying tool. Keep the fan and bracket to the side for later.
The Dirty Work
I recommend you go through these steps without thermal paste the first time you attempt it. If you mess up at any point, you can take a small knife and push it under the ziptie lock to free the ziptie so that you may retry.
- Put two zipties through one side of mounting holes and add a ziptie on each to extend them (see picture)
- Align your heatsink on top of the processor
- Pull the zipties through the heatsink's copper pipes. The second zipties should be able to fit snuggly through the line of fins.
- Using a third ziptie, lock the second zipties in place and pull the third zipties' lead through the copper pipes and into the mounting holes. (see picture)
- Lock the ends that are poking through the bottoms of the holes
using another ziptie's head. Push each ziptie 'head' as far as possible so the line is as tight as possible and the heatsink is being pressed as much as it can.
- Put the fan and bracket back on
Once you're done, you can clip any long ziptie leads with a pair of scissors to keep it nice and clean.
Extra!: Mounting Case Fans to Heatsink Fins


What will I need?
- 8 medium/long zipties
- 2 fans of equal dimensions
- Scissors
- Optional: a small knife like a pocket knife
The Dirty Work
- Align the two fans to either side of the heatsink, making sure they are both facing the same way.
- Push a ziptie through one set of corner holes until the head is against the hole.
- Use a second head to lock the first ziptie in place, making sure not to tighten it too far - only snug!
- Repeat steps 2 and 3 until all the zipties are through all four corners and are locked in place.
- Use a pair of scissors to clip off any long leads - such as on the zipties you used as locks.
Done!
If when you turn on your computer you hear a clicking noise of the fans hitting the heatsink, you've tightened the fans too far! Push a small knife under the ziptie's lock and loosen them a bit. They should be loose enough that you could pull them off the top.